
Picture this: stepping out into your living room or patio and harvesting fresh, crisp lettuce from a towering pillar of green. You have probably seen those sleek commercial vertical towers online. They look amazing, but the $500 price tags can quickly crush your gardening dreams.
Here’s the deal: you absolutely do not need to spend a fortune to grow massive yields at home. In my experience, a simple trip to the hardware store is all it takes to construct a highly efficient system. You can build a custom DIY vertical hydroponic tower under $100 that works just as beautifully as the premium retail versions.
Ready to transform a standard PVC pipe into a food-producing powerhouse? Let’s get our hands dirty and build your new vertical garden.
Why Vertical Hydroponics Makes Sense for Small Spaces
Space is the ultimate luxury for the urban grower. If you live in an apartment or have a tiny patio, traditional flat garden beds simply will not cut it. Vertical farming changes the entire equation.
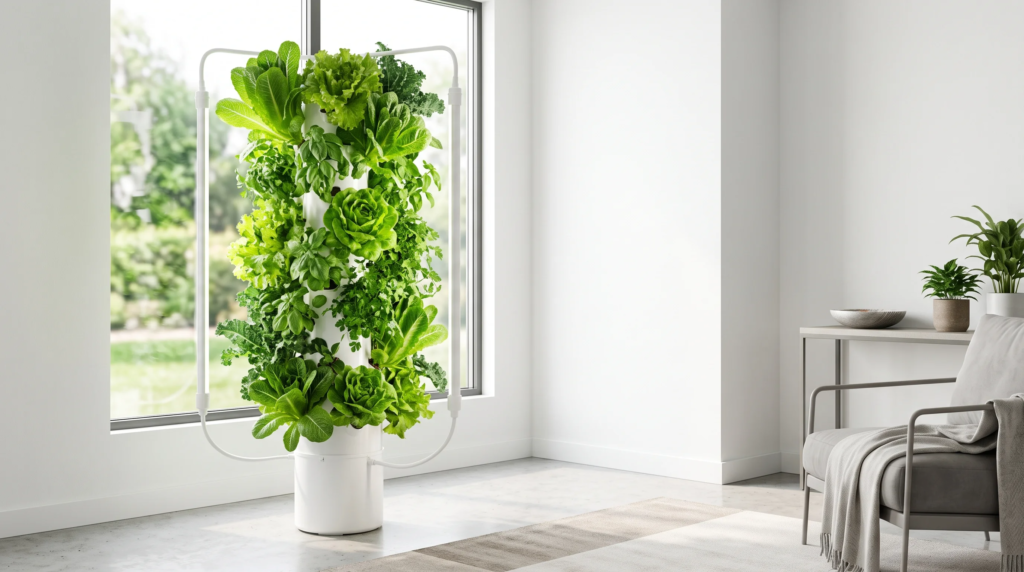
Maximizing Square Footage and Light Efficiency
By growing upward, you multiply your harvestable area exponentially. You can stack 20 or 30 plants in the same exact footprint that normally holds a single potted tomato. It is incredibly efficient.
This vertical orientation also allows you to position grow lights parallel to the tower. This bathes every single plant in uniform light from top to bottom. No more shaded, stunted seedlings struggling at the base of your garden.
The Physics of Vertical Drip and Aeroponic Recirculation
Ever wonder why plants in these towers grow so incredibly fast? It comes down to gravity and oxygen. A pump sends nutrient-rich water to the very top of the tower.
As the water cascades down the inside of the pipe, it splashes against the plant roots. This continuous dripping action highly oxygenates the water. Plant roots thrive in this high-oxygen environment, absorbing nutrients much faster than they ever could in dense soil.
Complete Materials & Budget Breakdown (Under $100)
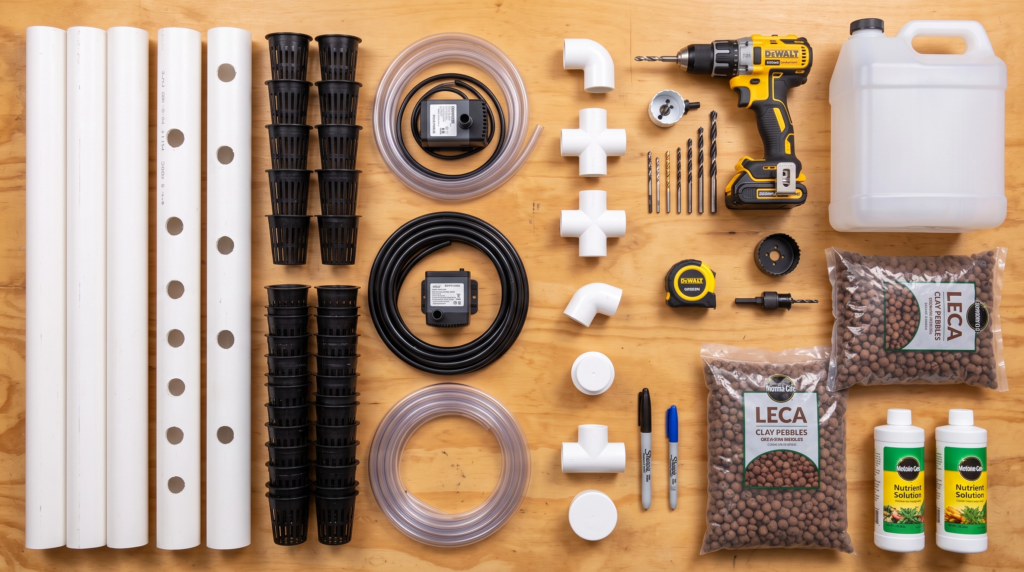
Building a DIY vertical hydroponic tower under $100 requires strict budget discipline. We are utilizing inexpensive, food-safe PVC and basic plumbing parts to keep costs down.
Here is exactly what you need to pick up. Prices will vary slightly based on your location; shop around at local plumbing supply stores for the best deals.
| Material | Quantity | Estimated Cost | Purpose |
| 4-inch PVC Pipe (Schedule 40) | 1 (5-foot length) | $18.00 | Core tower structure |
| 4-inch PVC End Cap | 1 | $6.00 | Seals the bottom of the tower |
| 5-Gallon Heavy Duty Bucket w/ Lid | 1 | $5.00 | Nutrient reservoir |
| Submersible Water Pump (400 GPH) | 1 | $22.00 | Pumps water to the top |
| 1/2-inch Black Vinyl Tubing | 6 feet | $8.00 | Delivers water from pump to top |
| 2-inch Net Pots | 20 | $10.00 | Holds the plants and substrate |
| Cycle Timer | 1 | $15.00 | Controls irrigation schedule |
| Total Estimated Cost | N/A | $84.00 | Under budget! |
Essential Tools and Safety Equipment
You likely have most of these tools sitting in your garage right now. If not, borrow them from a neighbor.
- Power drill
- Hole saw bit (2-inch diameter)
- Heat gun (or a small butane torch)
- Wooden shaping block (a piece of 2×4 cut to a wedge shape)
- Deburring tool or sandpaper
- Safety gear: heavy work gloves and protective eyewear
Pro tip: always wear heat-resistant gloves when molding PVC. The plastic gets incredibly hot and can cause severe burns if handled without protection.
Step-by-Step DIY Assembly Blueprint
Now comes the fun part. We are going to transform that plain white pipe into a high-yielding vertical garden. Take your time with the heating process; patience is key here.
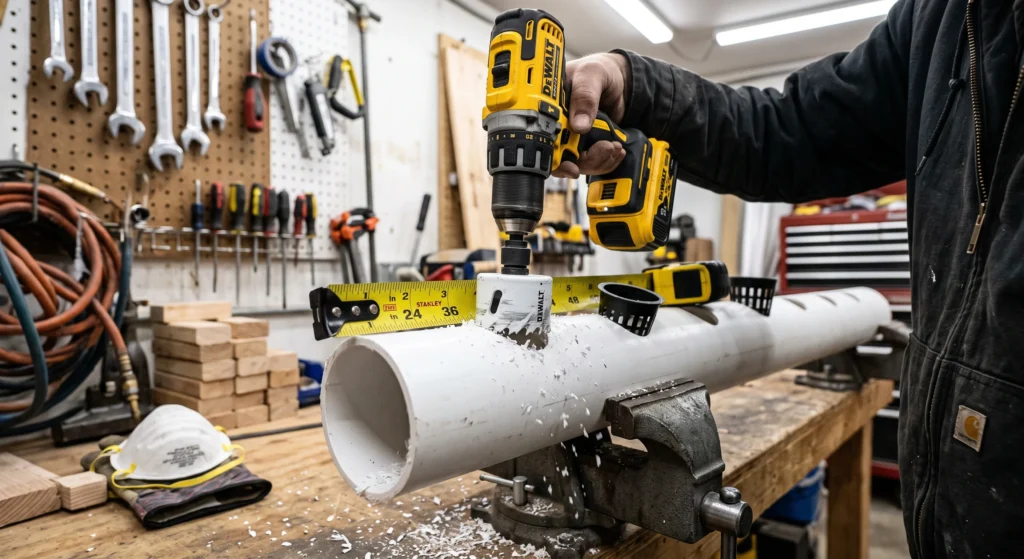
Step 1: Marking and Cutting the Core PVC Pipe
Lay your 4-inch PVC pipe flat on a workbench. Use a tape measure and a permanent marker to mark your planting sites. I recommend spacing the holes about 6 inches apart vertically.
Stagger the marks in a zigzag pattern around the pipe. This staggered layout prevents upper plants from completely shading out the plants below them. Once your marks are set, use a Dremel or a saw to cut a clean 3-inch horizontal slit at each mark.
Step 2: Heating and Shaping the Planting Pockets
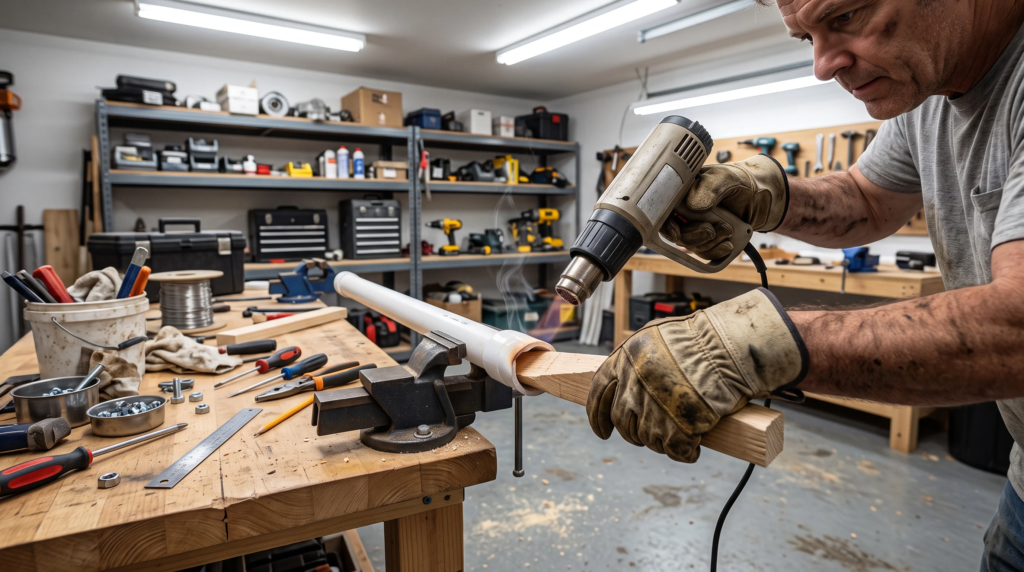
This step requires a heat gun and your wooden shaping wedge. Turn on your heat gun and apply heat evenly back and forth across one of the horizontal slits. Keep the heat gun moving so you do not scorch or burn the plastic.
When the PVC becomes soft and pliable like rubber, carefully press your wooden wedge down into the slit. Push the plastic inward and downward to create a deep pocket. Hold the wood in place for about a minute until the plastic cools and hardens into its new shape. Repeat this process for every single slit.
Step 3: Setting Up the Submersible Pump and Internal Plumbing
Place your submersible pump at the bottom of your 5-gallon bucket. Attach the 1/2-inch black vinyl tubing to the pump outlet. Run the tubing straight up through the inside of your newly shaped PVC tower.
Make sure the tubing reaches the very top of the tower. You want the water to shoot out of the tube and rain down freely over the roots inside the pipe. Using clear tubing is a huge mistake; light penetrates clear plastic and triggers massive algae growth. Always use black vinyl tubing to block the light.
Step 4: Reservoir Preparation and Return Drainage
Take the lid of your 5-gallon bucket and trace the outline of your 4-inch PVC tower in the exact center. Carefully cut out that circle using a jigsaw or heavy-duty knife.
Drill a few small drainage holes in the bottom PVC end cap, then attach the cap to the bottom of the tower. Insert the tower through the hole in the bucket lid. The tower should sit securely on top of the bucket, with the drainage holes allowing water to flow back down into the reservoir.
Best Substrates for Vertical Towers
Since you are not using soil, your plants need a sterile medium to hold them upright in the net cups.
Expanded clay pellets (often called Hydroton) are the absolute best choice for vertical towers. They drain incredibly fast, which guarantees maximum oxygen hits the roots. Always rinse clay pellets thoroughly before using them; they are covered in fine clay dust that will quickly clog your pump if left unwashed.
Stone wool cubes are another excellent option for starting your seeds. Once the seedlings sprout roots, you can tuck the entire stone wool cube directly into a net pot surrounded by clay pellets.
System Calibration: Flow Rates, Timers, and Aeration
Running your pump 24/7 is usually a bad idea. Constant water flow can literally drown your plants and promote root rot. You need to simulate a breathing cycle for the roots.
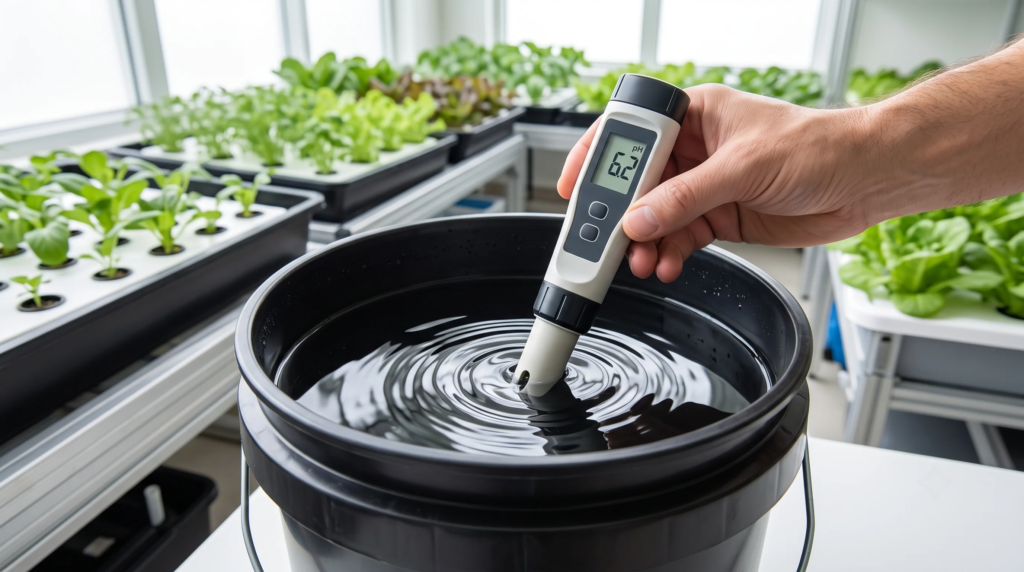
Set your cycle timer to run the pump for 15 minutes, followed by 45 minutes off. This schedule keeps the roots moist but gives them plenty of time to absorb oxygen.
You also must dial in your water chemistry. Every crop has a preferred pH and Electrical Conductivity (EC) range. Use this chart to calibrate your system based on what you choose to grow.
| Hydroponic Crop | Target pH Range | Target EC Range (mS/cm) | Best Water Temp |
| Leafy Greens (Lettuce, Kale) | 5.5 – 6.5 | 0.8 – 1.5 | 65°F – 70°F |
| Culinary Herbs (Basil, Mint) | 5.5 – 6.5 | 1.0 – 1.6 | 68°F – 72°F |
| Strawberries | 5.5 – 6.0 | 1.0 – 1.5 | 65°F – 68°F |
| Dwarf Tomatoes | 5.5 – 6.0 | 2.0 – 3.5 | 68°F – 75°F |
What Crops Thrive Best in Vertical Towers?
Vertical towers are legendary for growing leafy greens. Butterhead lettuce, romaine, kale, and Swiss chard will explode with growth in this system.
Herbs are also massive producers. Basil grows so vigorously in vertical hydroponics that you will likely have to prune it back weekly.
If you want to grow fruiting crops, stick to smaller varieties. Strawberries are absolutely phenomenal in vertical systems because the fruit hangs neatly down the sides of the pipe. Dwarf peppers and micro-tomatoes can work well; just be prepared to tie them to a small trellis if they get too heavy.
Recommended Equipment & Build Upgrades
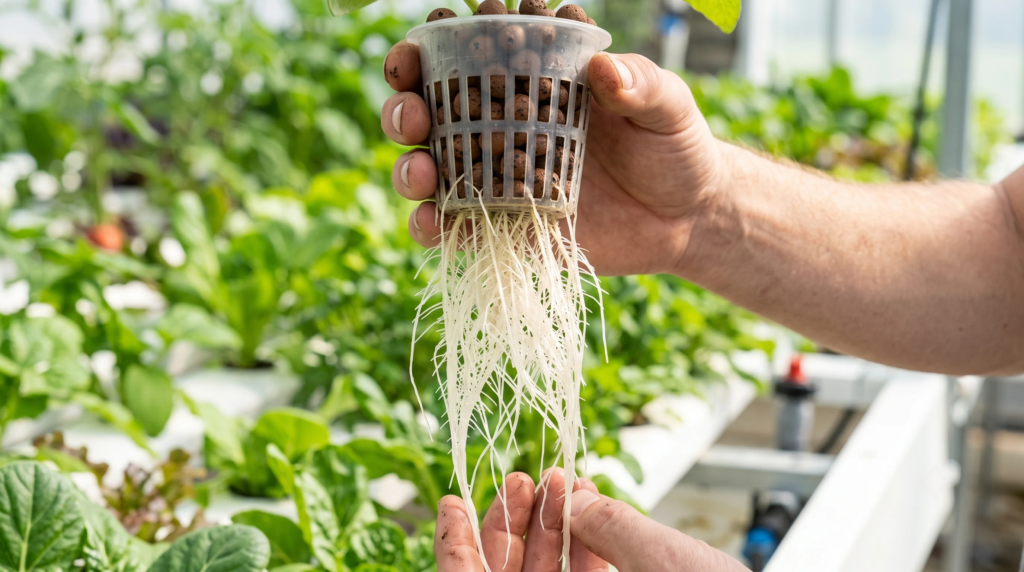
While building a DIY vertical hydroponic tower under $100 focuses on budget items, a few smart upgrades will save you massive headaches down the road.
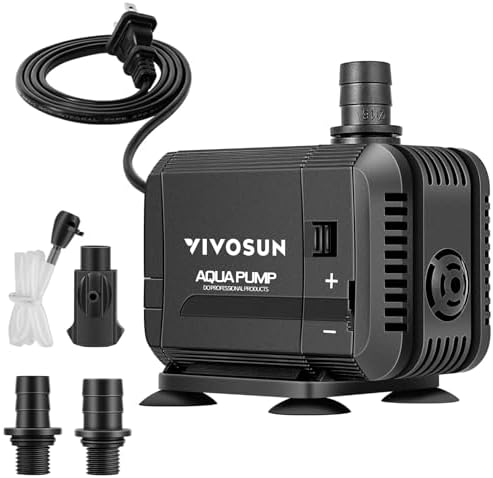
Why I recommend it: Cheap pumps will stall and ruin your crop. This unit has a highly reliable magnetic drive and handles vertical head pressure beautifully. I have run mine for two years without a single hiccup.
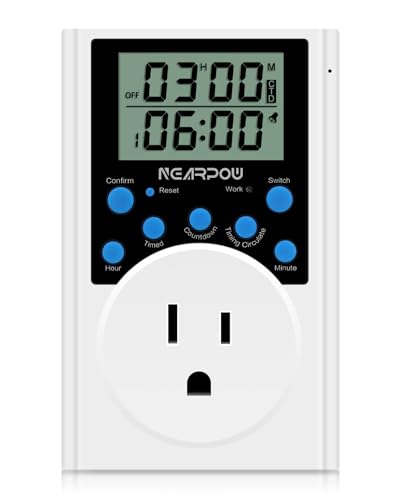
Why I recommend it: Standard mechanical timers only allow 30-minute intervals. This digital timer lets you set precise schedules, like 15 minutes on and 45 minutes off, which is critical for aeroponic-style towers.

Why I recommend it: Flimsy net cups will crush under the weight of a mature plant. These have a wide lip that grips the PVC pockets securely, keeping your plants stable even when they grow top-heavy.
Troubleshooting Common Vertical Tower Pitfalls
Even the best DIY systems run into occasional snags. Knowing how to fix them quickly will save your harvest.
The Tower is Leaking at the Pockets
This usually happens if the internal water tube is spraying directly at a pocket instead of dripping straight down. Try adjusting the top of the hose so it sits dead center in the pipe.
Plants are Wilting Despite Water Flow
Ever wonder why your leaves turn yellow or wilt overnight? It usually comes down to pH lockout. If your pH swings above 6.5 or below 5.5, the roots physically cannot absorb nutrients. Flush the system and recalibrate your reservoir.
The Tower is Unstable and Tipping
A 5-foot PVC pipe filled with water and heavy plants can act like a sail. If you are growing outdoors, wind will knock it over. Secure the top of the tower to a nearby wall or ceiling joist using a simple bungee cord or heavy-duty zip tie.
Frequently Asked Questions (FAQ)
Can I run this system completely off-grid?
Yes; you can hook a 12-volt DC submersible pump to a solar panel and deep-cycle battery. Make sure your battery has enough capacity to run the pump during cloudy days.
Do I need to glue the PVC pieces together?
I highly advise against gluing the main tower to the reservoir lid. Keeping the pieces unglued allows you to easily disassemble the tower for deep cleaning. If you must use PVC cement for structural stability, wait at least 24 hours for the toxic solvent fumes to completely off-gas before adding plants.
How often should I completely change the reservoir water?
Aim to completely dump and replace your nutrient solution every 14 to 21 days. As plants drink water, salt residues from the fertilizer build up in the bucket. Flushing the system resets the chemical balance and prevents toxic salt accumulation.
Will the water pump overheat if it runs dry?
Yes; most standard submersible pumps rely on the surrounding water to cool their internal motors. If your reservoir runs dry, the pump will overheat and burn out within hours. Check your water levels daily.
What should I do if the plant roots grow too long and clog the pipe?
Aggressive growers like mint and basil will send massive root systems down the pipe. Simply pull the net pot out of the pocket and give the roots a sharp haircut with sterilized scissors. Trimming the bottom third of the root mass will not hurt the plant and will keep water flowing freely.
Wrapping Up
Building a DIY vertical hydroponic tower under $100 is an incredibly rewarding weekend project. You bypass the outrageous markup of commercial units while gaining intimate knowledge of exactly how your food is grown.
By mastering the balance of water timers, oxygenation, and basic plumbing, you have unlocked the ability to grow massive amounts of fresh food in the smallest of spaces. Keep your pH in check, monitor your water levels, and watch your patio transform into a lush vertical farm.
Ready to expand your indoor farming knowledge? Check out our complete guide on mixing your own nutrient solutions to maximize those tower yields.