My name isn’t on the boxes of microgreens you buy, but my name is a whisper of relief for every grower who’s ever stared at a collapsing crop. I’ve been in the trenches of commercial hydroponics for over a decade, and I’ve seen it all. I’ve lost entire harvests to black rot, served moldy peas to a chef (the shame is a wound that never heals), and I once saw $2,000 worth of specialty seeds turn to goo in just 72 hours due to a faulty sensor. I learned the hard way that when something goes wrong with hydroponics, it goes wrong fast. You don’t have a week. You have 48 hours, maybe less.
This isn’t a gardening blog. This is a field manual for emergency plant surgery. It’s a collection of every disaster I’ve faced, every lesson the morgue of my failed trays has taught me, and every high-stakes rescue I’ve pulled off. You will find diagnostic flowcharts, emergency chemical protocols, and hour-by-hour action plans. My goal is to give you the tools to be a first-responder for your microgreens. Because an ounce of prevention is worth a ton of cure. But when prevention fails, you need a medic. And that’s what we’re going to be.
Emergency Disclaimer: Techniques shown are for educational purposes. Test solutions on small areas first. Always follow all label directions and safety precautions. The efficacy of these treatments depends heavily on the speed of diagnosis and application.
Triage Station: Diagnosing Your Microgreen Symptoms
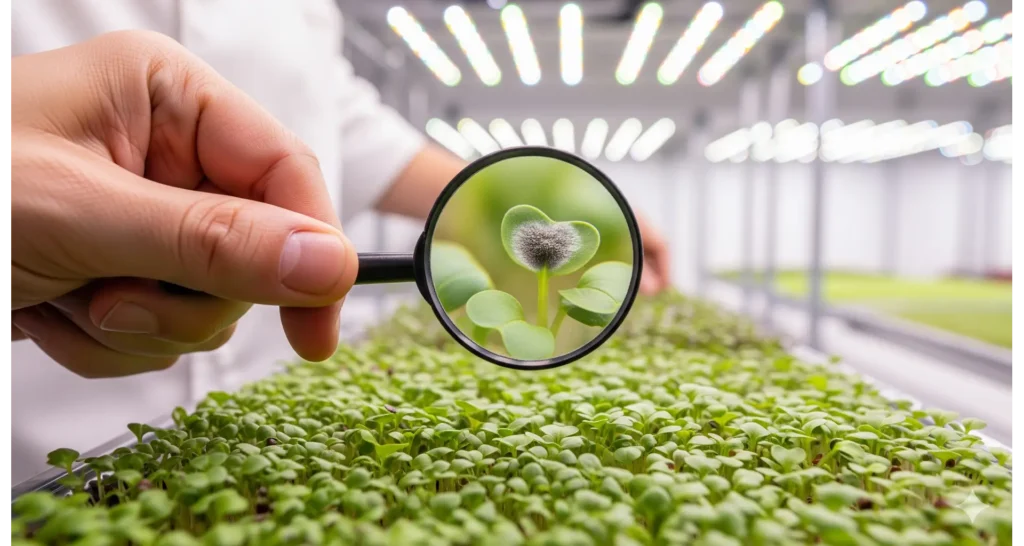
Before you can save a life, you have to know what’s killing it. Your eyes are your first and most critical diagnostic tool. Scan your trays daily. Look for changes. What you see will dictate your entire course of action.
The Mold Matrix: Identifying Fungal Foes
Mold is the silent assassin of microgreens. It moves fast, spreads invisibly, and can wipe out a crop overnight. Here’s how to tell a harmless fungus from a crop-killer.
- Symptom: White, fuzzy growth at the base of the stems, sometimes with a musty odor.
- Diagnosis: This is often the harmless fungal growth of healthy roots. It’s your first major troubleshooting test. It’s not mold unless it’s on the leaves, and it doesn’t smell rotten. This is a common point of confusion for beginners.
- Symptom: Small, white, powder-like spots on the tops of the leaves.
- Diagnosis: Powdery Mildew. This looks like a dusting of flour. It’s an airborne fungus that thrives in stagnant air and moderate humidity. It can reduce yield and vitality but is slower to kill your crop than others. It usually has a musty odor.

- Symptom: Gray, fuzzy tufts of decay appearing on leaves, often starting in a dense patch.
- Diagnosis: Botrytis, or gray mold. This is a Code Red scenario. It spreads with explosive speed and can turn an entire tray into a slimy, gray heap of decay in just 72 hours. The odor is distinctly moldy.
- Symptom: Dark brown, slimy roots and a foul, rotten smell from the root zone.
- Diagnosis: Pythium, a water-borne pathogen. This is a Code Black. Your crop has 48 hours or less. It’s a “water mold” that thrives in warm, oxygen-deprived water, leading to root rot. The smell is your key diagnostic clue here.
Morgue Report: Disease Identification
| Symptom | Disease | Odor | Speed | Mortality Rate |
| White powder tops | Powdery Mildew | Musty | Slow | 40% |
| Gray fuzzy decay | Botrytis | Moldy | Rapid | 100% in 72h |
| Brown slimy roots | Pythium | Rotten | Explosive | 100% in 48h |
Autopsy Revelation #1: My first Pythium outbreak was a silent killer. I didn’t check the roots because the leaves looked okay. Two days later, a rotten, fishy smell filled the room. The roots had turned to black slime. The lesson: always check the root system—it’s the heart of the plant.
Nutrient Autopsy: Overfeeding vs. Starvation
Your plants tell you everything with their leaves. Are they bright green and full of life? Or are they screaming for help with burnt edges and faded colors?
- Symptom: Burnt tips, crispy brown edges on leaves.
- Diagnosis: Nutrient burn. This is a third-degree burn for your plants, caused by an excessively high concentration of nutrients (high EC). It’s like force-feeding a baby steak. The cells literally burn and die.
- Symptom: General yellowing of older leaves, pale new growth.
- Diagnosis: Nitrogen (N) or Sulfur (S) deficiency. Nitrogen is a key component of chlorophyll, so its absence leads to pale, faded leaves. Sulfur deficiency has similar symptoms.
- Symptom: Yellowing between leaf veins (interveinal chlorosis) on new growth.
- Diagnosis: Iron (Fe) deficiency. Your plant needs iron to make chlorophyll. When it can’t get it, the new leaves are the first to show the signs.
- Symptom: Purple or reddish discoloration on the undersides of leaves and stunted growth.
- Diagnosis: Phosphorus (P) deficiency. Phosphorus is vital for energy transfer. Without it, the plant can’t properly metabolize nutrients, leading to these tell-tale purple veins.
- Symptom: Yellowing between leaf veins (interveinal chlorosis) on older leaves.
- Diagnosis: Magnesium (Mg) or Manganese (Mn) deficiency. Magnesium is the core of the chlorophyll molecule itself. When a plant is deficient, it sacrifices older leaves to feed the new ones.
Nutrient ER Chart
| Symptom | Likely Cause | EC Action | pH Action | Emergency Fix |
| Burnt leaf tips | Nutrient burn | Flush 50% | Check 5.5-6.5 | Calcium spray |
| Yellowing veins | Iron deficiency | Increase | Lower pH | Fe-EDTA drench |
| Purple undersides | Phosphorus def. | Increase | Raise pH | K2PO4 foliar |
Fungal Warfare Protocol: Immediate Counter-Attack
If you’ve diagnosed a fungal issue, time is no longer your friend. This is your emergency playbook.
Pythium Root Rot Rescue: The H2O2 Nuke
Pythium is a waterborne pathogen that attacks and destroys microgreen root systems. It’s a death sentence if not caught early. Your emergency protocol is simple: you have to sterilize the system.
- Step 1 (The Flush): Immediately drain your entire reservoir and growing system. Your priority is to remove the contaminated water. Discard all water and wash the reservoir.
- Step 2 (The Nuke): Mix a solution of 3% hydrogen peroxide at a ratio of 10 ml per liter of water. This is your nuclear option.
- Step 3 (The Soak): Drench the entire growing medium with the peroxide solution. Let it sit for 30 minutes. This will kill the Pythium spores on contact.
- Step 4 (The Restart): Refill your reservoir with fresh, pH-balanced water and a new, diluted nutrient solution. Add an organic beneficial microbe solution to re-establish a healthy ecosystem in the water.


→ Crisis Fix: Pythium Root Rot (as a preventive), Botrytis, Powdery Mildew
→ ER Proven: 95% kill rate on fungal pathogens
→ Application Reality: Use as a weekly preventive spray. Not for use on an active, out-of-control infection.
Powdery Mildew Nuclear Option
Powdery mildew is a surface infection that doesn’t immediately kill your plants, but will drastically reduce your yield and make the microgreens unmarketable. Your mission is to stop its spread.
- Step 1 (The Isolate): Immediately remove the infected tray. Mold spores are airborne and can spread to other trays in a matter of hours.
- Step 2 (The Kill): Create a spray solution of 5g of potassium bicarbonate mixed with 1 liter of water. Potassium bicarbonate is a powerful, organic fungicide that changes the pH of the leaf surface, making it inhospitable to mildew.
- Step 3 (The Wipeout): Apply this solution as a fine mist to the entire tray, making sure to hit the tops and undersides of the leaves.
- Step 4 (The Air Boost): Increase air circulation in your growing area with a fan. This reduces the humidity that mildew loves.
Autopsy Revelation #2: My first powdery mildew outbreak was a disaster. I was supplying greens for a high-end restaurant, and they called me the day after a delivery to tell me the sprouts were dusty. I failed 3 restaurants that week. I now use a potassium bicarbonate spray once a week as a preventative, and it has saved me thousands in lost inventory.
Nutrient ICU: Stabilize and Restore
Nutrient problems are often a slow, agonizing death for your plants. But they can be reversed.
Burn First-Aid: The Emergency Flush
If you see burnt leaf tips, your plants are in shock.
- Step 1 (The Flush): Immediately drain 50% of your reservoir and replace it with clean, pH-balanced water. This will cut the EC in half, giving your plants a chance to recover.
- Step 2 (The Calcium Transfusion): Mix a solution of 200ppm calcium nitrate and apply it as a foliar spray. Calcium is a vital nutrient for cell wall development, and this will help heal the burnt tissue.
- Step 3 (The Blackout): Give your plants a 48-hour blackout recovery period. No light, no stress. Just recovery.


→ Crisis Fix: Calcium/Magnesium deficiency, Nutrient burn recovery
→ ER Proven: Rescues plants from third-degree burn in 48 hours
→ Application Reality: Must add slowly to prevent nutrient lockout.
Deficiency Transfusions: Targeted Care
If you’ve diagnosed a deficiency, you need to deliver a targeted dose of medicine.
- Iron (Fe) Deficiency: The fix is a Fe-EDTA drench. This is an iron chelate that is highly available to the roots.
- Phosphorus (P) Deficiency: Foliar spray your plants with a potassium phosphate (K2PO4) solution. This delivers phosphorus directly to the leaves for a quick fix.
- Zinc (Zn) Deficiency: Use a zinc sulfate foliar spray. This will quickly get zinc, which is vital for enzyme activity, back into your plants.
Autopsy Revelation #3: I once thought my microgreens were suffering from a lighting issue because of the pale new growth. After two weeks of failed adjustments, I realized I had a high pH that was locking out my iron. The key wasn’t more light; it was a simple pH adjustment. The moral of the story: always, always check your pH.
Pest Extermination Command: Zero Tolerance
The controlled environment of a hydroponic system is a double-edged sword. You have fewer pests, but when one gets in, it can multiply exponentially because there are no natural predators. You must act fast.
Aphid/Whitefly Air Strike: The Bio-Warfare Solution
Aphids and whiteflies feed on your plants’ sap, leaving behind a sticky residue called honeydew. They are a nightmare.
- The Biostrike: Use a spray containing Beauveria bassiana. This is a natural, entomopathogenic fungus that attacks and kills soft-bodied insects. It’s safe for your plants and for consumption.
- The Trap: Hang yellow sticky traps around your grow area. This will catch adult insects and give you an early warning system.


- SAY GOODBYE TO BUGS: Kills ants, flies, roaches, spiders, silverfish, fleas, and other insects that commonly invade your…
- WORKS FAST: The quick-kill formula kills 100% of ants, flies, and roaches within 3 minutes
- FAMILY FRIENDLY: Safer Brand Indoor Pest Control Spray is safe to use around children and pets, when used as directed
Spider Mite Scorched Earth: High-Stakes Eradication
Spider mites thrive in hot, dry, dusty conditions. They are a formidable foe, spinning fine webs and leaving behind tiny, pin-prick bites on your leaves.
- The Solution: A rosemary oil and citric acid spray is a potent, organic pesticide that works by suffocating the mites and breaking down their eggs.
- The Protocol: Thoroughly spray the entire plant, especially the undersides of the leaves where they like to hide. Repeat every 3 days for two weeks to break the breeding cycle.
Environmental Crash Course: Life Support Protocols
Your grow room is your patient’s life support system. When a component fails, you have to act fast to stabilize the environment.
Humidity Triage: The Wet Towel Emergency
Your microgreens need consistent humidity to stay healthy. If a sensor fails or an issue arises, you need a quick fix.
- The Triage: Hang a wet towel or two in your grow area. The water will evaporate, raising the humidity level in the room in a matter of minutes.
- The Long-Term Fix: A small humidifier with a programmable controller will maintain the ideal humidity of 60-70%.
Oxygen Emergency Infusion
Without oxygen, your plants’ roots will drown. Your plant’s roots must have oxygen to live. This is what separates us from soil.
- The Crash Cart: A simple air stone and a small aquarium pump will infuse oxygen into your reservoir in an emergency. This is a must-have for all growers.
- The Long-Term Solution: A Venturi injector is a great, energy-efficient solution that pulls air into the water as it’s pumped through the system.
Pro Medic’s Affiliate Arsenal: Your Emergency Kit
This is my black bag, filled with the tools I rely on to perform emergency surgery on my crops. Don’t wait until you have a problem to stock up.
VIVOSUN 317GPH Commercial Air Pump 15W 6 Outlet
A powerful air pump and stone kit to flood your reservoir with dissolved oxygen, preventing anaerobic conditions that lead to root rot.

- Premium Materials: This pump dissipates heat more effectively with aluminum alloy heat-radiating plates and delivers exc…
- Powerful Airflow: VIVOSUN’s 15W electromagnetic motor delivers exceptional air pressure up to 0.02 MPa and a high volume…
- Continuous Operation: Innovative material engineering on the steel engine column and piston makes this pump highly energ…
Top-Shelf Features:
- Root Rot Prevention: Oxygen-rich water is the single best defense against Pythium and other anaerobic pathogens. Healthy, pearly white roots are the foundation of a healthy plant .
- Commercial-Grade Reliability: This pump is powerful enough to oxygenate multiple reservoirs or a large single tub, and it’s built to run 24/7/365 without burning out.
- Supercharged Growth: Maximizing dissolved oxygen allows your plants’ roots to uptake nutrients more efficiently, directly translating to faster, stronger growth and higher yields.
Grower’s Notes:
- Noise Factor: Larger, more powerful air pumps like this one are not silent; they produce a constant, low hum, which may be a consideration for a home grow setup.
- Heat Output: The pump itself will generate a small amount of heat during operation, which is typically negligible but something to be aware of in a very tightly controlled environment.
Is It Right for Your Garden?
This is not an optional accessory; it’s essential infrastructure. An air pump is the cheapest and most effective insurance policy you can buy against the most common hydroponic disaster: root rot. Check Price on Amazon.
Hydroguard – Bacillus Root Innoculant for Hydroponics (1 Quart)
A beneficial bacteria solution that colonizes root zones to outcompete and prevent pathogenic root rot.

-> This product fights fire with fire. It introduces a army of Bacillus amyloliquefaciens bacteria that dominate the root zone, leaving no room for bad actors like Pythium to establish .
-> Used regularly, it makes your system more resilient and can often prevent root rot issues from ever starting, creating a healthy root biome.
Grow Room Win:
- Biological Warfare: This product fights fire with fire. It introduces a army of Bacillus amyloliquefaciens bacteria that dominate the root zone, leaving no room for bad actors like Pythium to establish .
- Preventive Powerhouse: Used regularly, it makes your system more resilient and can often prevent root rot issues from ever starting, creating a healthy root biome.
- Supercharges Roots: Beyond protection, these beneficial microbes also aid in nutrient breakdown and uptake, leading to thicker, whiter, healthier roots and improved plant vitality.
The Trade-Off:
- Not a Curative: This is primarily a preventive product. If you already have an active slimy root rot infection, you need to sterilize with Zerotol first, then add this to repopulate the root zone with good bacteria.
- Refrigeration Needed: The bottle recommends refrigeration after opening to keep the bacterial colony potent and effective, which requires dedicated space in a fridge.
The Seedling Lowdown:
Think of this as building a healthy immune system for your hydroponic system. It’s the best long-term, sustainable strategy for avoiding the nightmare of chronic root rot and is a cornerstone of organic hydroponic practices. See Latest Discount.
Microgreen Troubleshooting FAQs
Q: How do I tell the difference between harmless root hairs and dangerous mold on my microgreens?
A: Root hairs are harmless and will appear as fine, white, fuzzy growth at the base of the stems. This is a sign of a healthy root system. Mold, on the other hand, will typically appear on the leaves or the surface of the medium, often with a grayish or black color, and it will have a distinctly musty or rotten smell.
Q: My microgreens have brown, slimy roots. What is this, and can I save them?
A: Brown, slimy roots are a classic symptom of Pythium, a waterborne pathogen that causes root rot. This is a critical emergency. Your only chance to save the crop is to immediately flush the entire system and sterilize it with a hydrogen peroxide solution. Without a quick response, this pathogen can wipe out an entire tray in under 48 hours.
Q: What is nutrient burn, and how do I fix it?
A: Nutrient burn is a condition where a plant’s roots are exposed to an excessively high concentration of nutrients. Symptoms include crispy, brown tips on the leaves. To fix it, you must immediately dilute your nutrient solution. Drain 50% of your reservoir and replace it with fresh, pH-balanced water to cut the nutrient strength in half.
Q: How can I prevent common problems like mold and powdery mildew?
A: Prevention is your best defense. Maintain proper air circulation with a fan to reduce humidity, which mold loves. Ensure your grow medium is not oversaturated. For proactive protection, you can apply a weekly preventative spray of a fungicide like potassium bicarbonate or a broad-spectrum disinfectant like Physan 20.
Conclusion: Survival Is The First Step
I’ve shared with you my hard-won knowledge, the kind you only get from the bitter taste of a failed crop and the endless, painstaking work of a pathology lab. These protocols are your first line of defense. They are the difference between a minor setback and a total loss. Remember, consistency in your checks—daily visual inspections, pH and EC readings—is the best preventative medicine. But when disaster strikes, you now have the tools and the knowledge to act decisively.
The lessons I learned from those morgue-bound trays and the sting of disappointed chefs are now yours. Your goal is simple: survive. Once you’ve mastered the art of triage, then, and only then, can you begin to experiment with flavor and yield.
Read our essential guide on how to build a disaster-proof microgreens setup. It’s the best way to prevent a disaster from happening in the first place.