Fertigation Controllers for Home Growers: From Simple Timers to Smart Dosers

Table of Contents
- Fertigation vs. Manual Feeding: The Agronomic Case for Automation
- The Chemistry of Concentrates: Why Automated Systems Require Part A and Part B Tanks
- Controller Types: Navigating the Automation Spectrum
- Interactive Fertigation & Dilution Toolkit
- Proportional Dosing Math: A Step-by-Step Calculation Guide
- Crop-Specific Scheduling: Aligning Controllers with Plant Physiology
- System Integration: Plumbing, Safety Interlocks, and Backflow Prevention
- Frequently Asked Questions (FAQ)
- Summary: Transitioning to Automated Growth
⚠️ Disclosure: MistCulture summarizes verified product specs, engineering data, and community feedback. We may earn an affiliate commission if you purchase through our links. Regulations vary by location; this content is for educational purposes only.
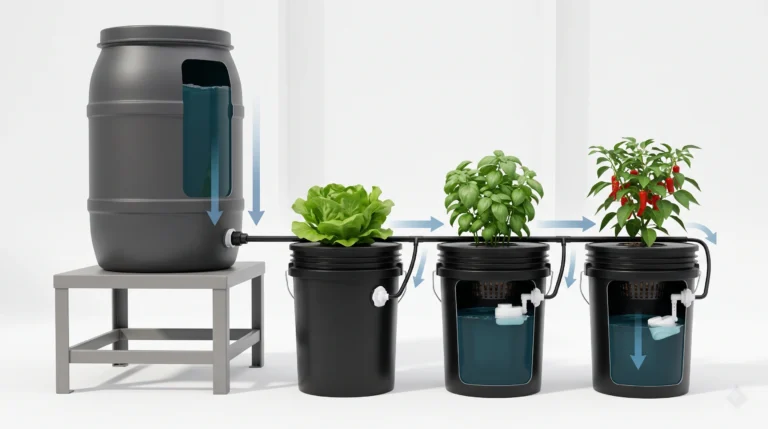
Feeding plants by hand gets old fast. Carrying heavy buckets, measuring liquid nutrient concentrates, and manually balancing pH day in and day out converts what should be a rewarding scientific hobby into an exhausting physical chore. As your plant count expands, hand-watering quickly becomes the primary bottleneck limiting your crop yields and system consistency. Shifting to automated fertigation—the process of delivering water-soluble fertilizers directly through your irrigation plumbing—replaces physical labor with scheduled, highly predictable delivery pipelines.
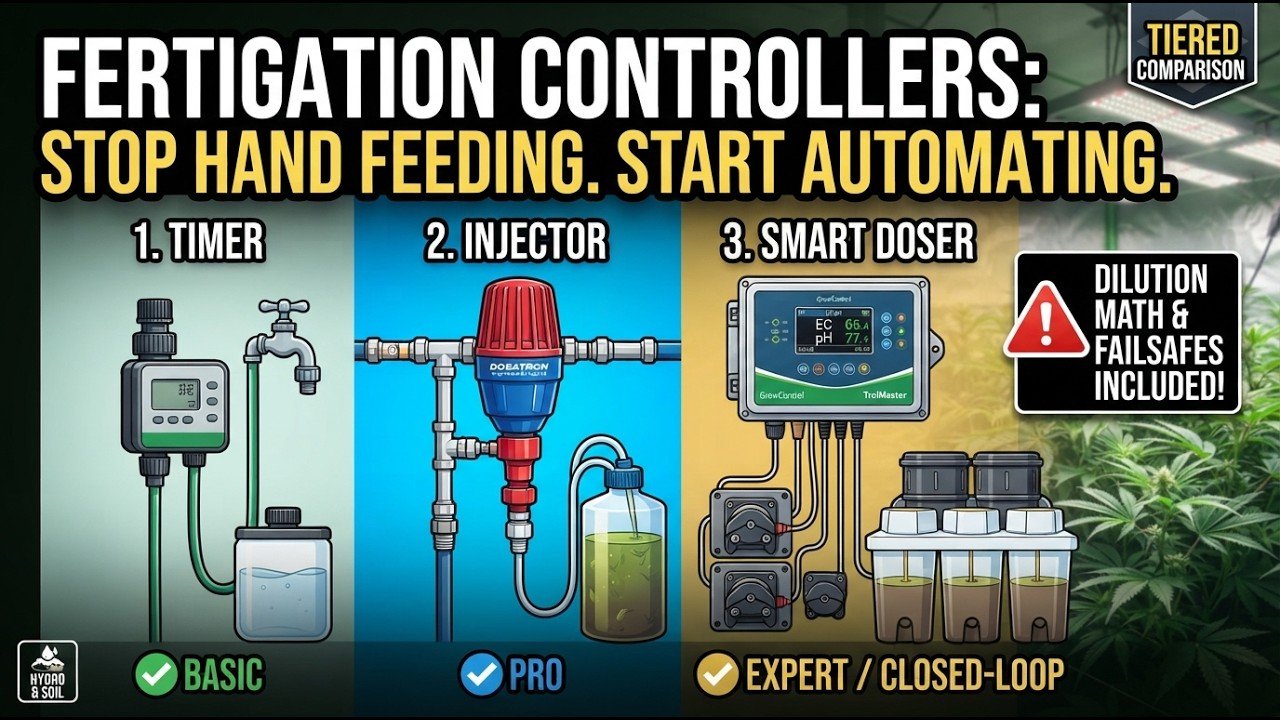
The hardware landscape for automated feeding spans from elementary time-clocks to closed-loop industrial automation. At the beginner level, a simple electronic timer cycles a submersible water pump inside a pre-mixed nutrient reservoir. On the high end, sophisticated smart dosing controllers continuously monitor solution parameters, drawing raw stock concentrates on demand to maintain exact electrical conductivity (EC) and pH setpoints. Finding the perfect controller for your grow room relies on a systematic understanding of your media type, plant counts, and required scheduling precision. This comprehensive guide details the mechanics of fertigation controllers, analyzes the main equipment tiers, walks through stock dilution chemistry, and establishes essential safety failsafes to protect your crops.
Fertigation vs. Manual Feeding: The Agronomic Case for Automation
Hand-watering works well when you only have a few pots to manage. You mix water and fertilizer in a watering can, adjust the pH with a handheld pipette, and pour it over the root zone. However, as plant numbers increase or your schedule demands time away from the grow room, manual mixing inevitably breaks down. Human error, variations in application volume, and missed feedings during travel introduce high stress to delicate root cell membranes.
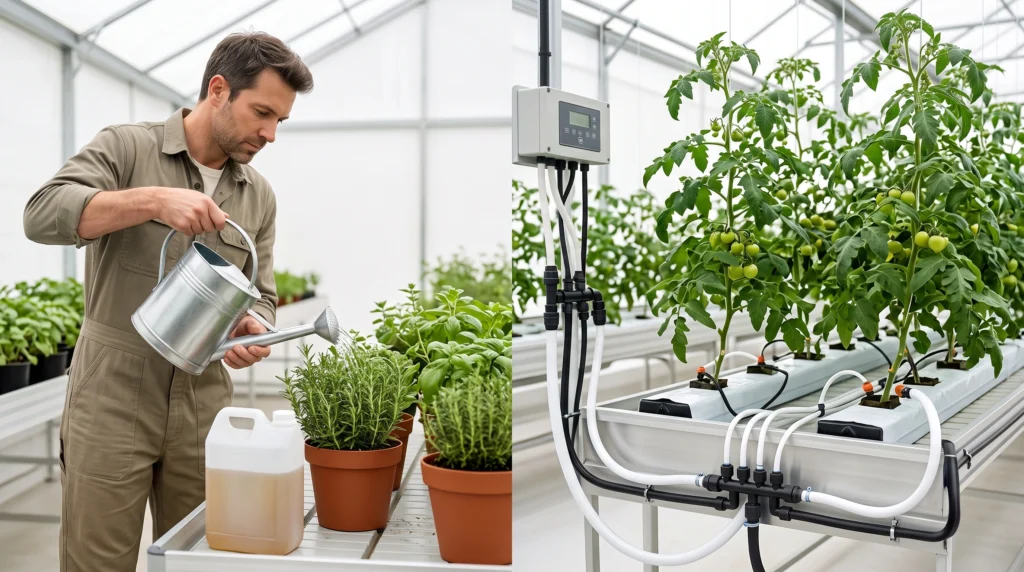
Automated fertigation systems route freshly balanced nutrient solutions directly to every plant in your system through a network of structured tubing and drip emitters. By automating this process, you achieve three primary agronomic advantages:
- Systemic Consistency: Every plant receives the exact same volume and concentration of mineral salts, eliminating pot-to-pot salinity variations that lead to localized nutrient lockout.
- Pulse Irrigation (High-Frequency Feeding): Automated systems enable “pulse feeding”—delivering multiple short, highly targeted doses of nutrient solution throughout the plant’s photoperiod. This technique is highly effective in inert media like coco coir or rockwool, keeping the Volumetric Water Content (VWC) and root-zone salinity completely stable.
- Labor Liberation: Scheduling your crop’s irrigation cycles removes manual mixing routines from your daily schedule, preventing costly under-watering or over-watering failures while you are away.
⚠️ The Physics of Salt Accumulation: Why Hand-Watering Stunts Growth
When a grower hand-waters once a day, the media undergoes a massive “wet-dry” cycle. As water evaporates and the plant transpires, the volume of water in the pot drops, causing the concentration of remaining mineral salts to spike. By the end of the day, the EC of the water inside the root zone can double or triple, subjecting roots to high osmotic pressure. Automated pulse irrigation prevents this by delivering small, frequent refreshes, keeping the root-zone EC perfectly stable and predictable.
The Chemistry of Concentrates: Why Automated Systems Require Part A and Part B Tanks
When building or operating an automated fertigation system, you will quickly discover that you cannot mix all your nutrients together in a single, highly concentrated stock tank. Doing so causes immediate chemical precipitation, rendering your expensive fertilizer completely useless. To automate feeding successfully, you must understand the basic chemical incompatibilities of dissolved mineral salts.
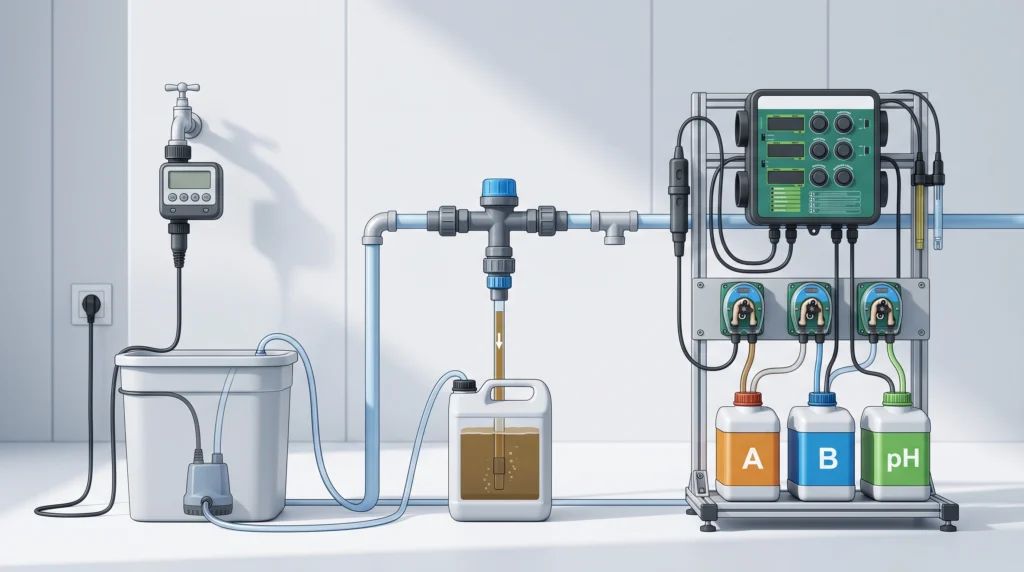
The primary conflict lies between Calcium (Ca2+) cations and Phosphate (HPO42-) or Sulfate (SO42-) anions. At standard, diluted feeding strengths (e.g., 1.5 mS/cm), these ions easily remain fully dissolved and co-exist in solution. However, when concentrated inside a stock tank, they chemically bind to form insoluble Calcium Phosphate (bone phosphate) and Calcium Sulfate (gypsum) solids. These solid mineral crystals precipitate out of the liquid as a thick white sludge, settling at the bottom of your stock bucket and permanently clogging your injector orifices, solenoid valves, and drip emitters.
| Stock Tank A (Cations & Chelates) | Stock Tank B (Anions & Magnesium) |
|---|---|
|
• Calcium Nitrate [Ca(NO3)2] • Potassium Nitrate [KNO3] (Partial) • Iron Chelates (Fe-DTPA or Fe-EDDHA) |
• Monopotassium Phosphate [KH2PO4] • Magnesium Sulfate [MgSO4] • Potassium Sulfate [K2SO4] • Trace Micronutrients (Mn, Zn, B, Cu, Mo) |
By separating your raw salts or concentrated liquid formulas into Stock Tank A and Stock Tank B, you keep the incompatible ions physically isolated until the exact moment your injector or dosing pump blends them into the flowing irrigation stream. For precise element balances, run your desired targets through our free hydroponic nutrient calculator.
Controller Types: Navigating the Automation Spectrum
Fertigation automation equipment exists along a distinct spectrum of cost, complexity, and physical control mechanism. Selecting the right class of hardware depends directly on your plant count, water volume, and desired level of daily hands-on involvement.
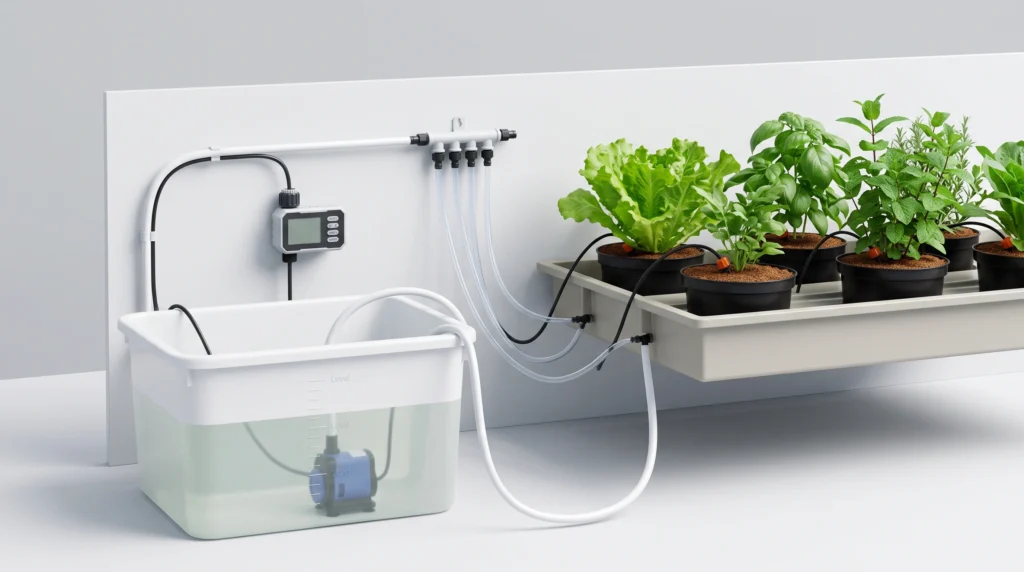
Tier 1: Simple Timer and Pre-Mixed Reservoir
The simplest automated fertigation layout utilizes a dedicated irrigation timer to trigger a high-pressure submersible pump inside a static, manually pre-mixed nutrient reservoir. When the programmed time arrives, the controller opens a solenoid valve, forcing the balanced water out to drip manifolds or flood benches.
While mechanically reliable and highly cost-effective, this approach suffers from a significant thermodynamic and chemical limitation: reservoir drift. As your plants transpire water, they alter the tank’s salt ratio. Furthermore, exposure to air causes dissolved carbon dioxide (CO2) to off-gas, steadily forcing the solution pH upward. To combat this, you must check parameters daily and manually adjust the tank with pH Up or Down buffers.

Why it’s necessary: A dedicated multi-zone timer automates delivery intervals down to 15-minute increments, removing the risk of missed watering cycles while enabling precise, scheduled pulses for timer-and-tank setups. It establishes the baseline consistency required to transition away from manual hand-watering.nKey Spec: 15-minute minimum cycle increments / Multi-zone solenoid valve control
Tier 2: Dilution (Ratio) Injectors
Proportioning dilution injectors operate inline, blending concentrated liquid stock nutrients directly into your main water line on demand. These devices rely on either water-driven physical pistons (e.g., Dosatron) or hydrodynamic venturi pressure drops (e.g., Mazzei injectors) to siphon precise volumes of stock concentrate into the flowing water stream.
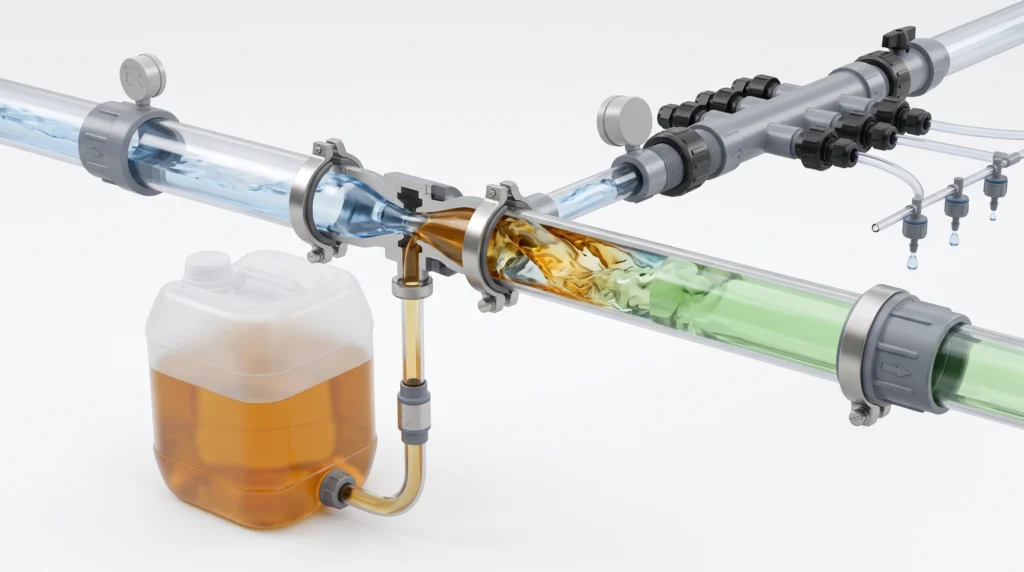
Injectors completely eliminate the need for a bulky pre-mixed water reservoir. Fresh, chemically stable nutrient water is created continuously as water flows through the line. Because the concentrated mineral salts remain physically isolated inside their respective stock tanks until irrigation starts, there is absolutely zero risk of reservoir salt drift or biological algal growth. This represents the gold standard for high-frequency drip irrigation and coco coir setups.
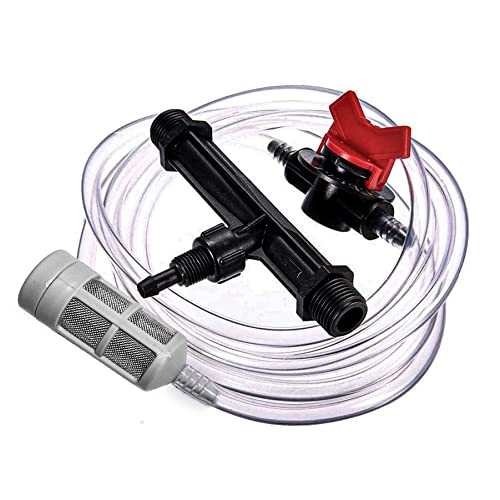
Why it’s necessary: This inline injector eliminates the need for large batch reservoirs by drawing concentrated nutrient stock directly into the main water line at fixed dilution ratios between 1:50 and 1:200. It prevents nutrient solution drift, delivering fresh feed on demand for coco coir and drip systems.nKey Spec: 1:50 to 1:200 adjustable dilution ratio / Water-powered or venturi injection
Tier 3: Closed-Loop EC/pH-Tracking Dosers
At the absolute pinnacle of automation are closed-loop dosing controllers. These systems utilize continuous-flow industrial pH and EC probes submerged inside a small mixing chamber or inline manifold. The controller receives real-time telemetry from the sensors. When values drift from your configured target, the microprocessor actuates high-precision peristaltic dosing pumps, injecting micro-pulses of Stock A, Stock B, or pH adjusters directly into the line.
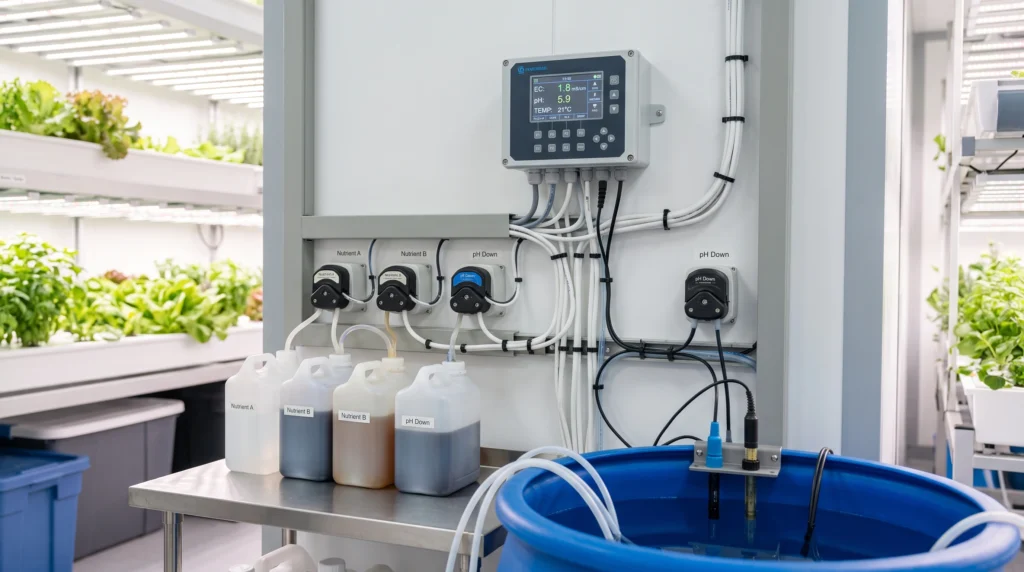
These systems deliver ultimate, set-and-forget precision. They adapt instantly to raw municipal tap water fluctuations, hold reservoir chemistry perfectly steady, and feature digital alarms that shut down irrigation if a probe drifts or a stock bucket runs dry. This high-end technology matches the dosing skids used in commercial greenhouses, justifying its cost for growers managing large rooms or traveling frequently.
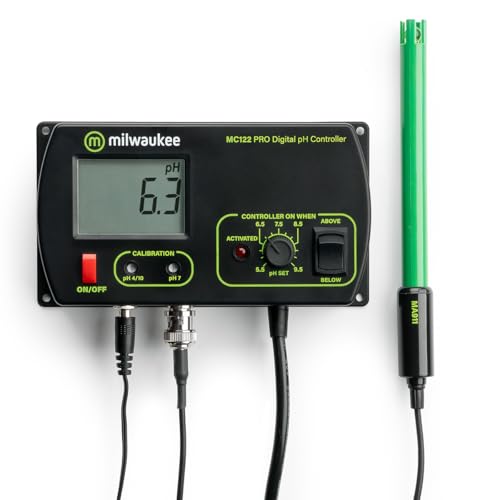
Why it’s necessary: A closed-loop dosing controller continuously monitors reservoir EC and pH through dedicated inline probes and automatically actuates peristaltic pumps to inject stock nutrients or pH adjusters. It holds target setpoints constantly and triggers safety alarms if parameters drift out of range.nKey Spec: Continuous EC/pH probe monitoring / Automated peristaltic dosing with high/low alarms
Interactive Fertigation & Dilution Toolkit
Use this integrated, mobile-responsive toolkit to calculate your exact stock tank mixing ratios, verify whether your mechanical injectors are drifting, and audit your daily grow room failsafes.
Proportional Dosing Math: A Step-by-Step Calculation Guide
Operating an inline fertilizer injector requires translating abstract volumetric proportions into real-world liquid measurements. Because the injector automatically dilutes concentrated stock on the fly, your stock tank must be mixed exactly at a concentrated multiplier scale. Follow this logical four-step walkthrough to calculate your concentrations.
(e.g., 2 mL/L Feed)
(e.g., 1:100 Setting)
(200 mL/L Stock Strength)
Step-by-Step Dilution Calculation Walkthrough
Step 1: Identify the Target Feed Strength. Check your fertilizer manufacturer’s feed chart for the target application strength. For this example, let’s assume the target vegetative rate is 2.0 mL of fertilizer per 1 Liter of fresh water (which represents a standard 1:500 final feeding dilution ratio).
Step 2: Check the Injector Setting. Look at the mechanical setting or venturi ratio configured on your proportioning injector. The standard, industry-default proportioning ratio is 1:100 (meaning 1 part of stock solution is injected into 99 parts of water, yielding 100 parts of final feed water).
Step 3: Calculate the Required Stock Strength. To ensure that the injector outputs the correct 2.0 mL/L rate at the emitter, the liquid inside your Stock Tank must be exactly 100 times stronger than the final target strength. Multiply your target rate by your injector ratio multiplier:
Step 4: Scale to the Total Stock Tank Size. Multiply your calculated stock concentration rate by your total stock bucket volume. If you are mixing a standard 20-liter stock bucket:
To mix this batch, add 4.0 Liters of raw liquid fertilizer into your bucket, then fill the remainder of the bucket with pure RO water until the liquid volume lands exactly on the 20-liter mark. Your Stock Tank is now prepared at 100x strength.
Worked Example: Verifying Emitter Injection Accuracy
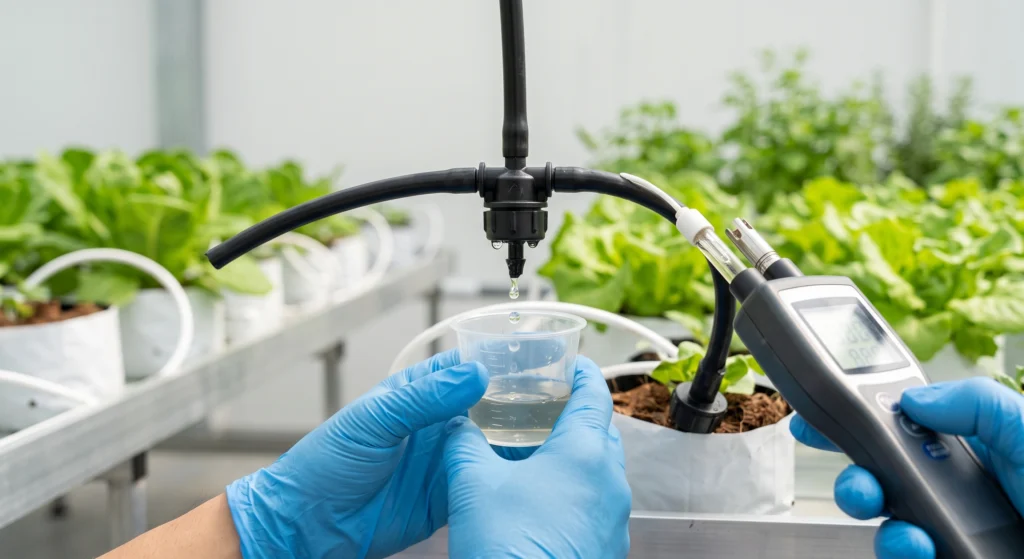
Mechanical proportioners can drift as internal check-valves wear. To verify your injector is pulling exactly 1:100, use this mathematical mass-balance verification protocol:
- Measure the EC of your raw water source (e.g., tap water EC = 0.15 mS/cm).
- Mix a small beaker representing your expected feed water by manually adding 2.0 mL of fertilizer to 1 Liter of raw water. Measure the EC of this control sample (e.g., target EC = 1.65 mS/cm).
- Turn on your automated irrigation system. Collect a fresh liquid sample directly from the drip emitter furthest from your manifold. Measure its EC using a calibrated meter (e.g., measured EC = 1.70 mS/cm).
Deviation = 1.70 − 1.65 = +0.05 mS/cm
Variance Percentage = (0.05 ÷ 1.50) × 100 = 3.33%
Since the variance is under 5.0%, your mechanical injector is operating safely within spec. If deviation exceeds 10.0%, clean your venturi line or replace the internal piston seals on your water-powered proportioner.
To dive deeper into EC management and standard salt conversions, explore our master Conversions and Reference Hub, or double-check your initial crop targets using our specialized hydroponic calculation guides.

Why it’s necessary: A waterproof handheld meter provides the ground-truth verification needed at the drip emitter to confirm that ratio injectors or dosing pumps are delivering the correct nutrient strength. It catches pump wear and ratio drift before plants suffer from under-feeding or salt burn.nKey Spec: Dual EC/ppm digital display / Automatic temperature compensation
Crop-Specific Scheduling: Aligning Controllers with Plant Physiology
Different crops possess vastly different physiological rates and nutrient preferences. Your fertigation controller must be programmed and operated to match the specific nutritional profile and transpirational rate of your current growth cycle. Selecting an incorrect scheduling frequency can trigger chronic root-zone stress.
1. Hydroponic Leafy Greens & Culinary Herbs
Leafy greens (such as butterhead lettuce, kale, and spinach) and herbs (such as bush basil) are fast-cycle crops with very low nutritional requirements. They prefer continuous, highly stable, and low-osmotic environments. Maintaining a steady feed target of 0.8 to 1.4 mS/cm EC prevents salt stress. Because greens are highly susceptible to leaf tip-burn under fluctuating moisture levels, use your controller to schedule light, consistent irrigation pulses that keep media moist but never oxygen-depleted. Learn more in our leafy greens crop guide.
2. Heavy-Feeding Fruiting Crops
Fruiting crops (such as indeterminate vining tomatoes, cucumbers, and bell peppers) require complex, multi-phase nutritional strategies. During early vegetative stages, they require moderate nitrogen and a steady EC of 1.5 to 1.8 mS/cm. However, as they transition into heavy flowering and active fruit set, their potassium (K+) and calcium (Ca2+) demands escalate dramatically, requiring you to ramp feed water EC up to 2.2 to 3.5 mS/cm.
Furthermore, fruiting plants require multiple, precisely spaced pulse feedings during active daylight hours to sustain heavy vegetative and generative transpirational pull without drowning the root zone. A static timer-and-tank system gets overwhelmed by this complexity. To manage these heavy-feeding crops predictably, rely on inline ratio injectors or automated closed-loop dosers that allow you to adjust solution parameters easily. Learn more in our fruiting crop guides.
System Integration: Plumbing, Safety Interlocks, and Backflow Prevention
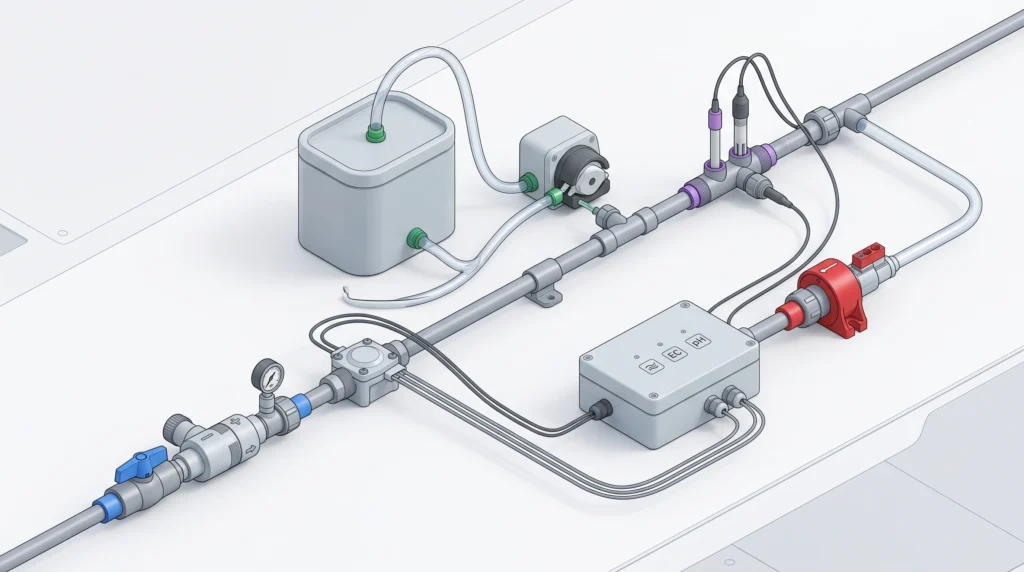
Automating your crop’s nutritional feeding creates a highly efficient workflow, but unmonitored automation can easily trigger massive grow room flooding or lethal crop overdose if a mechanical component fails. To secure your automated system, you must integrate physical failsafes and hydrodynamic interlocks directly into your plumbing blueprint.
| Failsafe Type | Physical Mechanism | Failure Mode Prevented |
|---|---|---|
| Flow Switch Interlock | Magnetic paddle or impeller switch in water line wired to controller power. | Raw acid or salt concentrates being injected into stationary or empty plumbing lines. |
| Backflow Check Valve | Spring-loaded physical check valve fitted before injector inlet port. | Non-potable stock nutrients siphoning backward into clean household or municipal water supply. |
| Parameter Alarms | Digital micro-controller limits (e.g. High EC > 3.0 / pH < 5.0). | Peristaltic pump run-dry or siphonage causing systemic plant tissue chemical burn. |
1. The Flow-Switch Interlock
Never allow an automated dosing controller to inject raw nutrient stock or pure phosphoric acid into a stationary or empty water line. If the water pump stops due to a power outage or blown fuse but the dosing controller continues to fire, you will build up a dangerous pocket of pure chemical concentrate inside the pipe. When the system restarts, this toxic chemical slug will hit your plants, causing immediate tissue death.
To prevent this, physically interlock the power supply of your dosing controller with a mechanical flow switch or minimum-pressure sensor. This simple plumbing interlock ensures that the dosing pumps cannot physically receive electricity unless water is actively flowing through your pipes.
2. Backflow Check Valves
Always fit physical check valves (non-return spring valves) on plumbing lines connecting raw water lines to nutrient injectors. Check valves prevent concentrated stock or non-potable reservoir water from siphoning backward into your domestic clean water lines during sudden plumbing pressure drops. For a complete guide on how to integrate check valves and flow-switches properly, read our master tutorial on automated plumbing safety.
3. Routine System Maintenance Schedule
Automated hardware demands a structured maintenance schedule. Clean your venturi throats quarterly to remove hard water calcium scaling, check peristaltic pump tubing for microscopic wear cracks, and flush your drip line manifolds with a diluted sanitizing solution to prevent organic biofilm buildup. A clogged emitter silently starves your crop, and a drifting probe can easily trigger a catastrophic over-dosing run. Keep your sensors accurate by bookmarking our step-by-step calibration guide.
Frequently Asked Questions (FAQ)
Automating your crop feeding schedules introduces many technical questions regarding equipment settings, sensor calibrations, and system safety. Review our answers to the most common fertigation questions below.
What is a fertigation controller?
A fertigation controller is a mechanical or electronic device that automates the delivery of liquid fertilizer solutions directly through irrigation plumbing. Tiers range from basic multi-zone time-clocks activating reservoir pumps, to inline proportional siphons, to premium microprocessors that use live sensors to dose stock concentrates on demand. Read our complete monitoring guide to understand these configurations.
Do I need a fertigation controller for a small indoor grow?
If you are only growing 2 to 4 plants in simple pots, manual hand-watering is perfectly manageable. However, if you run media with low buffering capacity like coco coir, feed multiple times per day, or travel frequently, automating your feeds is the single best way to ensure crop consistency and eliminate manual labor bottlenecks. You can cross-reference setup requirements using our system equipment index.
What does dilution ratio mean for inline injectors?
The dilution ratio represents the precise proportion of liquid stock concentrate that your injector draws into the main water line. For example, a 1:100 setting means the device siphons 1 part of concentrate into 99 parts of water (yielding 100 parts total). To use this, you must mix your stock tanks 100 times stronger than your desired emitter feed rate. Map your exact dosage with our Hydro Doctor dosage calculator.
Is a premium EC/pH dosing controller worth the investment?
For large-scale grows, multi-reservoir configurations, or commercial greenhouses, closed-loop dosers are highly cost-justified. They hold target parameters constant 24/7, reducing drift risk and protecting high-value crops from shock. For standard home tents, a simple multi-zone timer-and-tank setup combined with accurate handheld meters offers high value at a fraction of the cost. Check out our comparative reviews in the system equipment directory.
How often do I need to calibrate my fertigation probes?
You should calibrate your pH probes every two weeks using fresh 4.01 and 7.01 reference standard buffers. pH glass bulbs naturally drift as they react with dissolved mineral ions. EC probes are significantly more stable but should still be verified monthly using a standard 1.41 mS/cm reference standard. Review our complete step-by-step tutorial on grow-room sensor calibration.
Can I use organic fertilizers with automated fertigation controllers?
Thick, organic nutrients containing heavy particulate matter or unfiltered suspensions will quickly clog small venturi siphons, proportional valves, and narrow drip emitters. If you automate organic feeds, only use highly refined, fully water-soluble organic formulations, fit a fine inline mesh screen filter, and flush your lines with fresh water after every feeding run. Read about root care in our clog prevention directory.
What happens if my stock nutrient tank runs empty?
If a stock tank runs completely dry, your inline injector or automated doser will pump plain water through your lines, rapidly diluting your substrate salinity and starving your crops. Premium closed-loop dosing controllers prevent this catastrophe by incorporating physical stock tank float switches or low-EC safety alarms that automatically pause the irrigation cycle before damage occurs. Learn how to configure safe triggers on our automated failsafe dashboard.
Summary: Transitioning to Automated Growth
Shifting your hydroponic grow from manual hand-watering to automated fertigation converts daily crop maintenance from an exhausting physical chore into a highly predictable, science-backed schedule. Eliminating wet-dry stress cycles and keeping your root zone salinity perfectly balanced unlocks the true genetic potential of your crops—leading to explosive vegetative expansion, thicker stalks, and massive yields.
Evaluate your budget, plant counts, and grow media. Calculate your dilution ratios carefully, verify your delivery strength at the drip line using calibrated handheld meters, and integrate physical safety interlocks like check valves and flow sensors. Once your automated irrigation system is dialed in, explore our complete library of equipment reviews and precision calculators to continually refine your growing environment.

Continue Your Learning Journey