Alright, settle in, my fellow plant whisperers. We’re going to talk about a little bit of magic, the kind that makes a mid-January caprese salad from sun-warmed cherry tomatoes grown in your basement not just a possibility, but a weekly reality. For years, I’ve had my hands in… well, not dirt, but nutrient-rich water, cooing over everything from a tiny chili seedling to a bustling, four-foot tomato plant in my controlled garden. The sheer joy of biting into a crisp, perfectly ripe pepper in the dead of a cold snap is something you just can’t get from a grocery store. This, my friends, is why we do what we do. We chase that flavor, that impossible freshness, and that feeling of self-sufficiency. This isn’t just about growing food; it’s about growing the best food, on your terms.
Now, before we get our hands wet, a quick but necessary word of caution. Hydroponics is awesome, but it’s not a secret society. Every jurisdiction has its own rules. So, let’s be responsible, fellow cultivators, and check in with the powers that be.
Note: Some municipalities regulate indoor agriculture. Verify local compliance.
Why Soil Can’t Match Hydro Flavor: The Brix Level Advantage
You’ve probably heard it a thousand times: “hydroponic vegetables just don’t taste as good as soil-grown ones.” I’m here to tell you that’s a load of old-school gardening nonsense. It’s a myth born of poorly-managed commercial setups that prioritize speed and size over flavor. When you’re in control—and trust me, we will be—hydroponically grown tomatoes and peppers absolutely sing with flavor.
The secret? Brix levels. This isn’t some mad-scientist term; it’s just a measure of the sugar content in a plant’s juice, which directly correlates with sweetness and overall flavor complexity. In soil, a plant is at the mercy of countless variables: rain, drought, soil pathogens, nutrient tie-up, you name it. It’s a constant battle. The plant has to work hard just to survive, leaving less energy for what really matters: making delicious fruit.
In a well-tuned hydroponic system, everything is precisely delivered. The plant gets exactly the right amount of nitrogen for strong leaves, phosphorus for robust roots, and potassium for that final, crucial push into flowering and fruiting. By the end of its life cycle, especially in the final flowering stage, we can reduce nitrogen and boost potassium, a trick that signals the plant to pour all its energy into sugar production for the fruit.
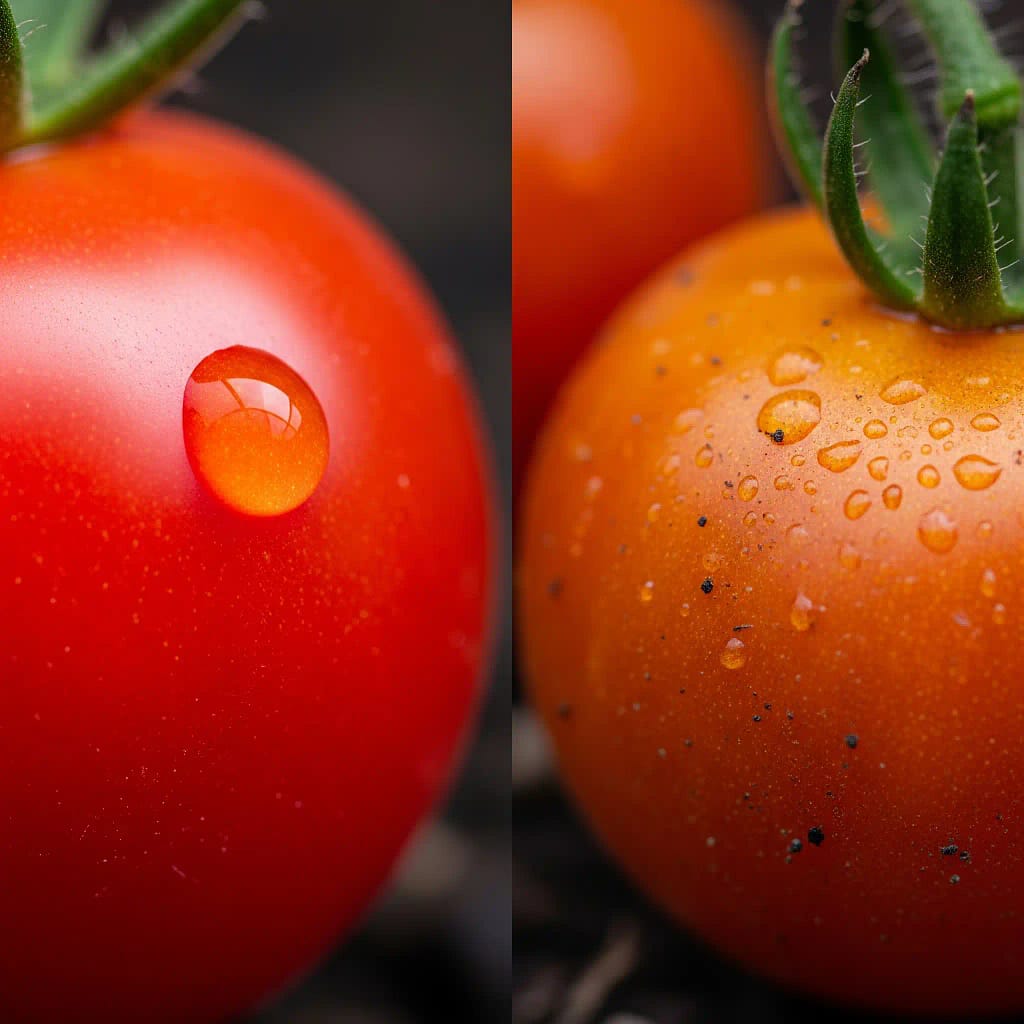
That’s how you get that complex, sun-warmed tomato essence in a cherry tomato you grew in January. I’ve had grocery store peppers taste like moist cardboard, and let me tell you, a hydro-grown pepper tastes like a firework of bright, vegetal flavor by comparison. It’s all in the precision.
System Smackdown: Choosing the Right Home for Your Fruiting Plants
When it comes to growing these culinary powerhouses, a one-size-fits-all approach is a recipe for disappointment. While lettuces and leafy greens are a bit more forgiving, fruiting plants like Solanum lycopersicum (that’s our fancy friend the tomato) and Capsicum annuum (the humble pepper) have specific needs. You wouldn’t put a shark in a bathtub, would you? The same goes for your plants.
Dutch Bucket Dominance for Tomatoes
Listen up, tomato lovers. If you’re serious about growing big, indeterminate tomato plants that reach for the sky and produce more fruit than you know what to do with, the Dutch bucket system is your best friend. This is my go-to system for my full-sized Roma and Beefsteak varieties. It’s simple, scalable, and beautifully efficient.
Here’s the deal: each plant gets its own five-gallon bucket filled with an inert, non-compacting medium like perlite or expanded clay pellets. This provides the physical support a large tomato plant needs, anchoring it firmly in place. The brilliant part is the irrigation. A drip line trickles a nutrient solution directly to the roots, and any excess drains out a tube at the bottom of the bucket and recirculates back to a central reservoir.
This design is a masterclass in efficiency. It uses far less water than a traditional flood-and-drain table and provides a crucial “air gap” for the roots to breathe. I once lost 60 plants to root rot before I learned this lesson. Drowning those roots in a constantly flooded system, with no oxygen, is a death sentence. The Dutch bucket, by contrast, gives the roots a constant supply of food but also the chance to breathe in a humid, oxygen-rich environment. It’s the best of both worlds.
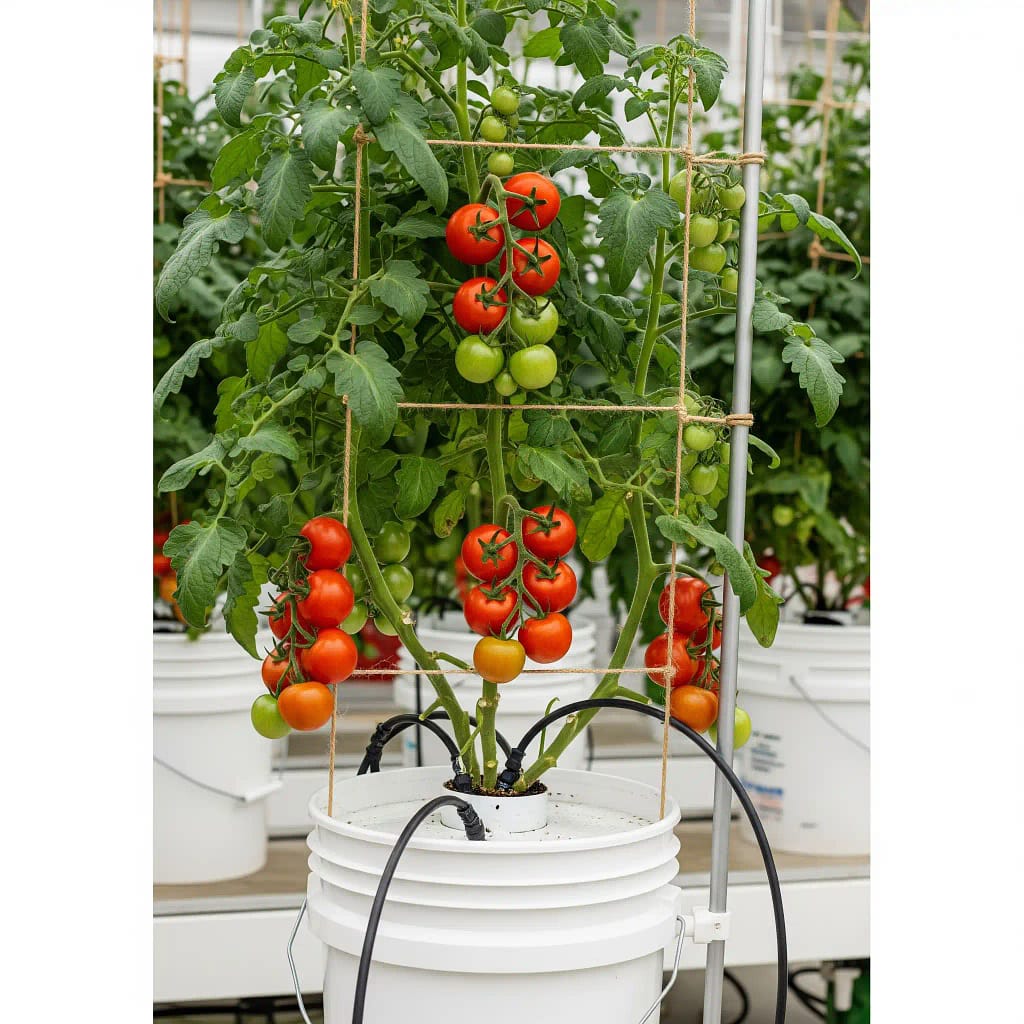
Tip from the Pharaoh’s Tomb: A simple Dutch bucket system can be built with minimal plumbing skills. You can buy the buckets, tubing, and fittings at a local hardware store. Or, even easier, find a ready-to-go kit online. Just make sure the medium you choose is clean and has good drainage.
Aeroponic Pepper Perfection
Now for my spicy sidekicks, the peppers. Whether it’s a sweet bell pepper or a fiery habanero, these plants thrive on oxygen. A lot of it. And nothing delivers that oxygen boost quite like a true aeroponic system. While a Dutch bucket works just fine, I’ve found that for sheer explosive growth and an abundance of fruit, aeroponics is the way to go.
Aeroponic Pepper Cultivation Blueprint:
The Chamber: Instead of a substrate, your pepper plants live in an enclosed root chamber. This chamber is dark and humid, just like a Dutch bucket, but completely empty. The roots dangle in the air.
The Misting Cycle: A high-pressure pump (80-100 PSI) or an ultrasonic nebulizer sprays an ultra-fine mist of nutrient solution directly onto the roots in timed, short bursts (1-5 seconds on, every 3-5 minutes off). This is the “aeroponic” part: roots get maximum oxygen exposure between feedings, which dramatically accelerates growth.
Yield Calculation: Because of this hyper-oxygenated environment, you can plant more densely. In my setup, I can comfortably grow a sweet pepper plant in a space where a tomato would feel cramped. While a single Dutch bucket might give me 10-15 pounds of tomatoes in a season, a vertical aeroponic tower can produce that same weight from a few pepper plants in half the space and time.
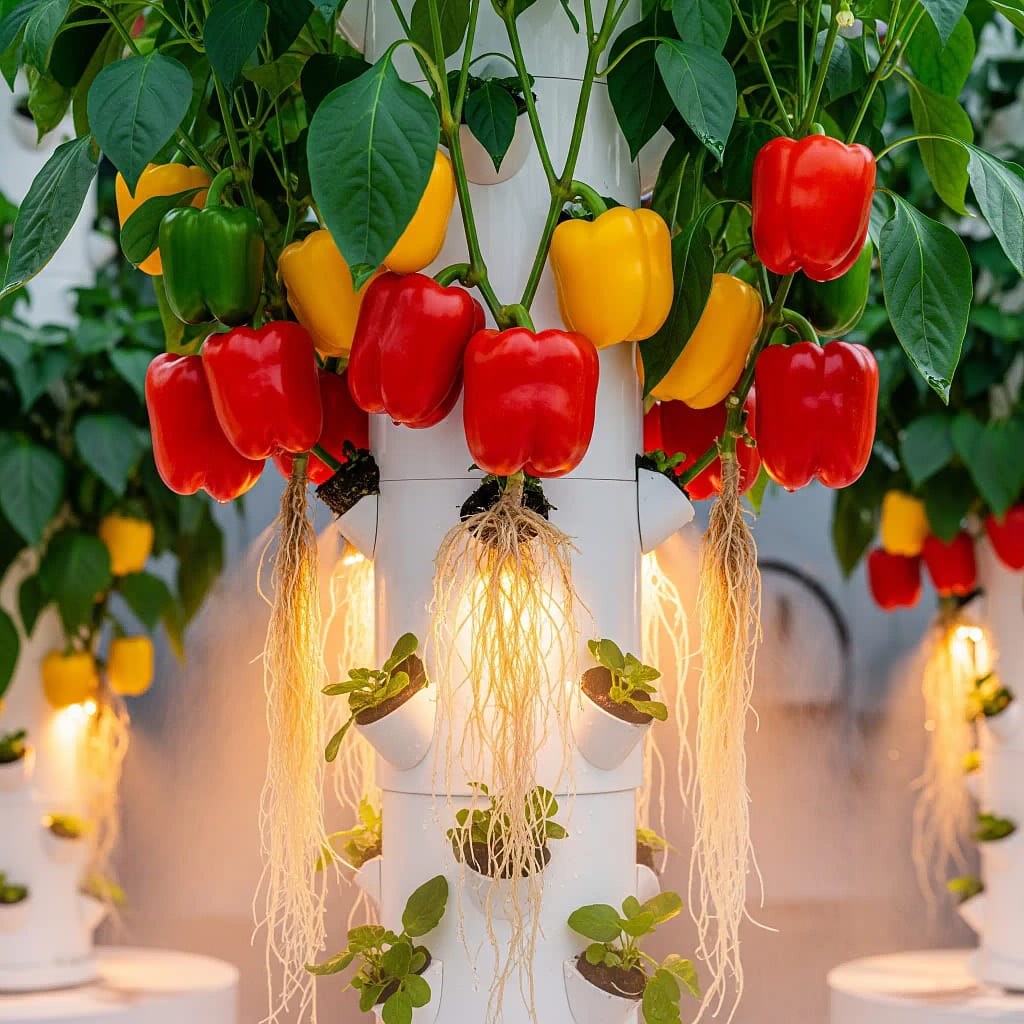
This method requires more initial investment and a more technical setup—with misters and pressure tanks—but the payoff in accelerated growth and overall plant health is undeniable. A simple power outage can kill your crop in hours, so a backup power source is non-negotiable.
Climate Command Center: Making Your Plants Feel at Home
This is where the real fun begins. You’re no longer just a gardener; you’re a climate god. The fate of your harvest rests not with a fickle sky, but with your ability to create the perfect little world for your plants.
| Factor | Tomatoes | Peppers |
| Ideal pH | 5.8-6.3 | 5.5-6.5 |
| EC/PPM | 2.0-5.0 EC | 1400-1750 PPM |
| Day Temp | 18.3-25°C (65-77°F) | 18-24°C (65-75°F) |
| Light Hours | 16+ artificial | 16 artificial / 6-8 sun |
| Flower Nutrients | NPK 5-15-14 | Higher K requirement |
Temperature Tango: Day & Night Rhythm
Plants, just like us, thrive on routine. Their growth isn’t just a matter of getting enough light and food; it’s about getting the right temperature at the right time. For our fruiting friends, a day/night temperature differential is crucial.
During the day, in the presence of light, your plants are busily photosynthesizing, a high-energy process where they convert light into sugars for growth. They like it warm for this. But at night, when the lights are off, they enter a period of rest and respiration, consuming those sugars for cell development. If the night temperature is too high, the plant burns too much of its stored energy just to stay cool. Lowering the night temperature a bit tells the plant to slow down its metabolism, allowing it to save more of that energy for fruit production. That’s why you want a day temperature of around 18.3-25°C (65-77°F) for tomatoes and 18-24°C (65-75°F) for peppers, and then a drop of around 5°C at night.

pH Precision: The 5.5-6.5 Sweet Spot
Okay, let’s talk about the single most critical factor in your hydroponic success: pH. I’m not exaggerating. I’ve seen beginners meticulously follow every other instruction, only to have their plants slowly yellow and die because they ignored their pH. It’s like giving a person all the food in the world but tying their hands behind their back. Without the right pH, your plants can’t access the nutrients floating right next to their roots. This is known as “nutrient lockout.”
For tomatoes, you’re aiming for a slightly acidic range of 5.8-6.3. Peppers are a bit more flexible and will tolerate 5.5-6.5. This narrow range is where the magic happens, ensuring all the macro and micronutrients—from iron to phosphorus—remain soluble and readily available for root absorption.
Greenhouse Confidential #1: Your pH will naturally drift up over time as the plant consumes nutrients. Don’t panic. This is normal. I check my pH meter every single day without fail, and I make minor adjustments with a couple of drops of pH Down. It’s a small, consistent effort that pays off in massive, healthy plants.
Light Recipe for Fruit Explosion
Light is food. But it’s not just about turning on a big, bright light. Different light spectrums trigger different responses from your plants. This is where we get to play mad scientist.
Blue Light (400-500 nm)
This is the vegetative growth champion. It encourages strong, compact foliage and thick stems, the foundation for a plant that can support a heavy fruit load. You want to start your seedlings and keep your plants in a blue-rich environment during their initial growth.
Red Light (600-700 nm)
This is the flower and fruit signal. As your plant matures and you want to trigger it to start producing fruit, you increase the red light in its “diet.” This tells the plant it’s time to reproduce.
Green Light (500-600 nm)
Believe it or not, plants don’t just reject green light. While they absorb red and blue most efficiently, the green light penetrates deeper into the canopy, reaching lower leaves that would otherwise be starved for energy. A balanced full-spectrum light is best for this reason, ensuring every part of your plant is thriving.
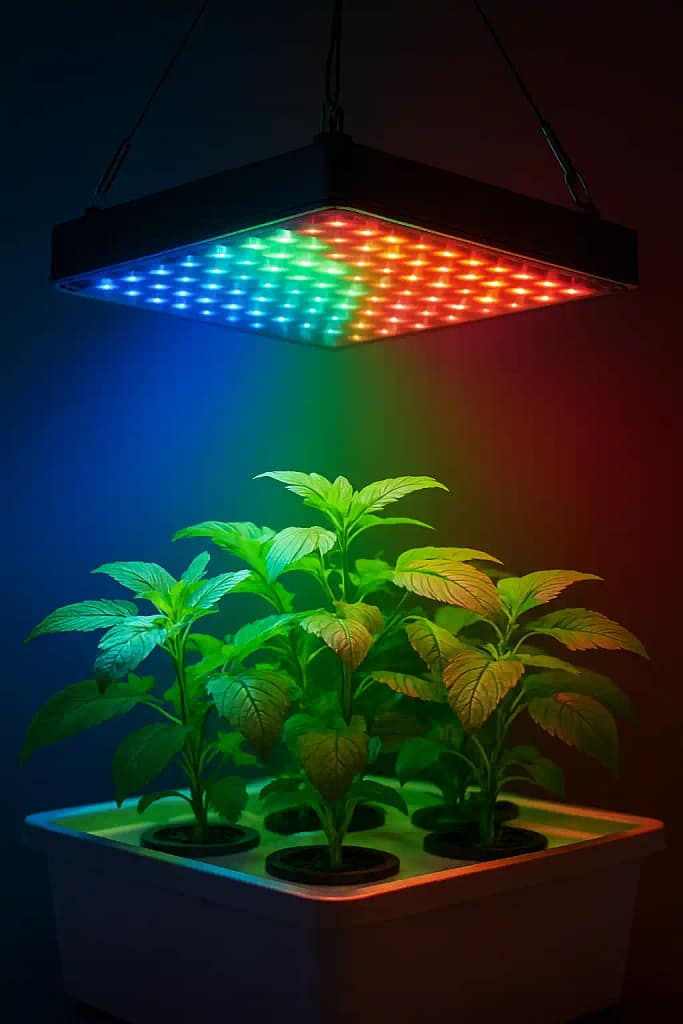
For optimal results, your plants need a long day. I run my grow lights for 16 hours a day. This tricks the plants into thinking it’s a long, perfect summer, keeping them in a productive state.
Nutrient Alchemy: The Difference Between Veg & Bloom
Here’s where many beginners fall short. They treat their plants’ nutrition like a single, unchanging recipe. But our plants, just like us, have different dietary needs at different life stages. A teenager needs different nutrition than an adult, and a seedling needs something different than a plant bursting with fruit.
I’ve lost countless potential harvests by feeding the same formula all the way through, resulting in weak plants and tiny fruit. We must transition from a “vegetative” formula to a “flowering” or “fruiting” one.
- Vegetative Stage (Weeks 1-8): Your plant is a leafy machine. It’s building its foundation: roots, stems, and leaves. During this phase, it has a ravenous appetite for nitrogen (N), the building block of green growth. Your nutrient solution should have a high N-P-K ratio, like a 10-5-5, to promote strong foliage.
- Flowering & Fruiting Stage (Week 8+): As you transition your plants, it’s time to dial back the nitrogen. Excess N at this stage can lead to a lush, beautiful plant with minimal flowers or fruit. Instead, you’ll dramatically increase the phosphorus (P) and potassium (K). Phosphorus is for flowers and roots, and potassium is the king of fruit development, swelling those beautiful fruits with sugar and flavor. An N-P-K ratio like 5-15-14 is perfect.
- Tomato vs Pepper Cheatsheet: Remember that peppers can be pickier. While tomatoes thrive with a broad mix, peppers require more potassium. Always check your specific variety and adjust accordingly.
- Greenhouse Confidential #2: Make your transition slowly. Start by cutting your vegetative formula with a third of the flowering formula for a week, then go to a 50/50 mix, and finally, after a week, switch entirely. This prevents nutrient shock and keeps your plants happy.
When it comes to feeding your plants, you don’t want to mess around. I’ve personally run the gamut from cheap garden-store stuff to high-end, multi-part systems. These are my battle-tested picks for explosive results.
Pollination Party: From Buzzing Bees to Electric Brushes
In nature, the wind and bees do the heavy lifting of pollination. In your controlled indoor environment, it’s all on you. Don’t worry; it’s less complicated than it sounds, and it’s actually pretty fun. The goal is to get pollen from the stamen to the pistil to fertilize the flower and make it turn into a beautiful fruit.
- Tomatoes (the Self-Pollinators): Tomatoes are self-fertile, meaning a single flower has both male and female parts. They don’t need an external partner, just a little encouragement.
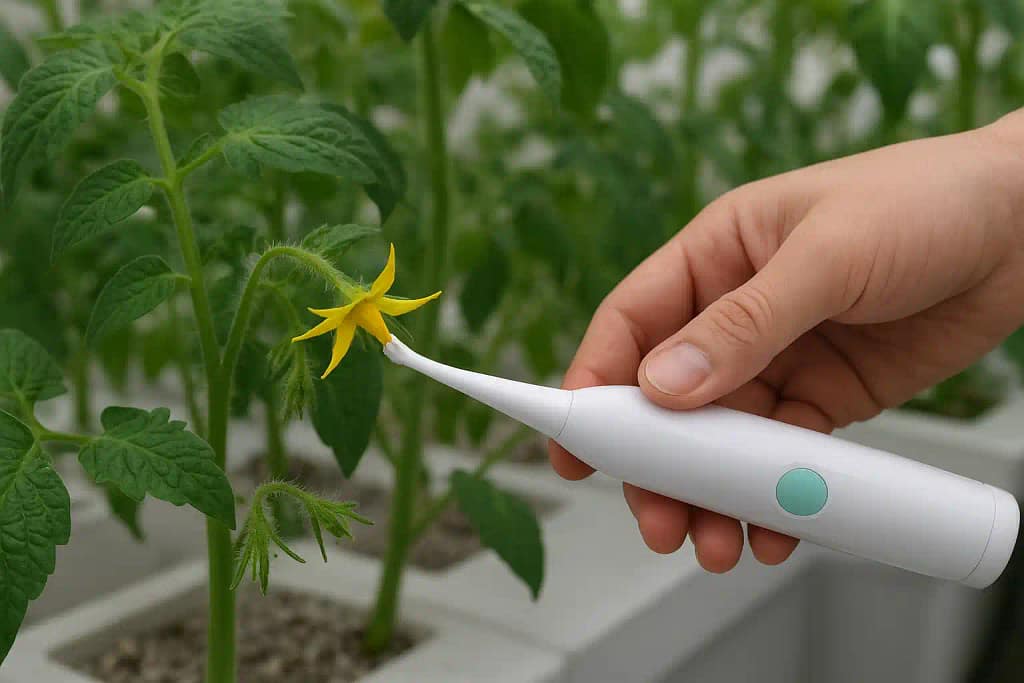
- Technique 1: The Daily Shake: This is the simplest method. Every day, just gently shake your tomato plant. This dislodges the pollen and helps it fall where it needs to go.
- Technique 2: The Electric Toothbrush: My secret weapon for a foolproof tomato set. I just put a cheap electric toothbrush on the main stem and let it buzz for 10-15 seconds. The vibrations shake the pollen loose, mimicking a bee’s wings. It’s effective, fast, and satisfying.
- Peppers (the Pickier Ones): Peppers are also self-pollinators, but they need a bit more personal attention to get a good fruit set. I’ve found that just shaking the plant isn’t enough for a heavy yield.
- Technique 1: The Cotton Swab: My preferred method. Gently touch the center of each flower with a clean cotton swab to pick up pollen, and then dab it on every other flower. It’s a bit tedious, but it guarantees a good result.
- Technique 2: The Fan: Running a fan for a few hours a day can mimic a gentle breeze and help a little, but it’s not as reliable as hands-on work.
The best time for this pollination party is in the morning when the pollen is fresh and flowers are open.
Support Squad: Giving Your Plants a Backbone
Tomatoes and peppers, especially when loaded with fruit, get heavy. Really heavy. If you don’t support them, they’ll collapse under their own weight, taking your dreams of a winter harvest with them. This is especially true for indeterminate tomato varieties, which can grow to be eight feet tall and require a serious support system.
- Tomato Cages: I find these work great for smaller, determinate bush varieties. They’re cheap and easy to set up. But for a vining tomato, they’ll quickly be outgrown, and you’ll have a tangled, messy jungle.
- Trellis Systems: This is the gold standard for my large tomato plants. I run a line of string from a support bar at the top of my grow area down to a clip on the main stem of the plant. As the plant grows, I gently wrap it around the string. This keeps the plant growing vertically and supports the weight of the fruit. This method is crucial for maximizing light exposure and airflow, preventing disease.
- Greenhouse Confidential: As your plant grows, don’t let it become a mess of leaves and stems. Prune! I remove any “suckers”—those little shoots that grow in the V-shape between the main stem and a branch. They drain energy that could be going into fruit. A little pruning goes a long way toward a big harvest.
War Room: Pest & Disease Battles
Here’s the thing about hydroponics: a happy, healthy plant is a resilient plant. But even a happy plant can get sick. The enclosed nature of a hydroponic system is great for keeping out most pests, but once one gets in, it can multiply at an alarming rate. It’s a war, but we have a well-stocked war room.
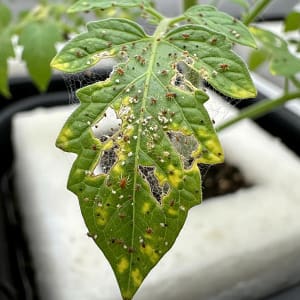
- Spider Mites: These tiny, reddish-brown pests love hot, dry environments. They suck the life out of leaves, leaving behind tiny yellow or white spots and, eventually, fine webbing. They are the scourge of my greenhouse.
- Aphids: These small, soft-bodied insects cluster on new growth, leaving behind a sticky substance called honeydew. They are a classic garden pest, but no less of a threat in hydro.
- Thrips: These are tiny, winged insects that scrape and suck on leaves, leaving silvery or brown streaks. They can also spread viruses.
DIY Organic Pest Solutions
You don’t need harsh chemicals. A few simple solutions can save your crop. I lost an entire crop of bell peppers to a spider mite infestation before learning these simple tricks.
- Garlic & Cayenne Spray: This simple solution is a powerful deterrent. Mince a few cloves of garlic and a teaspoon of cayenne pepper. Steep in hot water for a few hours. Strain, add a few drops of mild soap as an emulsifier, and dilute it with water. Spray it on the leaves. Bugs hate the smell and taste, but your plants will be fine.
- Diatomaceous Earth: This is a fantastic physical control. I sprinkle food-grade DE on the surfaces of my grow room and around the base of the plants. It’s razor-sharp to insects, literally slicing them apart, but is harmless to humans and animals. It saved my seedlings from a fungus gnat invasion.
Disease Management & Prevention
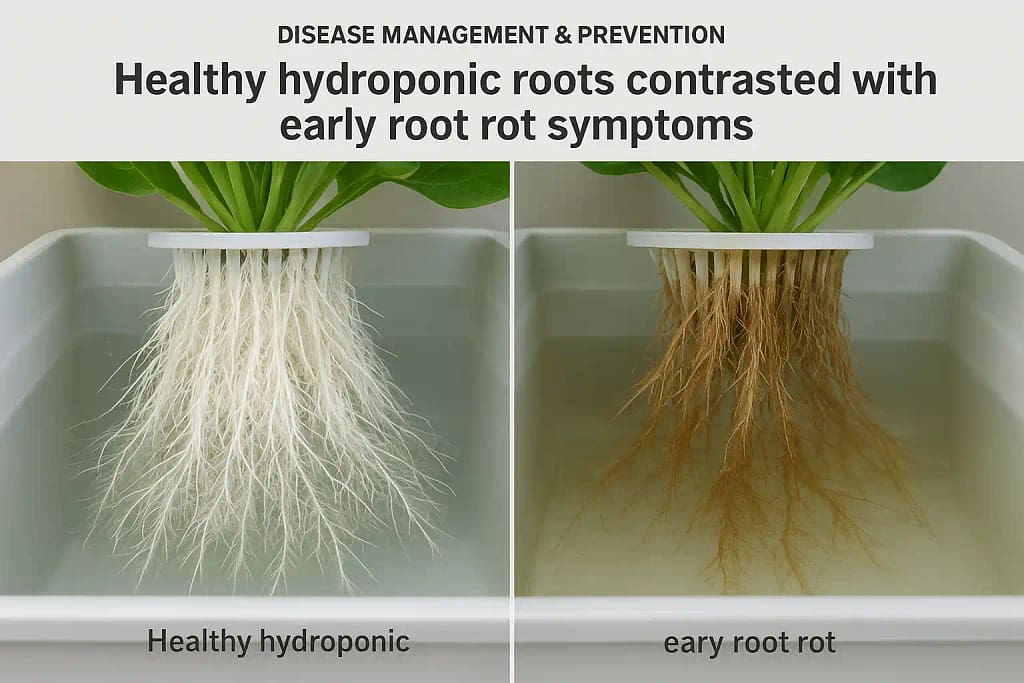
- Root Rot (Pythium): This is the ultimate boogeyman of hydroponic gardening. It’s a fungus that thrives in warm, oxygen-deprived water. The symptoms are a plant that’s wilting for no reason, with roots turning brown and slimy with a foul smell.
- Prevention is everything: Keep your water temperature below 20°C (68°F) to slow down its growth. Ensure your water is well-oxygenated with an air pump and air stone. And keep your reservoir light-proof to prevent algae growth, which provides food for the fungus.
- Blossom End Rot: This is not a fungus, but a calcium deficiency in the fruit itself. It shows up as a dark, sunken spot on the blossom end of the tomato or pepper. The solution is to ensure your pH is in the sweet spot (5.5-6.5) so the plant can absorb calcium.
I have a dedicated page on my site about this, check out the definitive pest identification guide for soilless systems here, so you can be ready for anything.
Pro Grower’s Arsenal: My Can’t-Live-Without Tools
After over a decade of growing, I’ve filled my toolkit with essential gear. I’ve tried everything, from cheap gadgets that fail after a month to expensive professional equipment. These are the tools that have earned their place.
Botanicare Cal-Mag Plus, 1-Quart
A concentrated calcium, magnesium, and iron supplement essential for preventing blossom end rot in tomatoes and peppers and ensuring strong cell wall development.
- Botanicare Cal-Mag Plus 2-0-0 is a highly fortified calcium, magnesium, and iron plant supplement
- Corrects common deficiencies
- Use during the vegetative, transition, and bloom stages of growth
Why Growers Love It:
- Blossom End Rot Prevention: Specifically formulated to prevent calcium-related disorders that commonly plague tomatoes and peppers, ensuring flawless fruit development.
- Enhanced Nutrient Uptake: Acts as a catalyst to increase the uptake of essential minerals when used with your base nutrients, maximizing their effectiveness.
- Comprehensive Formulation: Contains not just calcium and magnesium, but also iron and a proprietary blend of trace minerals to support robust plant health.
Room for Improvement:
- Regular Application Required: Needs to be used with every watering for consistent results, especially critical when using reverse osmosis (RO) water or growing in coco coir.
- Concentration Care: Requires precise measurement; overdosing can lead to nutrient lockout of other elements.
Bottom Line for Growers: A non-negotiable supplement for hydroponic tomatoes and peppers. It is the single most effective product for preventing the devastating blossom end rot that can ruin a harvest. Check Price on Amazon.
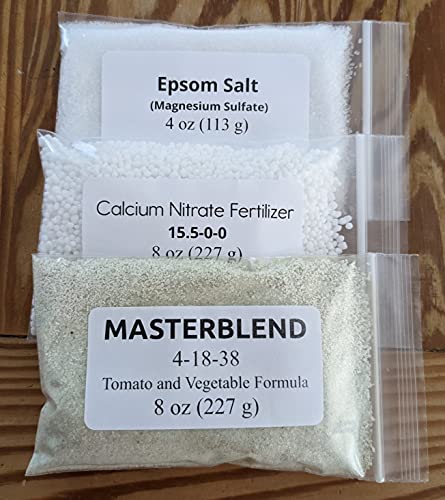
Masterblend 4-18-38 Complete Combo Kit (5lbs)
A professional-grade, three-part fertilizer system renowned for its exceptional results with tomatoes, peppers, and other heavy-feeding fruiting crops.
- The Combo Kit makes 95 to 114 gallons of nutrient solution, dependent on the concentration desired.
- The fertilizer can be used for hydroponics and soil gardens.
- The combo kit includes individually bagged components: 8 oz (227 g) Masterblend 4-18-38 Tomato & Vegetable Fertilizer, 8…
Top-Shelf Features:
- Optimal NPK Ratio: The 4-18-38 formula (when mixed with calcium nitrate and magnesium sulfate) provides the high potassium and phosphorus levels tomatoes and peppers crave for flowering and fruiting.
- Clean and Efficient: No dyes or fillers; dissolves completely, leaving no residue that can clog pumps or drippers in your recirculating system.
- Incredibly Cost-Effective: Yields a massive volume of nutrient solution per dollar, making it a favorite of large-scale commercial growers and savvy hobbyists alike.
A Word of Caution:
- Mixing Required: Requires purchasing separate calcium nitrate and magnesium sulfate (Epsom salt) and following a specific mixing order to prevent nutrient lockout.
- Learning Curve: Getting the ratios perfect takes a bit more effort than an all-in-one nutrient bottle.
Who This Is For: Growers who are serious about maximizing the flavor and yield of their tomatoes and peppers and don’t mind a little extra prep work for superior results. See Latest Discount on Amazon.
Vivosun Digital pH Meter and TDS Combo Kit
Dual-function digital meter with automatic temperature compensation for precise pH and PPM readings.
- Application: Great for all home and laboratory TDS & pH testing applications including aquariums, swimming pools
- PH Meter: Full measurement range of pH 0 – 14, reliable and quick readings
- 3-in-1 TDS Meter: Measurement Range 0-9990ppm, 0-9990µs/cm; Accuracy ± 2%, 0.1- 80.0°C, 32.0-176.0°F; Note: This meter c…
Top-Shelf Features:
- Dual-Parameter Monitoring: Simultaneously tracks pH and nutrient strength (PPM) for comprehensive solution management.
- Data Hold Function: Freezes readings for easy transcription into grow journals.
- Auto-Calibration: Features one-button calibration with included buffer powders for maintenance-free accuracy.
A Word of Caution:
- Calibration Demands: Requires weekly calibration to maintain precision readings.
- Fragile Components: Glass electrode needs careful handling and proper storage solution.
Who This Is For: Ideal for serious growers who need precise numerical readings rather than color interpretation. Perfect for diagnosing multiple parameter issues simultaneously. See Latest Discount.
Vivosun 5-Pack 5-Gallon Bucket Lid with Net Pots
A simple, robust Deep Water Culture (DWC) kit perfect for growing large, determinate tomato or pepper plants that need substantial root space and support.
- Perfect fit – 6 inch net pot lid is fits good on standard 3.5 and 5 gallon buckets. Also fit for 5 gallon Lowe’s bucket …
- Mesh net pot – 6”wide x 4. 5”deep is great for Orchid pot, Hydroponics and dwc Hydroponics.
- Great for hydro growrh – Net pot lid will grow the best plants in a hydroponic system, such as tomatoes, lettuce, spinac…
Bloom & Boost:
- Massive Root Zone: 5-gallon buckets provide ample room for the extensive root systems of tomato and pepper plants, preventing them from becoming root-bound.
- Durable Construction: Heavy-duty food-grade buckets and thick lids resist light leaks and won’t crack under the weight of a large plant.
- DIY Flexibility: Allows you to build a custom multi-bucket system at a fraction of the cost of a pre-built kit.
Things to Consider:
- Water Level Management: Requires frequent checking and topping off in hot weather, as large plants are thirsty.
- Reservoir Changes: Changing the nutrient solution in multiple 5-gallon buckets can be heavy and labor-intensive.
Is It Right for Your Garden? The ideal, scalable setup for growers who want to train large, high-yielding tomato and pepper plants without the high cost of a pre-built system. See Latest Discount on Amazon.
HIRALIY 50ft Drip Irrigation Kit
A complete drip system kit ideal for automating feeding for container-grown tomatoes and peppers in systems using coco coir or perlite.
- Adjustable Water Flow: The drip emitter can be adjusted to stop, micro-drip, and spray so that you can use the water dri…
- No-leaking Brass Splitter: The splitter has a solid brass construction and no rust. It not only separates the two drip l…
- Easy To Assemble and Use: Simple installation, simply insert the fittings and droppers, and you can begin watering your …
Grow Room Win:
- Hands-Free Watering: The digital timer allows you to set precise watering schedules, ensuring consistent moisture levels critical for preventing blossom end rot.
- Customizable Layout: 50 feet of tubing and various emitters let you design a system for any number of plants, from a patio garden to a full greenhouse.
- Water Filter Included: The built-in filter prevents sediment and nutrient particles from clogging the delicate drippers.
The Trade-Off:
- Pressure Dependent: Requires adequate water pressure from your source; may need a small pump if using a large barrel reservoir.
- Assembly Time: Requires an initial time investment to set up and customize for your specific garden layout.
The Final Verdict: Perfect for the grower who wants to automate their substrate-based grow. Takes the daily chore of hand-watering off your list and provides unparalleled consistency. Check Price on Amazon.
FoxFarm Grow Big, Big Bloom, Tiger Bloom Pack
A popular three-part liquid nutrient system known for producing flavorful, aromatic fruits and is especially well-suited for organic-leaning hydroponic approaches like container gardens.
- A POWER TRIO TO NOURISH YOUR PLANTS: This liquid fertilizer bloom bundle makes plants receive nutrition all season for b…
- GROW BIG TO SPARK LUSH VEGETATION: Kickstart wit grow fertilizer for vegetable garden, designed to promote lush vegetati…
- POWERS UP BUDS WITH TIGER BLOOM: Activate the strength of fruit and bloom booster plant food for flowers when buds begin…
The Green Thumb Upside:
- Stage-Specific Feeding: Separate formulas for vegetative growth (Grow Big), root and bloom development (Big Bloom), and fruiting (Tiger Bloom) simplify the feeding schedule.
- Enhanced Flavor Profile: Many growers swear that organic-based nutrients like FoxFarm enhance the complex flavors and sugars in tomatoes and peppers.
- Ease of Use: Liquid formulation is easy to measure and mix, making it less intimidating for beginners than powder systems.
Grower’s Notes:
- Potential for Clogging: The organic matter in Big Bloom can clog small pumps and drippers; best used in drain-to-waste or hand-watered systems.
- Dilution Needed: The recommended strength on the bottle is often too “hot” for peppers; most growers start at half-strength.
The Seedling Lowdown: A fantastic “set and forget” nutrient system for growers in soil or coco coir who prioritize flavor and simplicity over ultra-high yields. See Latest Discount on Amazon.
Key Considerations for Your Tomato & Pepper Garden:
- Support is Mandatory: Both plants become top-heavy with fruit. Use sturdy tomato cages or a trellis system to prevent branches from breaking.
- Pollination Help: Gently shake the main stem of your plants during flowering or use a small electric toothbrush to simulate buzz pollination and ensure a full fruit set.
- Pruning: For larger fruits, consider suckering indeterminate tomato varieties. Pepper plants generally require less pruning.
- Patience with Peppers: Pepper plants often grow slower than tomatoes initially and may require a slightly lower EC/ppm level to avoid nutrient burn.2
Note: Product availability and prices may change. Verify specs on Amazon before purchase. We participate in the Amazon Services LLC Associates Program.


