Hydroponic Leafy Greens Yield Hack: Grow 40% More in Half the Time

Table of Contents
A few years back, I had a client come to me with a nightmare scenario. A brand-new 5,000-square-foot warehouse, wall-to-wall with DWC rafts, humming with the promise of thousands of heads of butterhead. But it wasn’t humming. It was dying. Pythium had taken hold, and a sea of yellow, slimy roots was all that was left. They were operating on a prayer and generic nutrient recipes pulled from a forum. They’d lost over $12,000 in a single cycle. My job was to turn that prayer into a protocol. We rebuilt their system, not with new prayers, but with data, precision, and an ironclad plan. The result? Within three months, that same space was cranking out 8 pounds of lettuce per square foot, with a 35-day turn. They went from zero to hero, and you can, too. This isn’t about hope; it’s about a blueprint. It’s about turning your grow space from a garden into a factory.
Research Disclaimer: Techniques shown are for educational purposes. Verify local regulations before implementation.
Nutrient Bloodwork: Beyond EC Meters
Here’s the thing about your nutrient solution: it’s not just plant food. It’s your plants’ life support. Think of it as an IV drip. You wouldn’t just pump an unspecified liquid into a patient and hope for the best, would you? The same goes for your grow. Relying solely on an EC meter is like taking a patient’s temperature and assuming their entire blood panel is fine. The EC reading gives you a total dissolved solids measurement, but it can’t tell you if you have a dangerous excess of one ion or a critical deficiency of another. We need to go deeper. We need to run bloodwork.
The core of successful hydroponic leafy green nutrition is a rigorous, phased approach based on two principles: progressive dosing and ion-specific ratios. You have to feed the plant what it needs, when it needs it, and in a way it can actually absorb it.
Nitrogen Dosing Algorithms
Nitrogen is the fuel for vegetative growth. It’s the accelerator pedal for your lettuce and spinach. But hit the gas too hard, and you’ll burn out the engine. Too little, and you’re just crawling along. The key isn’t a single, static dose but a calculated progression.
For leafy greens, we start low and ramp up quickly as the plant develops, then taper off to finish. This prevents tender seedlings from getting nutrient burn and ensures maximum biomass accumulation just before harvest. Our target is not a blanket EC, but specific ppm ranges for key ions. The most critical of these is nitrogen.
The table below shows our commercial-grade EC and Nitrogen targets. Don’t eyeball this. Measure it. Dial it in.
EC Progression Matrix
| Growth Stage | Lettuce EC | Spinach EC | Nitrogen (ppm) |
| Seedling | 0.4-0.7 mS/cm | 0.8-1.0 mS/cm | 50-75 |
| Early Veg | 1.0-1.2 mS/cm | 1.2-1.5 mS/cm | 100-125 |
| Late Veg | 1.2-1.5 mS/cm | 1.8-2.0 mS/cm | 150-175 |
| Pre-Harvest | 1.0-1.2 mS/cm | 1.5-1.8 mS/cm | 100 |
Now, for the advanced trick: not all nitrogen is created equal. Plants absorb two forms: nitrate (
The Nitrate-to-Ammonium Ratio
Now, for the advanced trick: not all nitrogen is created equal. Plants absorb two forms: nitrate (NO3-) and ammonium (NH4+). A high nitrate-to-ammonium ratio is generally favored because it promotes a healthier root zone pH and prevents the acidic conditions that can lead to nutrient lockout. However, a slight boost of ammonium can increase overall nitrogen uptake and boost protein synthesis. For our leafy greens, we target a ratio of around 90:10 (NO3- to NH4+) to maintain a stable, slightly acidic root environment while still getting that growth kick. This subtle adjustment can be the difference between floppy, sad lettuce and crisp, robust heads.
The Calcium-Magnesium Tango
Calcium (Ca) and magnesium (Mg) are the unsung heroes of your nutrient solution, but they’re divas. They need to be in balance or they’ll trip over each other. Calcium is the bouncer for your plant’s cell walls, keeping them rigid and strong. A deficiency leads to “tip burn”—the classic browning on the edges of young leaves, especially in high-light, high-transpiration environments.
Magnesium is the core of the chlorophyll molecule itself, the literal green machine powering photosynthesis. A magnesium deficiency is a yellowing of older leaves, a clear sign your plant is starving for energy.
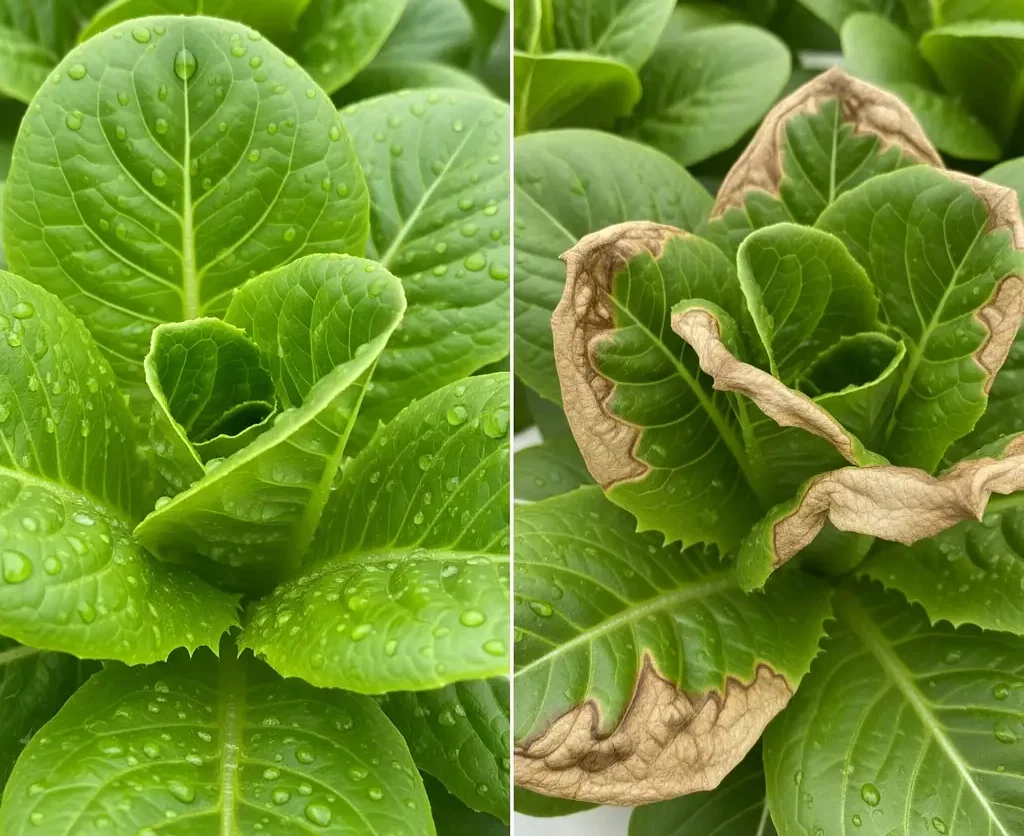
The trick? A Ca:Mg ratio of approximately 2:1 is your gold standard. If one gets out of whack, it can antagonize the uptake of the other, leading to a cascade of problems. This is why a separate Cal-Mag supplement is so critical in many nutrient protocols. We want to avoid what’s called nutrient antagonism, where an excess of one nutrient prevents the absorption of another. By carefully managing these two, you ensure your plants have strong bones and the deep green color that customers love.
Environmental Domination
Your grow room isn’t a passive space; it’s an extension of your control system. Every variable temperature, humidity, airflow is a lever you can pull to accelerate growth. In commercial grows, we don’t just set a thermostat and walk away. We manipulate the environment to push plant metabolism to its absolute limit.
Diurnal Temperature Pumping
This is where the real black ops farming starts. Most growers keep their temperatures constant. That’s a mistake. Plants are built for diurnal cycles; a warm day followed by a cool night. This temperature swing triggers specific metabolic pathways that can drastically increase yield.
Our playbook calls for a 20°F (11°C) swing between day and night. During the day, aim for an ambient temperature of 72-75°F (22-24°C) to maximize photosynthesis. As the lights go off, lower the temperature to 55-60°F (13-16°C).
This cool night period does two things: it reduces respiration, so the plant burns less of the energy it stored during the day, and it tells the plant to move those stored carbohydrates from its leaves to its roots.
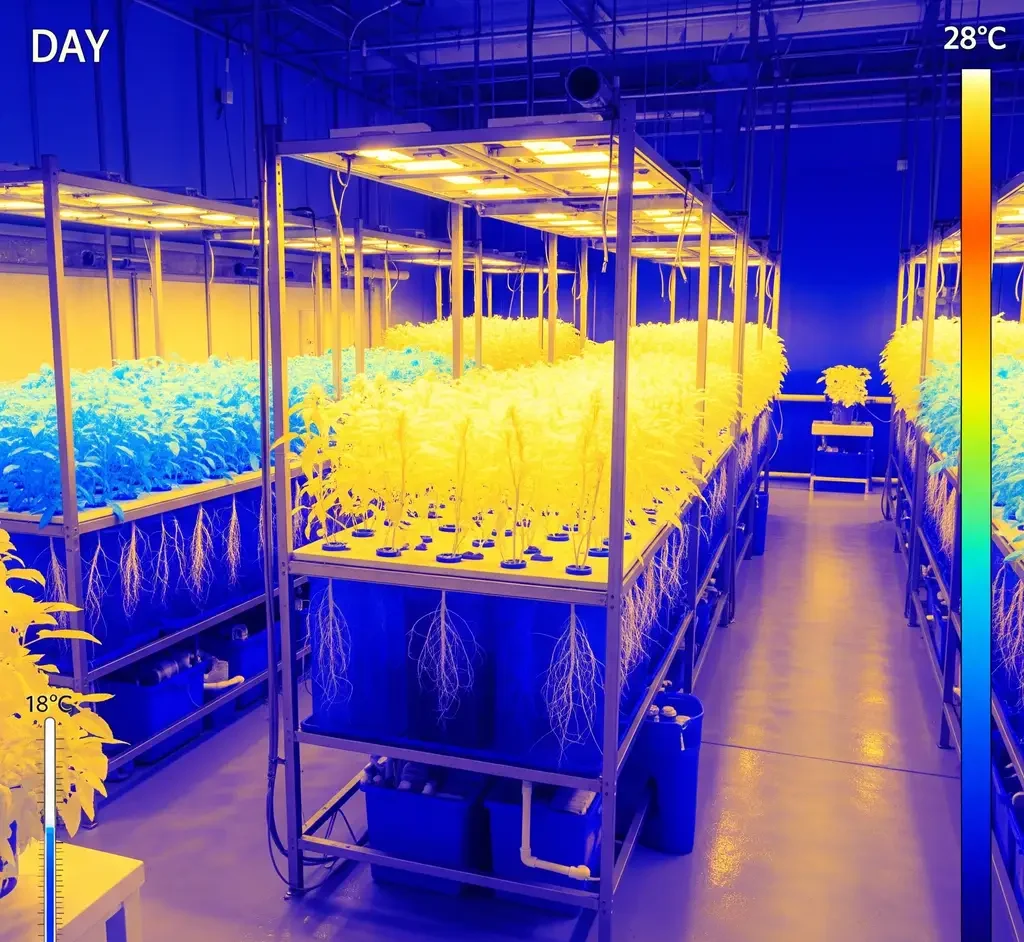
The result is a more compact, nutrient-dense plant with a stronger root system. It’s like a workout and recovery cycle, all in one. We call this a “diurnal temperature pump” because it literally pumps more energy into your plants.
VPD Mastery for Crispness
Vapor Pressure Deficit (VPD) is the single most important factor for achieving that sought-after “crisp” texture. VPD is the difference between the amount of moisture in the air and the amount the air can hold when it’s fully saturated. It’s the engine of your plant’s transpiration. A perfect VPD means your plant is happily drinking water and nutrients from its roots while releasing moisture from its leaves without stress.
The VPD Sweet Spot
- Low VPD (<0.8 kPa): The air is too humid. Your plant struggles to transpire, leading to poor nutrient uptake and a high risk of mold and fungal diseases like Botrytis. Your lettuce will be limp and soft.
- High VPD (1.6 kPa): The air is too dry. Your plant transpires too quickly, stressing out and closing its stomata. Growth slows, and you risk salt buildup in the leaves, which can lead to tip burn.
For hydroponic leafy greens, we target a VPD of 0.8−1.2 kPa during the vegetative stage. This sweet spot ensures vigorous, stress-free growth. Master this, and you’ll feel the difference in the final product.
Disease Warfare Protocol
Let’s get one thing straight: prevention is not an option. It’s a requirement. The minute you see root rot or powdery mildew, you’ve already lost. In a closed-loop system, a single pathogen can replicate exponentially and contaminate your entire crop in a matter of hours. This is why our protocol is built around active, daily defense.
Our playbook treats every grow cycle like a military operation against a microscopic enemy.
Disease Countermeasures
| Pathogen | Prevention Cost | Treatment Cost | Yield Loss % |
| Pythium | $0.25/plant | $1.50/plant | 40-100% |
| Powdery Mildew | $0.10/plant | $0.75/plant | 20-60% |
| Botrytis | $0.15/plant | $2.00/plant | 30-80% |
As you can see, the cost of treatment is orders of magnitude higher than prevention. The real cost is the lost yield and the time to sanitize and start over.
Biofungicide Cocktails: The Organic Defense
Forget chemical fungicides. They’re a scorched-earth policy that kills everything, good and bad. Our strategy is to build a thriving microbial ecosystem in the root zone that acts as a natural, living shield.
We use a cocktail of beneficial bacteria and fungi, introduced as a root inoculation in the seedling stage. Our go-to is a mix of
Bacillus amyloliquefaciens (Fungus Fighter) and a species of Trichoderma.
Black Ops Technique #1: Bio-Shield Inoculation
- Dosing: Add a concentrated dose of your biofungicide cocktail to your master reservoir immediately after mixing your fresh nutrients. We aim for a concentration of 106 to 107 CFU/ml.
- Frequency: We re-dose every 7-10 days to maintain a high population of beneficial microbes. Think of it as a constant patrol.
- Pro Tip: Never mix your biofungicides directly with a high-strength peroxide solution or a chemical sterilizer. That defeats the purpose. Dose your peroxide and wait 12-24 hours before adding your microbial shield.
Root Zone ICU: The Temperature Defense
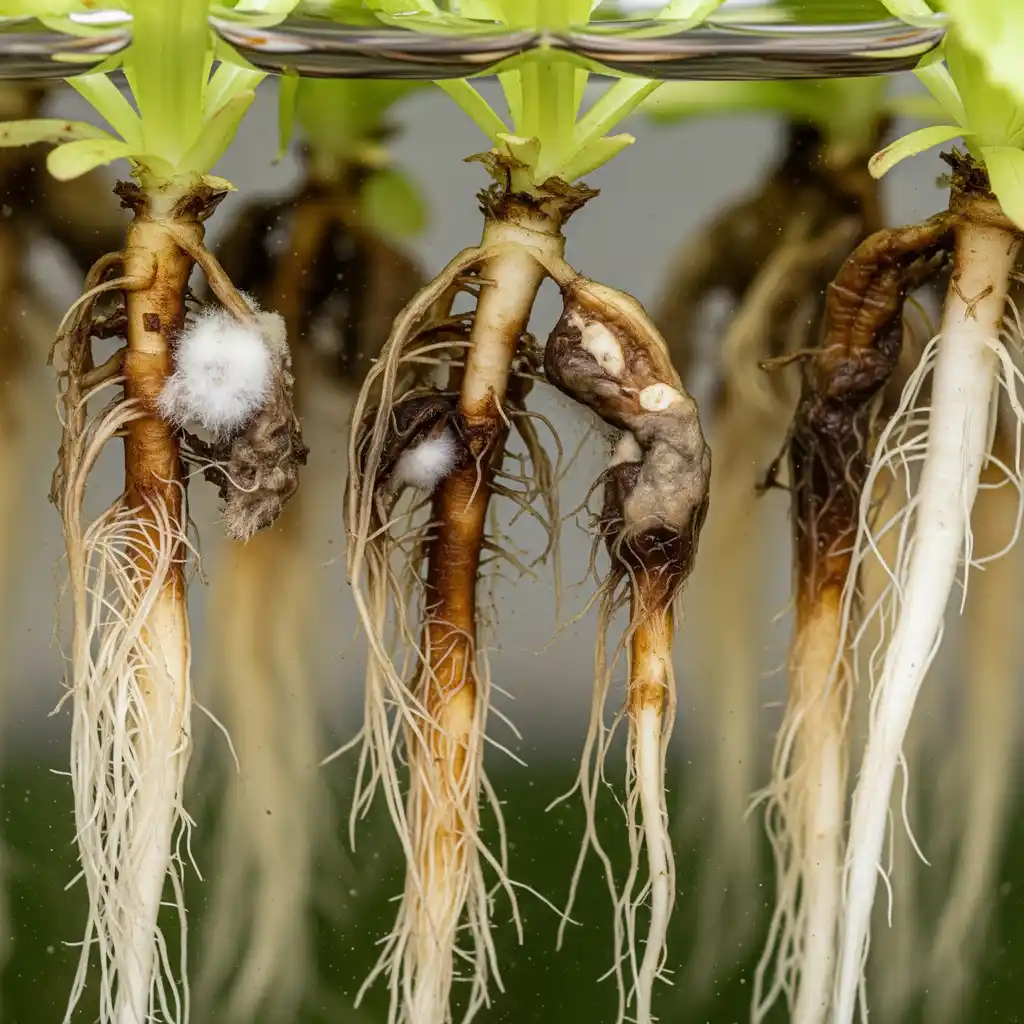
Pythium thrives in warm, stagnant water. Your enemy’s favorite temperature is 77°F. Your roots, however, prefer a crisp environment. We maintain our root zone temperature between 68-72°F (20-22°C). This temperature range is a double whammy: it’s ideal for optimal root function and nutrient uptake, and it’s a cold, inhospitable wasteland for pathogenic fungi. For larger systems, this means investing in a water chiller. Yes, it’s an upfront cost, but look at the “Disease Countermeasures” table again. It’s a non-negotiable insurance policy against total crop failure.
Velocity Farming: Speed Optimization
Photoperiod Pulsing: The Light Trick
To accelerate hydroponic lettuce grow speed and achieve a commercial-grade cycle, you need to understand how light and air work in concert with your nutrient solution. This isn’t just about faster growth; it’s about optimizing for maximum biomass in the shortest possible time.
Your plants need light, obviously. The standard vegetative cycle for leafy greens is a long photoperiod, typically 18 hours on, 6 hours off (18/6). This maximizes the plant’s light exposure and photosynthetic potential. It works. But there’s a more nuanced approach that can sometimes be more efficient.
Black Ops Technique #2: The 20/4 Photoperiod
Some research suggests that a continuous light cycle can lead to photoinhibition, where the plant is overwhelmed and its photosynthetic machinery becomes less efficient. A 20-hour on, 4-hour off cycle provides a short, intense “sleep” for the plant to recover and repair. We’ve seen this lead to a modest increase in overall leaf biomass and a faster maturation cycle for certain leafy greens. For a high-value crop like lettuce, a one or two-day reduction in cycle time is a significant increase in profitability.
Dissolved Oxygen Maximization
Your roots are living organisms, and they need to breathe. In a soilless environment, their only source of oxygen is what’s dissolved in your nutrient solution. The more dissolved oxygen (DO) your roots have, the faster they can perform their work; pulling in water and nutrients. The magic number here is 12 ppm DO, well above the 6-8 ppm you’ll get from a standard air stone setup.
Black Ops Technique #3: The Venturi Injector
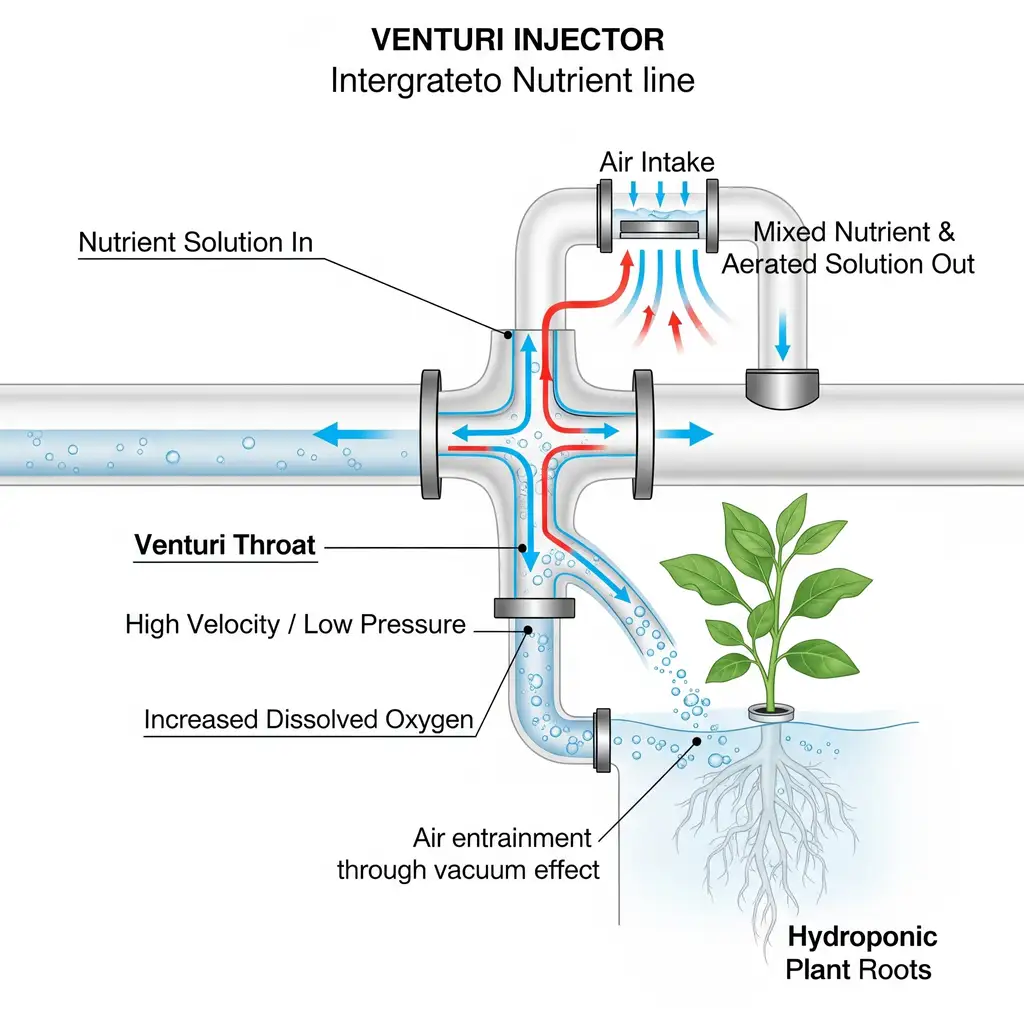
A Venturi injector is a small, low-cost piece of equipment that uses the water pressure from your pump to create a vacuum, pulling in air and injecting it into your nutrient line in a highly efficient manner.
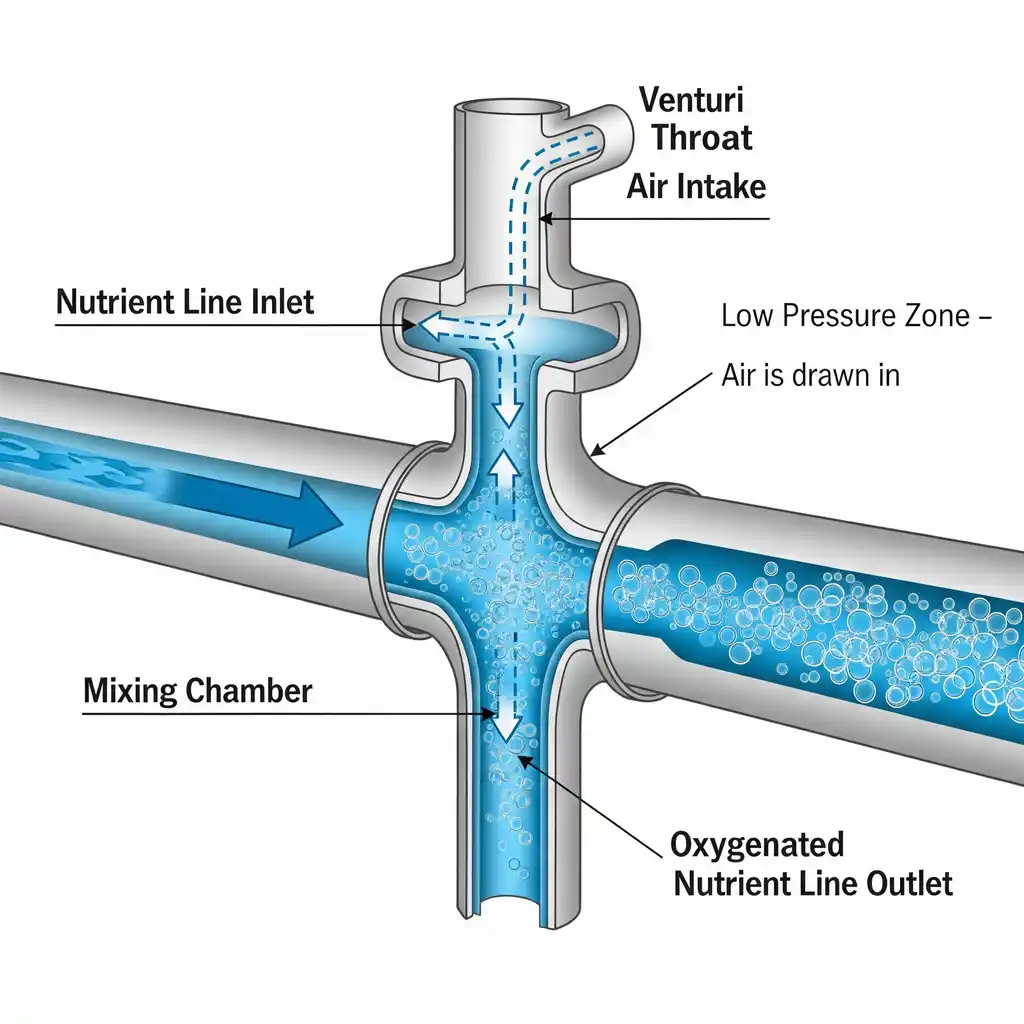
This is far more effective than an air stone at saturating your solution with oxygen. We install these in all our commercial systems. It’s an energy-efficient way to get high-octane air to your roots.
Commercial-Grade Toolkit: The Data-Driven Grower’s Arsenal
Running a high-yield hydroponic operation is about more than just a green thumb; it’s about having the right tools for the job. You need to invest in instrumentation that gives you the data you need to make informed decisions. These are the tools my commercial operations can’t live without.

A professional continuous monitoring system that provides real-time, WiFi-enabled data tracking for pH, EC, and temperature in your reservoir.nnYou can’t optimize what you can’t measure. This is the central nervous system for a data-driven grow. My commercial facility runs dozens of these for a reason: 0.1 pH and 0.2 EC precision is non-negotiable. The WiFi app lets me check the status of every reservoir from my phone, turning guesswork into actionable data.
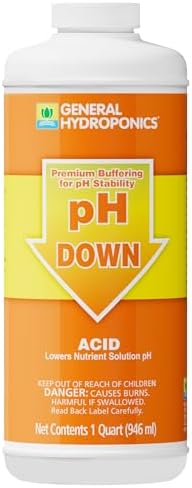
A kit containing precise liquid pH Up (potassium hydroxide) and pH Down (phosphoric acid) solutions for nutrient adjustment.nnThe industry standard for a reason. Pure, reliable, and doesn’t introduce unwanted elements into your solution. The liquid form allows for extremely precise, drop-by-drop adjustments, which is crucial when dialing in that perfect 5.5-6.5 range.nnYield Impact: Foundational. Without precise pH control, none of your other nutrient algorithms matter.
Troubleshooting Catastrophes
In this line of work, things will go wrong. Your job is to be a detective, a mad scientist, and a quick-response team all in one. Here are the most common catastrophes and our proven protocols to fix them.
The Yellowing Plant: Root Rot vs. Nutrient Deficiency
This is the most common misdiagnosis in hydroponics. A yellowing plant is a symptom, not a diagnosis.
- Symptoms: Pale, yellowing leaves starting from the top. Slow, stunted growth. You see this, and your first thought is a nitrogen or iron deficiency. But don’t act yet.
- Root Check: Pull the plant out of its net pot. Look at the roots.
- Healthy roots: White, clean, firm, with a feathery texture. They should smell fresh, like a forest after rain. If your roots look good, you probably have a nutrient deficiency.
- Diseased roots: Brown, slimy, and stringy. They’ll come apart when you touch them. They’ll smell like rot, pond scum, or worse. You have root rot.
- Protocol: If it’s a nutrient deficiency, check your pH first. Is it in the 5.5−6.5 range? If not, adjust it. If so, check your EC against the “EC Progression Matrix.” You may need to add a bit more of your vegetative nutrient.
- Protocol: If it’s root rot, you need to act fast. I lost $12,000 to misdiagnosed Fusarium in a new DWC facility, and it’s a mistake I’ll never make again.
- Isolate: Remove the infected plant and all adjacent plants immediately.
- Trim: Trim all the slimy, dead roots from the remaining plants.
- Sterilize: Add a dose of 3% hydrogen peroxide to your reservoir to kill off the pathogens. Let it run for a day.
- Re-innoculate: Drain your reservoir and replace it with a fresh nutrient solution and your biofungicide cocktail.
The Busted Pump: Minutes to Meltdown
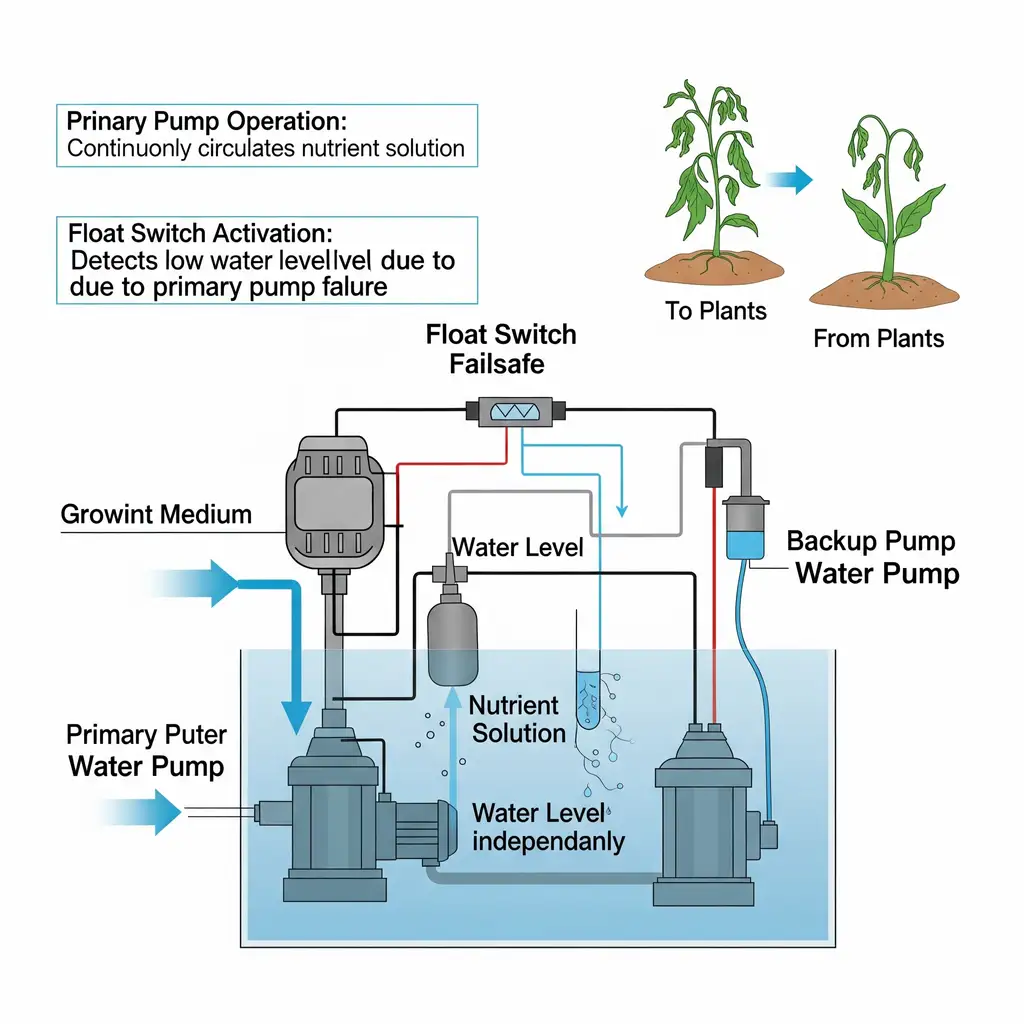
A pump failure in an aeroponic or NFT system is a race against the clock. Your roots will dry out in minutes, not hours, and you will lose your crop.
- Symptoms: Plants wilting in unison, a dry root chamber, a silent pump.
- Protocol:
- Immediate Response: First, hand-water the root zone with a portable sprayer. Just get the roots wet to buy yourself time.
- Diagnostic: Check the pump’s power supply. Is it unplugged? Is a breaker tripped? If the power is on, your pump has failed.
- Swap: A spare pump is not a luxury; it’s a necessity. Install your spare pump immediately. A smart grower has a backup for every critical component.
- Long-term: Consider a failsafe. A simple float switch can be installed to trigger a secondary pump if your main pump fails, giving you an audible or text alert.
Conclusion
This whole enterprise, this beautiful, high-tech dance of water, light, and nutrients, is all about control. We’re not fighting nature; we’re optimizing it. We’re taking a century of agricultural research and compressing it into a single, efficient, and highly profitable system. The secrets aren’t secrets; they’re data points, carefully measured, meticulously applied, and validated by the hard-won experience of growers who have learned from their own catastrophes.
The next time someone tells you hydroponics is hard, you can tell them it’s simple. It’s a machine, and every machine has a manual. Your job is to be the engineer who wrote it. With a foundation built on precision nutrient management, environmental domination, and a proactive defense against disease, you can move from a hobbyist to an expert, from a gardener to a green machine. You’ve got the blueprint, now it’s time to build.
To get started on your journey, check out our Beginner’s Hydroponic Lettuce Guide for a solid foundation. If you’re already in the thick of things, dive into our deeper content on how different lighting spectrums impact plant morphology. The science is out there, and so are the yields. It’s time to go get them.
FAQ – Upgrade Red Flags & Green Lights
Q: Why is an EC meter not enough for managing my hydroponic nutrient solution?
A: An u003cstrongu003eEC (Electrical Conductivity)u003c/strongu003e meter only measures the total concentration of dissolved salts in your water, but it doesn’t tell you the specific levels of individual nutrients. This can lead to a false sense of security, as you might have an overall high EC but a critical deficiency in a key nutrient like nitrogen or calcium, which your plants need to thrive.
Q: What is a u0022diurnal temperature pumpu0022 and how can it increase my lettuce yield?
A: A diurnal temperature pump is the practice of maintaining a warm day temperature (72-75°F) for maximum photosynthesis, followed by a cool night (55-60°F). This temperature swing forces the plant to store energy more efficiently by reducing respiration, which leads to a more compact, nutrient-dense head of lettuce with a stronger root system.
Q: How do I prevent root rot and other diseases in my hydroponic system?
A: Prevention is paramount. The best defense is to maintain a sterile, cool, and oxygenated root zone. This includes keeping your water temperature below 72°F (22°C), using a highly effective aeration method like a Venturi injector, and regularly inoculating your reservoir with beneficial microbes to create a living shield against pathogens like Pythium.
Q: What is the ideal photoperiod for growing hydroponic leafy greens?
A: For most leafy greens, a standard 18 hours of light and 6 hours of darkness is effective for vigorous vegetative growth. However, some advanced growers use a u003cstrongu003e20-hour on, 4-hour offu003c/strongu003e cycle. This provides a short, intense recovery period that can prevent photoinhibition and lead to faster maturation and a higher overall yield.
Ready to expand your indoor harvest?
Mastering your current system is just the beginning. Whether you are looking to dial in massive leafy greens, experiment with heavy-feeding fruiting plants, or troubleshoot a specific root zone, success comes down to crop-specific blueprints. Explore All Hydroponic Crop Guides →

Continue Your Learning Journey