Hydroponic Tomatoes for Beginners: Your Engineering Blueprint

Table of Contents
- The Mechanics of Soilless Growth
- System Architecture: DWC vs. NFT vs. Passive Setups
- The System Design Failure That Ruins First-Time Crops
- Lighting Mechanics: Driving Photosynthesis
- Environmental Control: Grow Tents, Ventilation, and VPD
- Nutrient Chemistry: Managing pH, EC, and Ion Antagonism
- Routine Maintenance and Top-Off Mechanics
- Troubleshooting Pathology: Diagnosing Failures
- Canopy Management: Trellising and Pruning Vines
- Frequently Asked Questions
- Project Wrap-Up
Disclosure: MistCulture summarizes verified product specs, engineering data, and community feedback. We may earn an affiliate commission if you purchase through our links. Regulations vary by location; this content is for educational purposes only.
Let’s be honest. You are here because you are tired of dedicating months to a tomato plant that yields two stringy fruits and a canopy full of powdery mildew every August. You water the soil, apply organic fertilizers, and watch the local wildlife consume the harvest before it ever reaches your kitchen. You have seen images of indoor vines sagging under perfect red clusters and assumed the process was reserved for commercial agriculture engineers.
That assumption is incorrect. Growing hydroponic tomatoes for beginners is not about possessing a specialized degree in botany. It is about understanding the basic physics and chemistry of plant growth, delivering exact parameters to the root zone, and removing the variable of soil entirely. When you master the mechanics of water, light, and nutrients, you control the harvest. This blueprint strips away the guesswork, providing the verified data and exact specifications required to build, manage, and harvest heavy yields from your first indoor tomato system.
The Mechanics of Soilless Growth
Hydroponic tomato vines grow faster and fruit heavier than field-grown plants because the roots never expend energy searching for resources. You trade the biological buffer of soil for absolute precision and control. The return on that investment is earlier fruiting, massive vegetative expansion, and a harvest that dwarfs traditional garden beds in a fraction of the space.
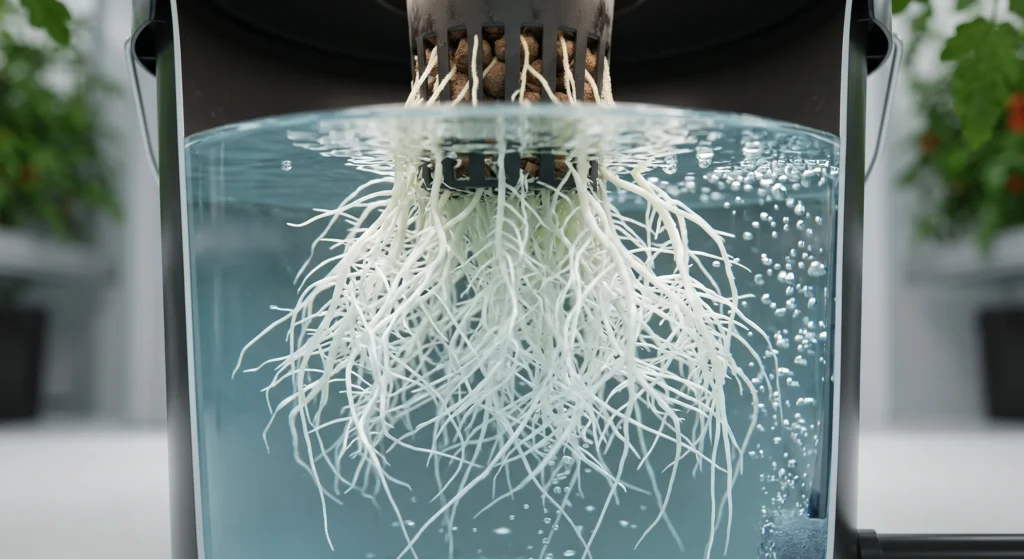
In soil, roots must force their way through dense, compacted particulate matter, hunting for moisture pockets and waiting for microbial activity to break down organic fertilizers into usable elemental forms. In a deep water culture (DWC) setup, the roots hang suspended in a highly oxygenated, perfectly balanced solution. The plant redirects the massive amount of energy normally spent on root expansion directly into stem growth, flower production, and fruit swell.
The data supporting soilless cultivation is clear:
- Accelerated Maturation: Direct, uninterrupted access to elemental nutrients allows growth rates to run 30% to 50% faster than equivalent soil-based crops. You effectively shave weeks off the vegetative cycle and force the plant into an earlier fruiting stage.
- Maximized Yields: Accelerated vegetative growth creates a larger canopy capable of supporting more trusses per plant. Indoor growers routinely harvest yields two to three times higher than outdoor gardeners working within the same square footage.
- Resource Efficiency: Closed-loop recirculating systems or contained reservoir setups use up to 90% less water than traditional irrigated dirt. Water is only lost to plant transpiration and minor surface evaporation.
- Pathogen Reduction: Soil harbors the vast majority of garden pests. Removing the dirt eliminates fungus gnats, cutworms, soil-borne blights, and weeds competing for nitrogen.
Hydroponics is unforgiving. Soil naturally buffers pH swings and acts as a sponge to hide over-watering errors. Water offers no such safety net. If your reservoir pH drifts out of range, the plant will show signs of lockout within hours, not days. However, once you establish a stable environment and taste a warm, vine-ripened tomato harvested from your living room in January, the effort pays off completely.
System Architecture: DWC vs. NFT vs. Passive Setups
Hydroponic systems require exact matching to the crop type. Heavy, aggressive fruiting vines like tomatoes demand deep, stable reservoirs to support massive root balls and high water consumption rates.
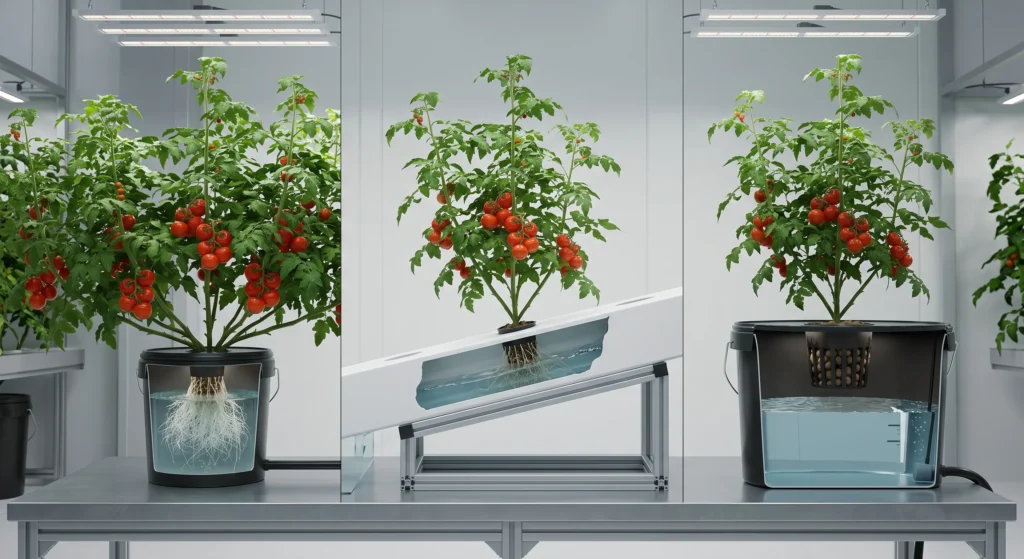
Walk into any indoor gardening supplier and you will see a dozen different plastic configurations promising massive yields. For a beginner tomato grower, understanding the fluid dynamics and root space requirements of the crop is mandatory. You cannot force a heavy-feeding vine into a system designed for delicate leafy greens. If you are comparing basic system mechanics, our DWC vs. NFT vs. Aeroponics guide breaks down the specific advantages of each layout.
- Deep Water Culture (DWC): This is the undisputed champion for beginner tomato growers. DWC is a contained system where the plant is supported in a net pot while the roots hang directly into a large volume of nutrient solution. An air pump forces air through a submerged stone, super-saturating the water with dissolved oxygen. DWC offers high volume buffering; a 5-gallon bucket takes much longer to swing in pH or temperature than a shallow tray. A single bucket handles the aggressive root mass of an indeterminate tomato vine perfectly.
- Nutrient Film Technique (NFT): You see these PVC channel systems in commercial lettuce operations. A thin film of nutrient water flows down a sloped pipe, grazing the bottom of the root mass. NFT is exceptional for short-cycle greens, but it actively punishes beginner tomato growers. Tomato roots grow so thick they will physically clog a standard 4-inch PVC channel, causing the water to back up and overflow onto the floor. If the water pump fails in an NFT system, the thin layer of moisture dries up rapidly, and a large tomato plant will die within hours.
- The Kratky Method: This is an ultra-cheap, passive DIY approach requiring no pumps or electricity. The plant sits in a static container of water. As the plant drinks, the water level drops, exposing the upper roots to the air to breathe. While Kratky works brilliantly for basil and lettuce, a mature tomato plant can consume over a gallon of water per day. Refilling a Kratky container without drowning the established “air roots” is difficult, making it a poor choice for heavy-drinking fruiting crops.
Verdict: Start with DWC. It provides the necessary root volume, high dissolved oxygen levels, and the environmental buffer needed to survive early learning curves. For a broader look at matching plants to equipment, consult our hydroponic system match guide.

Why it’s necessary: Root health in DWC relies entirely on dissolved oxygen. A strong air pump keeps the water moving, preventing anaerobic bacteria from taking hold and keeping the root mass bright white.
Key Spec: 6 Watts, 15 Liters Per Minute (LPM) airflow capacity, adjustable dials.
The System Design Failure That Ruins First-Time Crops
Growers frequently purchase cheap all-in-one desktop kits under the assumption that hydroponics requires minimal hardware to succeed. These starter kits come with flimsy reservoirs, microscopic air pumps, and generic proprietary nutrient blends. You might start a tray of tomato seeds successfully, but as soon as the plant enters the vegetative growth phase, disaster strikes.
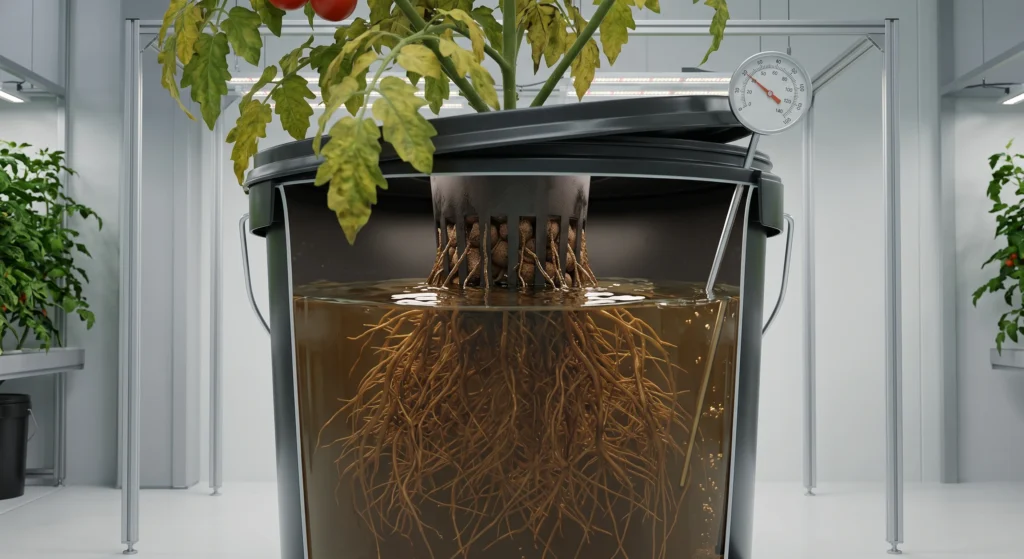
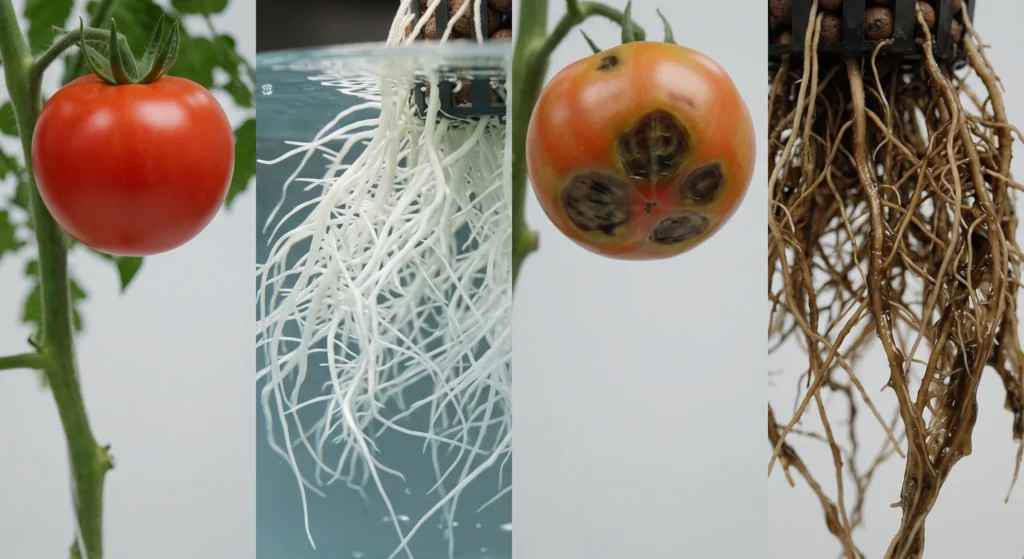
The leaves begin yellowing, the stems droop despite sitting in water, and the roots transform from a vibrant white to a slimy, foul-smelling brown mass. This is Pythium, commonly known as root rot.
The mechanism of failure is entirely predictable. A cheap, under-powered air pump fails to agitate the water sufficiently. The thin plastic reservoir walls allow the heat from the LED lights to penetrate the tank. As the water temperature rises above 72 degrees Fahrenheit (22 degrees Celsius), the capacity of the water to hold dissolved oxygen plummets. You are left with a warm, stagnant, oxygen-deprived swamp. Pythium zoospores thrive in these exact conditions, swimming through the stagnant water to colonize and destroy the root tissue.
Your equipment dictates your baseline for success. Sizing your air pump correctly is not optional. A standard rule of thumb dictates 1 Liter Per Minute (LPM) of airflow for every gallon of nutrient solution. A 5-gallon DWC bucket requires a pump capable of pushing at least 5 LPM through a quality air stone to maintain safe dissolved oxygen levels. Read our comprehensive hydroponic pump sizing guide to ensure your aeration system matches your reservoir volume.
Lighting Mechanics: Driving Photosynthesis
Tomato plants require intense light parameters to trigger fruit set. Relying on old wattage metrics is inaccurate; modern growers measure light in Photosynthetic Photon Flux Density (PPFD) and the Daily Light Integral (DLI).
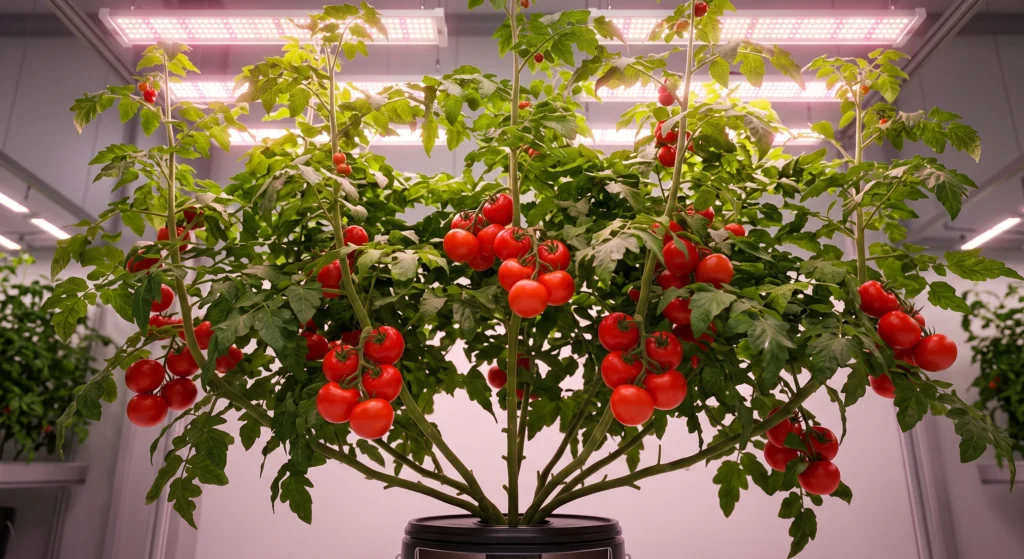
Forget outdated forum advice pushing high-heat High Pressure Sodium (HPS) bulbs that spin your electric meter out of control. The commercial industry has transitioned to full-spectrum LED fixtures. They emit less thermal radiation, operate with extreme electrical efficiency, and provide dialed-in spectrums that push plants from seedling to harvest.
To design an effective light environment, you must understand the mathematics of photobiology. Tomatoes are high-light crops. They require a specific volume of light photons hitting the canopy every single day to fuel the energy-intensive process of building fruit.
- PPFD (Photosynthetic Photon Flux Density): This measures the instantaneous intensity of light hitting the plant canopy, expressed as micromoles per square meter per second (umol/m2/s). During the vegetative phase, tomatoes need a PPFD of 400 to 600. During flowering and fruiting, they demand a PPFD of 600 to 900.
- DLI (Daily Light Integral): This measures the total accumulation of photons the plant receives over the entire photoperiod (the hours the light is turned on). Think of PPFD as the speed of rain falling, and DLI as the total inches of water in the rain gauge at the end of the day. Tomatoes require a minimum DLI of 22 mol/m2/day to yield well, pushing toward 30 mol/m2/day for commercial-level harvests.
📐 Calculating Daily Light Integral (DLI)
You calculate DLI using this standard formula:
DLI = PPFD × (hours of light × 3600) / 1,000,000
💡 Calculation Example:
If your LED provides 600 PPFD at the canopy, and you run it for 14 hours a day, the calculation looks like this:
-
600 × (14 × 3600) / 1,000,000 - Result: 30.24 DLI
This means a 14-hour photoperiod at 600 PPFD provides an excellent total daily energy budget for fruiting tomatoes. Understanding how to raise or lower your fixture to hit these target numbers is essential. Check our LED distance and PPFD guide to properly map your specific fixture to your canopy height.

Why it’s necessary: A true full-spectrum LED provides the red wavelengths necessary for fruit expansion and the blue wavelengths required for tight, dense vegetative growth. The dimmable driver allows you to adjust intensity without burning young seedlings.
Key Spec: 150 Watts actual power draw, highly efficient SMD diodes, 2×2 foot core flowering footprint.
Environmental Control: Grow Tents, Ventilation, and VPD
Growing indoors requires you to physically manage the atmosphere. A grow tent is the most efficient way to isolate the crop from your living space, reflect light back into the canopy, and establish micro-climate control. Review our grow tent buying guide to properly size the enclosure for your intended number of buckets.
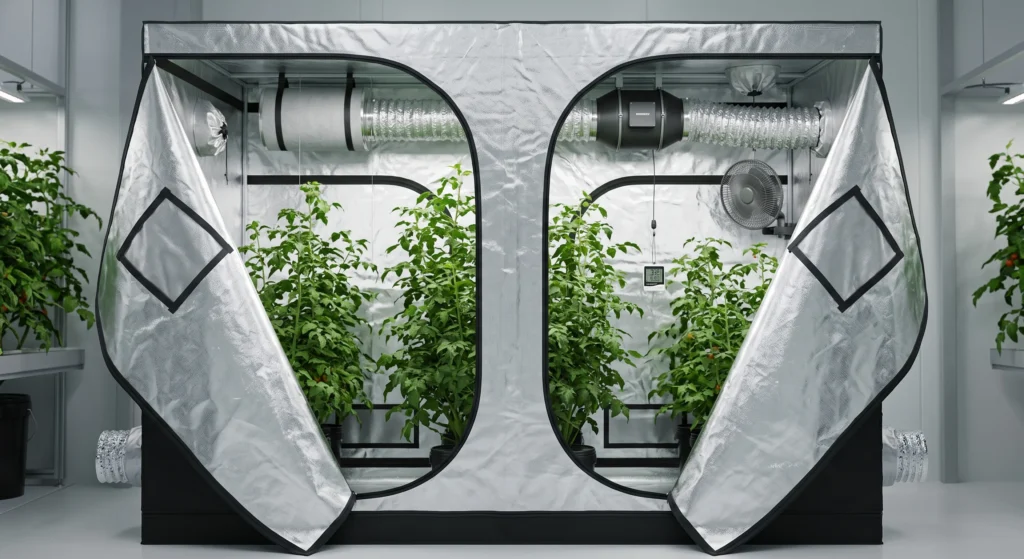
Beyond containing the light, you must control the exhaust. Tomato plants transpire aggressively, pushing massive amounts of moisture through their leaves and into the air. If you do not extract this humid air, the environment will reach maximum saturation.
This brings us to Vapor Pressure Deficit (VPD). VPD measures the difference between the amount of moisture currently in the air and how much moisture the air can physically hold at a specific temperature.
- High VPD (Dry Air): The air is incredibly dry. The plant is forced to transpire rapidly to pull water up from the roots to cool itself, which can lead to rapid nutrient burn as salts accumulate in the leaf tissue.
- Low VPD (Humid Air): The air is completely saturated. The plant cannot transpire at all because the atmosphere cannot accept any more moisture.
When a tomato plant cannot transpire due to a low VPD, the upward flow of water through the xylem tissue stops completely. Calcium is an immobile element; it only travels up the plant via the flow of water. If transpiration stalls, the rapidly dividing cells in the swelling fruit receive absolutely no calcium. The cell walls collapse, turning the bottom of the tomato into a black, leathery, sunken lesion. This is the physiological trigger for Blossom End Rot.
Managing your exhaust fan to maintain a VPD between 1.0 and 1.5 kPa during the fruiting phase guarantees the transpiration stream remains active, preventing calcium deficiencies in the fruit.

Why it’s necessary: Pulling humid, stagnant air out of the grow tent prevents the low VPD conditions that trigger Blossom End Rot and powdery mildew. The automated controller responds instantly to temperature and humidity spikes.
Key Spec: 4-inch diameter, PWM-controlled EC motor, integrated digital environmental controller.
Nutrient Chemistry: Managing pH, EC, and Ion Antagonism
The most essential aspect of hydroponic chemistry is holding the nutrient solution within strict pH and Electrical Conductivity (EC) parameters to prevent elemental lockout.
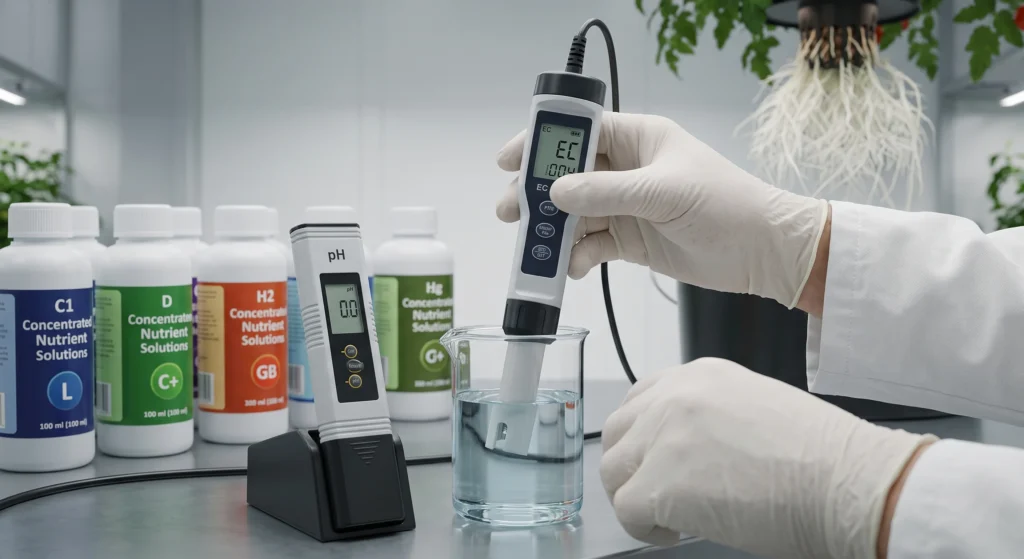
Hydroponic fertilizers are highly refined mineral salts. You must provide a complete base nutrient profile that supplies Nitrogen, Phosphorus, Potassium, Calcium, Magnesium, and Sulfur, alongside trace micro-nutrients. Avoid organic emulsions or thick organic supplements in DWC; they lack the necessary microbial soil biology to break down rapidly and will quickly putrefy in a liquid reservoir. Stick to high-quality synthetic mineral salts.
You manage this chemical soup through two distinct metrics:
1. pH (Potential of Hydrogen)
Tomatoes require a strict pH window of 5.8 to 6.2. The pH level dictates whether a specific elemental ion is soluble in the water and available for root uptake. If the pH drops to 5.0, Magnesium and Calcium become physically locked out, meaning the plant cannot absorb them even if they are heavily concentrated in the water. Test the pH daily using a digital meter and adjust using phosphoric acid (pH Down) or potassium hydroxide (pH Up). For deep technical specifications on pH buffering, read our hydroponic pH and EC guide.
2. EC (Electrical Conductivity)
EC measures the total concentration of dissolved salts in the water. The higher the salt content, the higher the electrical current that passes through the water. While some meters read in TDS (Total Dissolved Solids) or PPM (Parts Per Million), these are simply arbitrary conversions of the base EC reading. Sticking to EC provides a universal standard.
Tomato nutrient demands shift aggressively as the plant matures:
| Growth Stage | Target pH | Target EC (mS/cm) | Physiological Focus |
| Seedling (Weeks 1-2) | 5.8 – 6.0 | 0.8 – 1.2 | Delicate root establishment. High EC will burn fragile tissues. |
| Vegetative Growth | 5.8 – 6.2 | 1.5 – 2.0 | Heavy nitrogen uptake for stem expansion and leaf canopy development. |
| Flowering & Fruiting | 5.8 – 6.2 | 2.5 – 3.5 | Aggressive Potassium and Phosphorus demand for flower set and fruit swell. |
Tomatoes are exceptionally heavy feeders. During the peak fruiting stage, they demand large volumes of Potassium. However, you must respect the chemical rules of ion antagonism, specifically Mulder’s Chart. Mulder’s Chart demonstrates how an extreme excess of one element actively blocks the absorption of another.
If you push Potassium levels too high trying to force larger fruit, the heavy concentration of Potassium ions will physically block the roots from absorbing Calcium and Magnesium. You will induce Blossom End Rot and interveinal chlorosis (yellowing between the leaf veins) simply by over-feeding Potassium. Maintaining balanced ratios is essential. Use our hydroponic nutrient calculator to formulate the exact dilution rates for your reservoir volume, and reference our cal-mag hydroponics guide to understand how to supplement Calcium and Magnesium without triggering an antagonistic lockout.
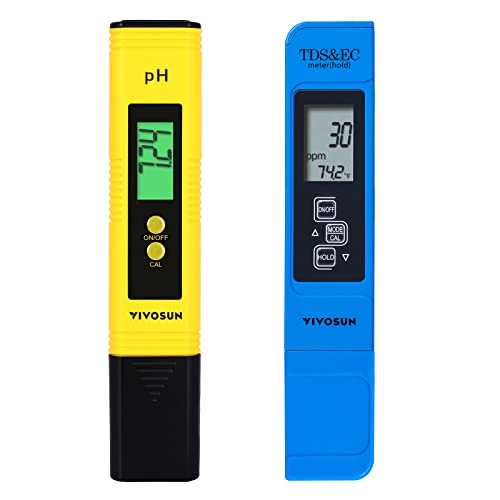
Why it’s necessary: Accurate measurements dictate nutrient availability and prevent salt toxicity. Guessing leads to immediate crop failure. This digital combination kit captures pH drift and EC spikes before root damage occurs.
Key Spec: 0.01 pH resolution, automated temperature compensation (ATC).

Why it’s necessary: A three-part liquid salt system allows you to scale specific elements. You run higher Nitrogen (FloraGro) during the vegetative stage and shift to higher Phosphorus and Potassium (FloraBloom) when the fruit sets.
Key Spec: 3-Part Base (Micro, Gro, Bloom), highly soluble, pH stable.
Routine Maintenance and Top-Off Mechanics
A hydroponic system punishes neglect. Establishing a strict maintenance calendar ensures you catch environmental drift before it impacts plant health. Systematize your data logging. Record daily EC and pH drift, noting adjustments inside the mistculture-master-tracking-workbook.pdf to establish baseline crop trends.
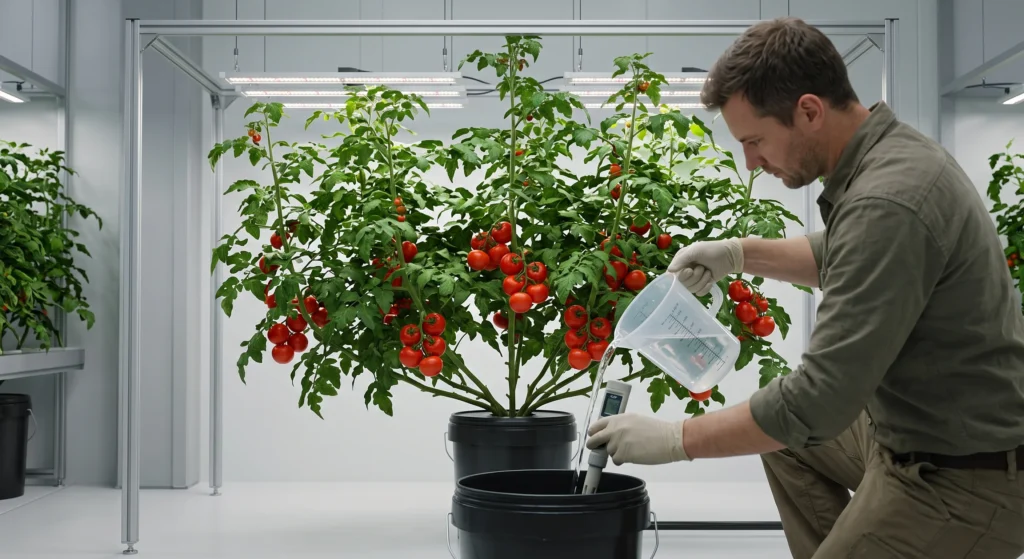
Daily Tasks (5 Minutes):
Check the water level. A mature tomato plant drinking a gallon of water a day will rapidly expose roots to the air. Check the pH and adjust back to 6.0. Record the EC reading. Inspect the underside of the leaves for early signs of spider mites or aphids.
Weekly Tasks (20 Minutes):
A frequent chemical error occurs during weekly water top-offs. As plants transpire, they extract clean water rapidly while leaving certain nutrient salts behind. This causes the remaining reservoir solution to concentrate, spiking the EC.
If your 5-gallon reservoir starting at a 2.0 EC drops down to 3 gallons of water, the remaining solution’s EC might spike to 2.8. If you add 2 gallons of raw tap water (0.2 EC) to refill the bucket, you are diluting the total concentration.
⚗️ Standard Nutrient Dilution Math
To calculate the final EC when mixing two solutions, use this formula:
Final EC = (Volume 1 × EC 1 + Volume 2 × EC 2) / Total Volume
💡 Calculation Example:
If you mix 3 gallons of nutrient solution at 2.8 EC with 2 gallons of fresh water at 0.2 EC:
-
((3 × 2.8) + (2 × 0.2)) / 5 Total Gallons -
(8.4 + 0.4) / 5 - Result: 1.76 EC
Your bucket is now full, but the overall strength has dropped to 1.76 EC. You must then add concentrated liquid nutrients to bring the entire 5-gallon volume back up to your target of 2.0 EC.
Bi-Weekly Tasks (45 Minutes):
Every 14 days, you must completely drain the reservoir and mix a fresh batch of nutrients. Plants absorb elements at different rates. Over two weeks, the plant may consume all the Potassium but leave behind high levels of Sulfur. The EC meter only reads total salts; it cannot tell you which specific elements are missing. A complete water change resets the chemical balance to absolute zero, ensuring no single element reaches toxic accumulation while another is entirely depleted.
Troubleshooting Pathology: Diagnosing Failures
Even perfectly designed systems encounter stress. Diagnosing the exact pathology ensures you deploy the correct fix. Review our hydroponic troubleshooting guide for comprehensive diagnostic matrices, but prepare for these primary tomato specific issues:
Blossom End Rot (BER):
As discussed in the VPD section, BER appears as a dark, sunken, rotting patch on the bottom of the tomato. This is always a Calcium transport failure. The plant either lacks Calcium in the reservoir (EC too low), is locked out of absorbing it (pH below 5.5 or excess Potassium antagonism), or cannot transport it up the stem due to extreme humidity (VPD too low) or extreme heat (VPD too high causing stomatal closure). Correct the VPD and ensure reservoir pH is 6.0.
Leaf Curl (Physiological Roll):
When the edges of the tomato leaves roll upward tightly, resembling a canoe, the plant is attempting to reduce its total surface area. This is a defense mechanism to halt severe moisture loss. It is triggered by high-intensity light stress, extreme heat, or severe root damage preventing water uptake. Raise your LED fixture, ensure the ambient temperature remains below 82 degrees Fahrenheit (28 C), and check the roots for Pythium.
Pythium Root Rot:
The sudden onset of severe wilting despite the roots sitting in water indicates the root mass is dead. Pythium presents as brown, slimy roots that smell like a swamp. The outer sheath of the root will strip away easily, leaving a thin, wire-like core. Prevention relies entirely on heavily aerated, cool water. Keep the reservoir below 72 degrees Fahrenheit (22 C). Use hydrogen peroxide treatments or beneficial Bacillus root inoculants to suppress zoospore reproduction. Check our hydroponic root rot prevention guide for detailed sterilization protocols.
Canopy Management: Trellising and Pruning Vines
Tomatoes are classified into two distinct growth habits: determinate (bush) and indeterminate (vining). Indoor hydroponic growers must select indeterminate varieties to maximize the duration of the harvest, but these vines will easily grow 15 feet long, rapidly smashing into your grow lights if left unmanaged.
Sucker Removal:
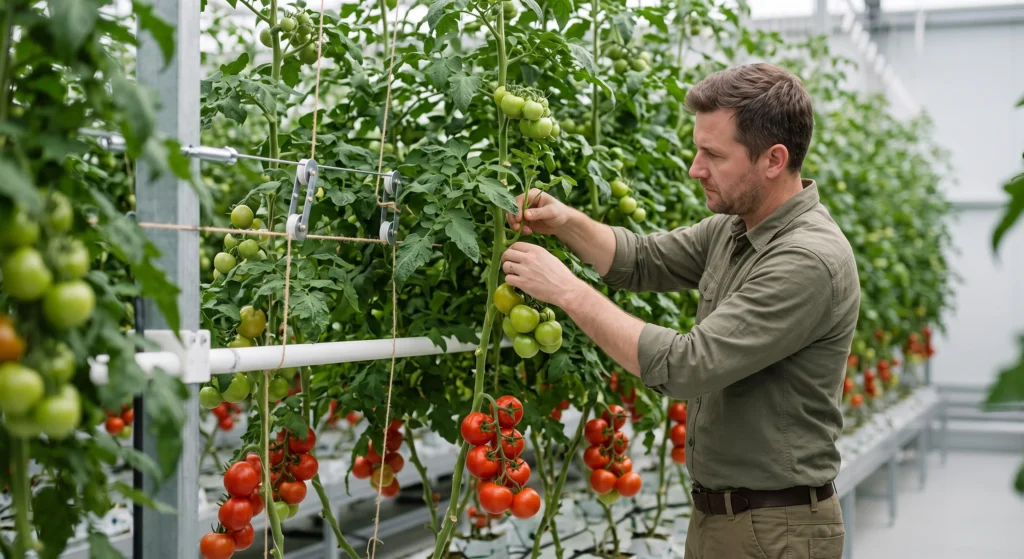
Tomato vines produce lateral shoots, known as “suckers,” in the axillary joint between the main stem and a sun leaf. If left attached, these suckers develop into entirely new main stems, turning the plant into a tangled, dense bush that blocks airflow and invites powdery mildew. You must pinch out these suckers by hand while they are small (under 2 inches). Limit the plant to a single, strong central leader stem. This directs all biological energy into expanding the fruit trusses rather than growing unnecessary foliage.
The Lower and Lean Technique:
Since an indeterminate vine will outgrow the vertical height of a standard grow tent, you must use roller hooks and tomato clips. A string drops from the ceiling roller hook and attaches to the base of the plant. As the plant grows upward, you clip the stem to the string. Once the plant reaches the top of the tent, you squeeze the roller hook, releasing an extra foot of string. You lower the plant down and lean it horizontally along the floor. The bare lower stem rests in a coil at the base of the bucket, while the active fruiting head of the plant remains upright under the lights. This allows a 15-foot vine to grow continuously inside a 6-foot tall enclosure.
Frequently Asked Questions
How long does it take to grow hydroponic tomatoes from seed to harvest?
Accelerated growth in a DWC system typically pushes indeterminate slicer tomatoes to their first ripe harvest in 90 to 100 days. Smaller cherry tomato varieties mature even faster, often producing ripe fruit in 70 to 80 days. Hydroponics generally shaves 2 to 3 weeks off standard soil-based timelines.
Can I use tap water for my hydroponic reservoir?
Tap water is acceptable only if the starting EC is below 0.3 (or roughly 150 PPM). High levels of calcium carbonate in municipal water will constantly drive your pH upward, making stabilization incredibly difficult. If your tap water EC exceeds 0.4, you must invest in a Reverse Osmosis (RO) filtration system to strip out the existing minerals before adding your hydroponic nutrients.
Do indoor tomatoes need to be manually pollinated?
Yes. Tomato flowers contain both male and female parts, but they require physical agitation to release the pollen. In the field, wind and bees handle this. Indoors, you must act as the pollinator. Gently tap the main stem or use an electric toothbrush vibrating against the back of the flower trusses for a few seconds every day to ensure heavy fruit set.
Why are my tomato flowers dropping off without forming fruit?
Blossom drop is triggered by severe environmental stress. If temperatures exceed 85 degrees Fahrenheit (29 C) or drop below 60 degrees Fahrenheit (15 C), the pollen becomes sterile and the flower aborts. Extreme fluctuations in humidity outside the safe VPD zone also cause pollen to clump or dry out, preventing fertilization.
How frequently should I replace my air stones?
Air stones accumulate calcium deposits and biological film over time, slowly restricting airflow and reducing dissolved oxygen levels in the bucket. Soak them in a mild acid solution or hydrogen peroxide to clean them, but fully replace the stones every 3 to 4 months to guarantee maximum aeration.
Project Wrap-Up
Executing a successful hydroponic tomato build relies entirely on respecting the physics of the environment. You must provide intense full-spectrum LED lighting to drive photosynthesis, a heavy-duty air pump to sustain dissolved oxygen in the root zone, and absolute precision when mixing your EC and pH parameters.
By eliminating the variables of soil and managing the Vapor Pressure Deficit inside a controlled grow tent, you remove the biological barriers that limit plant growth. You dictate the harvest. Maintain a clean reservoir, aggressively prune the axillary suckers to manage the canopy, and track your data religiously to spot pH drift before it damages the roots.
The transition from a beginner to a highly efficient indoor grower requires exact execution of these technical principles. Expand your knowledge base across different plant profiles by studying our comprehensive hydroponic crop guides and begin designing your next high-yield system today.

Continue Your Learning Journey