Listen, salad lovers. Imagine a world where Caesar salads are always at their peak crispness, and spinach tastes like icy mountain streams, not a whisper of dirt. A world where you never have to worry about a sudden frost or a pest invasion ruining your harvest. For years, I toiled in the soil, praying to the weather gods for a decent crop, only to have my lettuce bolt in the summer and my spinach melt into a slimy mess in the spring. I lost hundreds of plants, and my sanity, before I found my salvation: hydroponics. This isn’t just a guide; it’s a field manual born from a decade of greenhouse grit and countless failures. I’ll walk you through how to grow hydroponic lettuce and spinach so crisp it snaps, so fresh it sings. From battling the dreaded root rot to pulling off a continuous harvest, I’ll share every trick, every hack, and every lesson I learned the hard way. It’s time to stop crossing your fingers and start building your own year-round salad garden.
Note: Compliance with local indoor gardening regulations is required.
Why Soil Steals Crispness: A Battle for Nutrients
I used to believe soil gave greens their character. It was my religion. But after switching to hydroponics, I realized something shocking: soil often robs them of their true potential. The very essence of a great leafy green is its crispness, its delicate crunch that should snap like autumn air. This crispness is directly tied to the plant’s ability to absorb calcium and other minerals efficiently. In soil, those nutrients are locked away, bound to organic matter or unavailable due to pH fluctuations. It’s a constant battle for the plant’s roots to scavenge for what they need.
My first two commercial spinach crops were grown in soil, and they were disasters. They bolted at the first hint of heat and tasted earthy, not fresh. The texture was limp. It wasn’t until I learned that hydroponics delivers a perfectly balanced, bio-available nutrient solution directly to the roots that I understood the problem. In a hydroponic system, there’s no search party. The roots are bathed in a spa of exactly what they need, when they need it. This allows the plant to focus all its energy on building strong cell walls, which gives lettuce its satisfying crunch and spinach its vibrant, firm texture. My third spinach crop, my first in hydro, was a revelation. It tasted like an icy mountain stream and was so crisp it practically shattered in my hand. That’s the difference between hoping for a harvest and engineering one.
System Smackdown: Choosing Your Battlefield
The first choice you’ll make is your growing system. Don’t be intimidated. For leafy greens, it all comes down to two main champions: DWC (Deep Water Culture) and NFT (Nutrient Film Technique). Each has a clear purpose, and choosing the right one is half the battle.
DWC Dominance: The Lazy Grower’s Lettuce Dream
If you’re a beginner, DWC is your best friend. It’s simple, cheap, and forgiving. In a DWC system, your lettuce plants sit in net pots, and their roots are suspended directly in a deep reservoir of nutrient solution. The key is to keep the water highly oxygenated with an air pump and air stone. This constant bubble bath is exactly what lettuce loves.
I recommend DWC for lettuce because of its simplicity and resilience. My first hydroponic lettuce crop, a beautiful butterhead variety, was a DWC masterpiece. I lost 100 spinach plants to Pythium before learning this, but the DWC system with lettuce was an instant success. If my pump failed for a few hours, the roots still had enough water to survive. It’s a forgiving system that gives you a massive harvest of crisp, beautiful heads.
NFT Excellence: The Spinach Strategist’s Secret
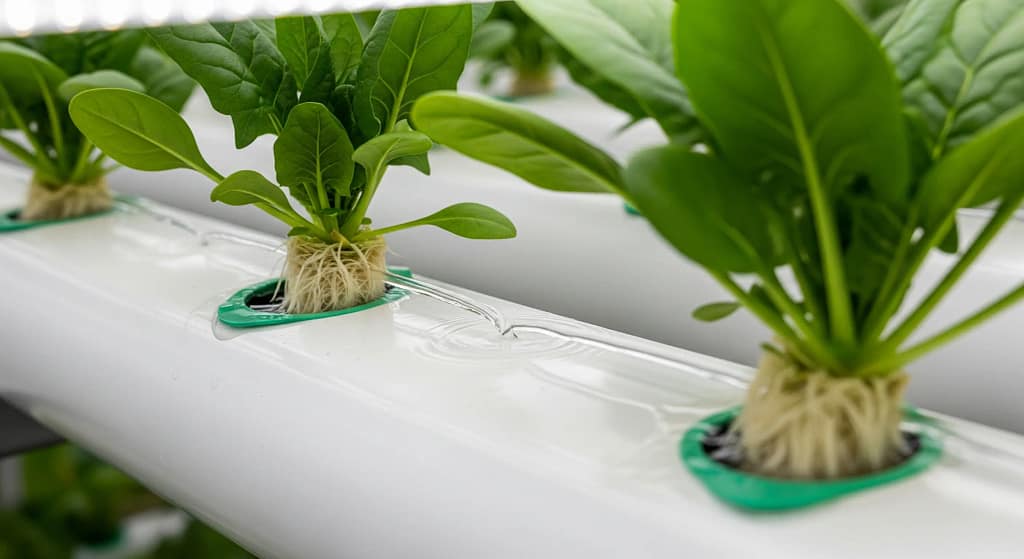
Spinach, being a bit more delicate, thrives in an NFT system. In this method, a thin film of nutrient solution constantly flows over the roots in a sloped channel. This provides constant access to nutrients while still exposing the majority of the root mass to air, which is critical.
I found that NFT was the only way I could get my spinach to consistently grow large, succulent leaves without bolting or suffering from root diseases. The continuous flow prevented any stagnant spots from forming and kept the root zone perfectly oxygenated. My NFT spinach leaves were twice the size of anything I ever grew in soil.
Climate Control Command Center: Your Indoor Seasons
Your indoor garden is a tiny planet, and you are its sun, wind, and rain. Controlling the climate is non-negotiable for success.
Temperature Tango: Finding the Sweet Spot
- Lettuce: Lettuce is a cool-season crop. Its leaves will get bitter and it will bolt prematurely if the temperature is too high. I’ve found the perfect temperature is between 60-75°F (15-24°C). The roots are even more sensitive; keep your reservoir temperature below 72°F (22°C) to prevent root rot.
- Spinach: Spinach loves it a little cooler. Its sweet spot is 65-70°F (18-21°C). My first spinach crop melted into a slimy mess because my greenhouse hit 85°F. That was my first, tragic, slimy disaster.
Humidity Harmony: The 50-70% Sweet Spot
Leafy greens thrive in a humidity of 50-70%. Too high, and you risk powdery mildew and gray mold. Too low, and your plants can’t transpire properly, which can lead to tip burn. A small hygrometer and a fan are your best friends here.
Field-Tested Hack #1: Use a cheap clip-on fan (like a PC fan with a USB adapter) to create gentle air movement. It prevents mildew and strengthens plant stems, just like a natural breeze.
Light Recipe for Crunch: Engineering Your Sun
Light is your energy source. Too little, and your greens will be pale, leggy, and tasteless. Too much, and you risk bolting and tip burn. This is the art of hydroponics.
Photoperiod Hacks: The On/Off Switch
- Lettuce: Lettuce needs a long day. I run my grow lights for 14-16 hours a day. This tricks the plant into thinking it’s a perfect spring day, leading to rapid, robust growth.
- Spinach: Spinach is a bit more sensitive to light duration. I found that 10-12 hours of light a day produced the best results. Any longer and it started to bolt on me.
Spectrum Secrets: The Blue-Heavy Boost
For leafy greens, you need a grow light with a heavy blue spectrum (400-500 nm). Blue light encourages vegetative growth and dense foliage. Red light (600-700 nm) encourages flowering. Since we don’t want flowers on our leafy greens, a blue-heavy light is the secret to a great harvest.
Nutrient Mastery: The Secret Sauce
This is where you graduate from a home gardener to an alchemist. The right nutrient solution is the single most important factor for a successful, flavorful harvest.
Lettuce NPK: The High-N Focus
Lettuce is a nitrogen junkie. It needs a continuous supply of nitrogen to fuel its rapid leafy growth. A formula with a high nitrogen ratio, like 2-1-2, is a great place to start. A steady EC (Electrical Conductivity) of 0.8-1.6 mS/cm is the sweet spot. If your EC is too low, you’ll see pale, stunted growth. Too high, and you risk nutrient burn, which looks like brown, crispy leaf edges.
Spinach Minerals: The Ca/Mg Emphasis
Spinach needs a bit more. I learned the hard way that spinach is a calcium and magnesium hog. Without enough, the leaves will be flimsy and pale. My first spinach crops were sad and flavorless until I boosted their calcium and magnesium. An EC of 1.8-2.3 mS/cm is ideal, higher than lettuce because of its love for these minerals.
Lettuce vs Spinach Cheat Sheet
| Factor | Lettuce | Spinach |
| Ideal pH | 5.5-6.5 | 5.5-6.5 |
| Light Hours | 14-16 | 10-12 |
| EC Range | 0.8-1.6 | 1.8-2.3 |
| Key Nutrient | High Nitrogen | Calcium/Magnesium |
| Harvest Time | 30-35 days | 40-50 days |
Field-Tested Hack #2: Don’t just dump nutrients into your reservoir. Mix them in a separate bucket with a small submersible pump running for 10-15 minutes to ensure they’re fully dissolved before adding them to your system. This prevents “hot spots” of concentrated nutrients that can burn your roots.
War Room: Pests & Diseases
This is where the real battle is fought. I lost my first year of crops to diseases I never even knew existed. My lettuce was decimated by tip burn, and my spinach was wiped out by root rot. It was a humbling, expensive, and devastating education.
Root Rot Rescue: The Pythium Battle Plan
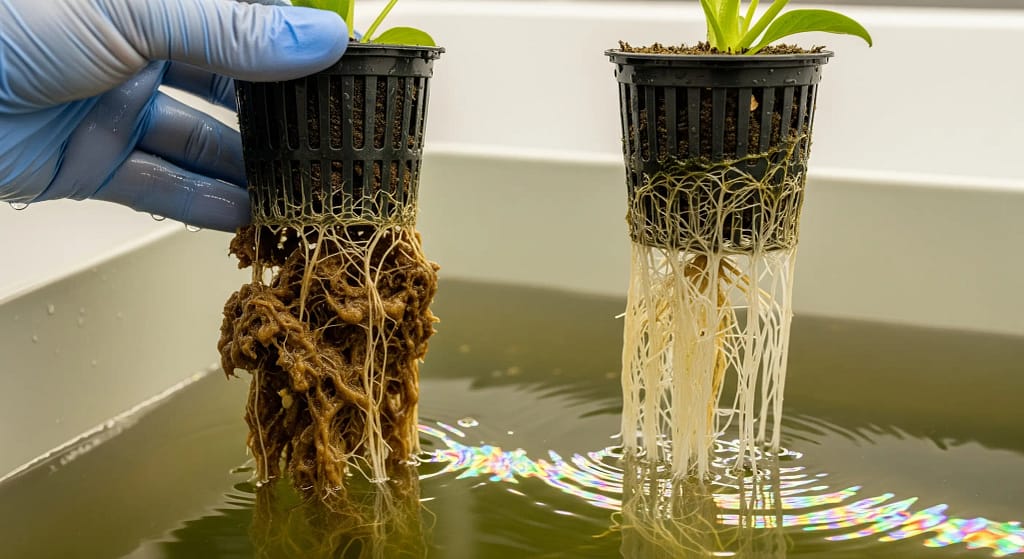
Root rot is the silent killer of hydroponic gardens. I lost 100 lettuce plants to Pythium before I understood the fundamentals. The symptoms? Your once-pristine white roots turn brown, slimy, and smell foul. The plant wilts and dies, and your reservoir becomes a breeding ground for this fungus.
The Fix:
- Immediate Triage: If you see signs of root rot, immediately remove the infected plants.
- Peroxide Power: Drench the remaining roots in a diluted hydrogen peroxide solution (3-5 ml of 35% food-grade H2O2 per gallon of water) for 15-20 minutes.
- Cleanse & Sterilize: Empty your entire reservoir. Clean all surfaces, tubes, and air stones with a diluted bleach solution (1:10 ratio) and rinse thoroughly.
- Rebuild: Refill with a fresh nutrient solution, and add a biological control like Botanicare Hydroguard to prevent future outbreaks.
Disease Prevention Protocol
- Pythium: Maintain a high level of dissolved oxygen in the water (>5ppm) and a cool water temperature (<72°F).
- Powdery Mildew: Maintain a low humidity (40-60% RH) and ensure vigorous airflow (>1.5 m/s).
- Tip Burn: Ensure a consistent supply of calcium and reduce the concentration of ammonium (NH_4+) in the nutrient solution.
Mildew Mitigation: The Airflow Advantage
Powdery mildew is a sneaky, white fungus that can coat your leaves overnight. It thrives in stagnant air and high humidity. My first spinach crop was ravaged by it.
The Fix:
- Airflow is Everything: This is your best defense. A small clip-on fan is your most important tool. It keeps the air moving and prevents spores from settling on the leaves.
- Pruning: Thin out dense foliage to improve airflow between plants.
- Baking Soda Spray: For active infections, a simple baking soda spray (1 tbsp of baking soda + 1/2 tsp of non-toxic liquid soap in 1 gallon of water) is an effective, non-toxic fix.
Harvest & Regrowth Secrets
This is the reward for all your hard work. You’ve engineered the perfect growing environment, and now it’s time to reap the rewards.
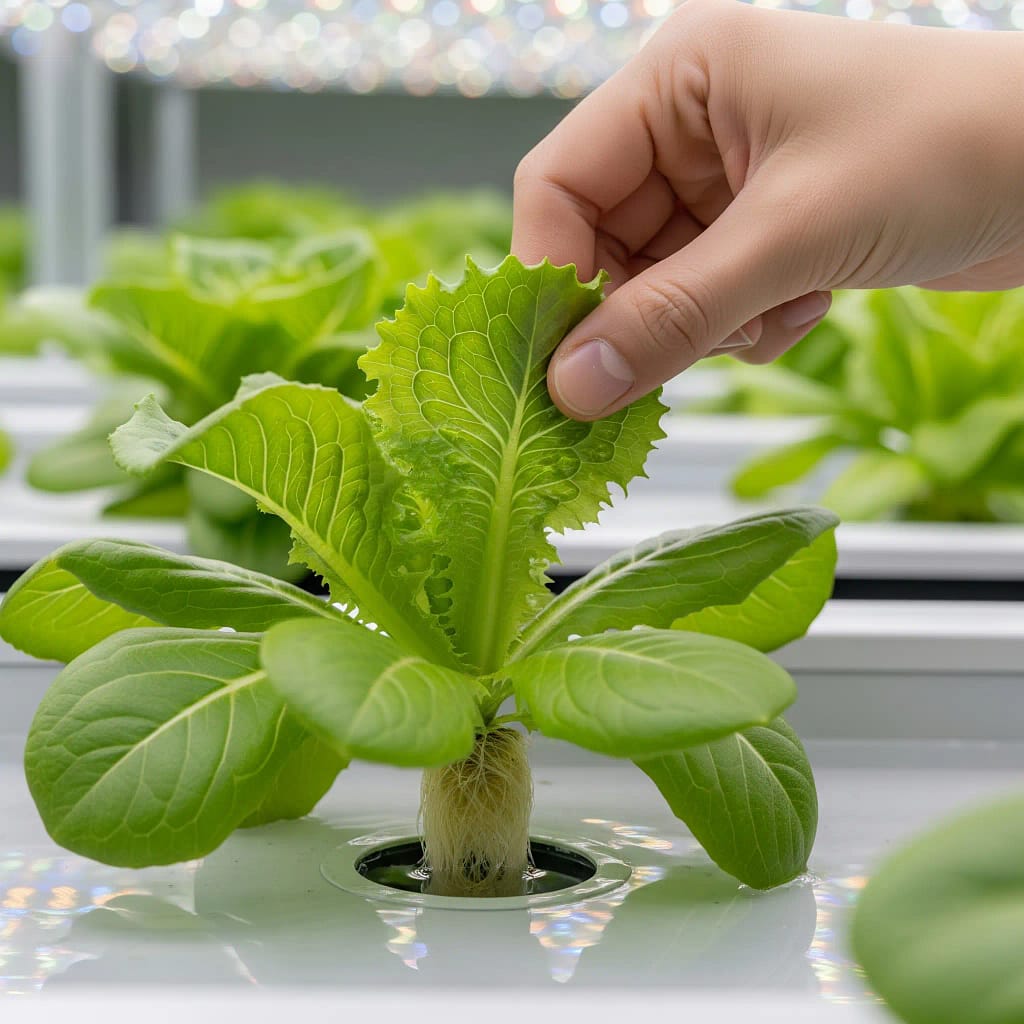
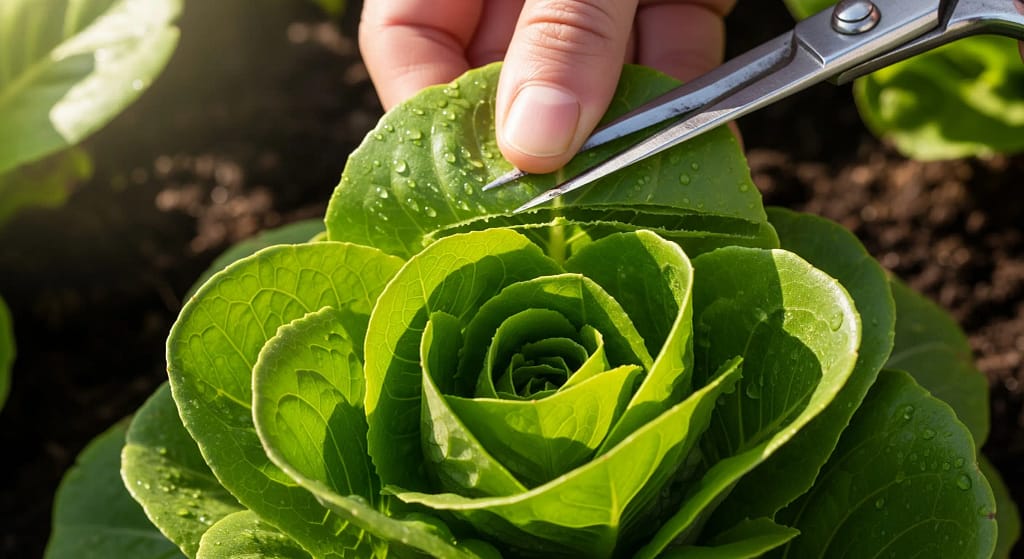
The Cut-&-Come-Again Method: To get a continuous supply of lettuce and spinach, you can’t just pull the whole plant out. You need to use the “cut-and-come-again” method. Harvest the outer, mature leaves, leaving the inner leaves and the core intact. This will allow the plant to continue growing and provide you with a continuous harvest for months.
The Morning Ritual: Always harvest in the morning. This is when your plants are at their peak crispness and nutrient content. The leaves are full of water, and they haven’t been stressed by the heat of the day.
Pro Grower’s Toolkit: My Personal Arsenal
Listen, you don’t need to spend a fortune to get started, but investing in a few key tools will save you from heartache and crop failures. These are the products I use and trust, born from years of battling every conceivable hydroponic disaster.
Disclaimer: This section contains affiliate links. As an Amazon Associate, I earn from qualifying purchases. This helps keep the blog running and the tips flowing!
AeroGarden Harvest Elite – Indoor Garden with LED Grow Light
A sleek, countertop hydroponic system with automated lighting and watering, perfect for beginners starting with leafy greens and herbs.
- INDOOR GARDENING MADE EASY: Enjoy abundant harvests year round with the AeroGarden Harvest Elite, an indoor hydroponic g…
- ROOM FOR 6 PLANTS: This compact, stainless steel countertop garden features a spacious grow deck and water bowl so you c…
- HIGH-PERFORMANCE GROW LIGHT: The full spectrum 20W LED grow light with an automatic on/off timer mimics natural sunlight…
Battle-Tested Verdict:
My go-to for a quick, cheap, and reliable herb harvest. The automation is almost foolproof for beginners.
- Set-and-Forget Simplicity: The automated light timer and pump make it incredibly easy to start growing immediately.
- Sleek Design: Looks great on a kitchen counter, not like a piece of lab equipment.
- Perfect for Beginners: Eliminates the guesswork of pH and nutrients for your first grow.
Reality Check:
- Kitchen Noise: The pump can be a bit noisy in a silent kitchen.
- Ongoing Cost: You need to buy their proprietary seed pod kits for the best results.
- Size Limitations: The 6-pod size is perfect for herbs but limits larger crops.
Is It Right for Your Garden?
Ideal for anyone who wants a truly hands-off introduction to hydroponics. Check Price on Amazon.
Bluelab PENPH pH Pen, Digital pH Meter for Hydroponics
A professional, waterproof pH pen designed for frequent use in hydroponic nutrient solutions.
- Conductivity pen can test and monitor your nutrients (TDS) level to maximize your grow and ensure plants get the balance…
- This hydroponics tester has ATC that provides consistent reading regardless of any fluctuations in temperature; Durable …
- Calibration optional, the meter comes factory calibrated so it’s ready to be used; Regular cleaning is recommended for a…
Battle-Tested Verdict:
3 seasons of commercial grows, zero pH fails since I started using this. Accurate readings are a game-changer.
- Lab-Grade Accuracy: Provides reliable, precise pH readings to prevent nutrient lockout.
- Durable Build: Waterproof design and robust construction can handle the occasional drop or splash.
- Easy Calibration: Simple 2-point calibration process takes less than a minute.
Reality Check:
- Requires Maintenance: Needs monthly calibration to stay accurate. Don’t skip this.
- Storage: The probe must be kept hydrated with storage solution or it will be ruined.
- Investment: It’s a tool for serious growers, not a disposable item.
The Bottom Line:
The most important tool in your garden after your lights. Don’t cheap out on pH. See Latest Discount.
General Hydroponics Flora Series Performance Pack
The iconic 3-part nutrient system with CALiMAGic and RapidStart supplements.
- The Flora Series is a hydroponic-based nutrient system that helps fulfill your plants’ nutrient needs at every stage of …
- Nutrients included in the Series are FloraMicro, FloraBloom, and FloraGro
- FloraMicro: contains nitrogen and calcium, as well as trace minerals, which are essential for a comprehensive hydroponic…
Why Growers Love It:
- Complete Nutrition: Three-part system provides precise control over each growth phase
- pH Stability: Buffered formulation minimizes pH drift in reservoir
- Strain Specific: Feeding charts available for various cannabis genetics
Room for Improvement:
- Mixing Order: Requires specific mixing sequence to prevent nutrient lockout
- Supplement Needs: May require additional PK boosters for heavy-feeding strains
Bottom Line for Growers: The industry standard for reliability. Perfect for growers who want predictable results harvest after harvest. Check Price on Amazon.
Bluelab PENPH pH Pen, Digital pH Meter for Hydroponics
A beneficial bacteria solution that colonizes plant roots to prevent pathogenic fungi and root rot.
- Botanicare Hydroguard assists in the decomposition of organic matter in hydroponic gardening
- Contains bacillus, a natural bacterial root inoculant
- Helps convert organic matter into nutrients that may be absorbed directly by the roots of a plant
Battle-Tested Verdict:
This saved my commercial spinach crop after I lost 100 plants to Pythium. I will never grow without it again.
- Root Rot Prevention: The Bacillus amyloliquefaciens bacteria actively fight off root pathogens.
- Root Zone Health: Creates a healthier rhizosphere, leading to better nutrient uptake and growth.
- Plant Resilience: Helps plants better handle environmental stress.
Reality Check:
- Mixing Order: Crucial: Don’t mix it in concentrated form with your nutrients. Always add it last to your reservoir after everything else is mixed and diluted.
- Refrigeration: Requires refrigeration after opening to keep the bacteria alive and effective.
- Not a Cure-All: It’s a fantastic preventative, but can’t always reverse severe, established root rot.
The Final Verdict:
Cheap insurance for your roots. A non-negotiable addition to any reservoir. See Latest Discount.
FAQ’s
Q: Why do my hydroponic lettuce leaves get crispy brown edges (tip burn)?
A: Tip burn is a sign of a localized calcium deficiency, which is common in fast-growing hydroponic crops. It’s often caused by low humidity in the grow room, which makes it hard for the plant to transport calcium to its new leaves. A simple fix is to increase your grow room’s humidity and, for a quicker solution, mist your plants with a calcium-rich foliar spray.
Q: What is the ideal temperature for growing hydroponic lettuce and spinach?
A: Both crops are cool-season plants. Lettuce thrives in an air temperature between 60-75°F (15-24°C) with a reservoir temperature below 72°F (22°C). Spinach prefers it slightly cooler, with an optimal range of 65-70°F (18-21°C). Maintaining these temperatures is crucial to prevent premature bolting and inhibit the growth of root diseases.
Q: How do I prevent root rot in my hydroponic system?
A: Root rot is a common fungal infection often caused by a lack of oxygen in the water. The best prevention is to ensure your water is highly oxygenated with an air pump and air stone and to keep your reservoir temperature below 72°F (22°C). You can also use a biological control like Botanicare Hydroguard, which introduces beneficial bacteria to your system to fight off pathogens.
Q: Can I use the same nutrient solution for both lettuce and spinach?
A: While a general hydroponic nutrient solution will work for both, you’ll get better results by tailoring your mix. Lettuce is a nitrogen-heavy feeder and prefers an EC of 0.8-1.6 mS/cm. Spinach needs a richer diet, especially of calcium and magnesium, and thrives with a higher EC of 1.8-2.3 mS/cm. Understanding these differences is key to a high-yield harvest.
Conclusion: Your Salad Revolution Awaits
Hydroponic lettuce and spinach are more than just a hobby; they’re a revolution in flavor, texture, and control. By understanding the unique needs of each plant and providing a consistent, clean environment, you can stop crossing your fingers and start engineering a continuous, explosive harvest. The journey from soil to hydro is a humbling one, full of a few heartbreaking failures, but the reward is a year-round supply of greens so crisp, so fresh, they will change the way you cook forever.
Field-Tested Hack #3: The Tip Burn Fix Lettuce tip burn is a heartbreaking sight. It’s caused by a localized calcium deficiency in the fastest-growing leaves, usually due to low humidity. My fix is simple: I gently mist my lettuce plants with a calcium-rich foliar spray every other day. This bypasses the root system and delivers the calcium directly to the leaves, saving the crop.
Root Rot Triage Guide
- Symptoms: Roots are brown, slimy, and smell foul. The plant wilts and dies.
- Cause: Lack of oxygen in the water, high water temperature, or lingering pathogens.
- Rescue:
- Remove infected plants immediately.
- Empty your reservoir and scrub it clean.
- Treat remaining roots with a diluted hydrogen peroxide solution (1 teaspoon of 3% food-grade H2O2 per gallon of water).
- Refill with fresh water and nutrients.
- Add a biological control like Botanicare Hydroguard.


