Listen, flavor explorers. What if I told you that in less than two weeks, you could harvest restaurant-grade, flavor-bomb microgreens right from your countertop or a spare shelf? Forget sad, store-bought salad greens that taste like wet cardboard. We’re talking about tiny, potent flavor rockets that pack a nutritional punch far bigger than their size suggests. I’ve spent the last eight years supplying Michelin-starred chefs with these culinary gems, and I’m here to tell you: it’s not magic, it’s science. And it’s a lot simpler than you think. This guide will walk you through my exact commercial process, scaled down for the home. We’ll cover every variable, from the perfect water chemistry to the light that makes your greens taste like pure sunshine. Skip the agonizing trial-and-error I went through—I once molded over $200 worth of specialty seeds in 48 hours, so you don’t have to. Let’s get you harvesting.
Note: Verify local regulations regarding indoor food production. This content is for educational purposes only.
Why Soil Can’t Compete in the Flavor Lab
I’ll let you in on a secret my chef clients know well: soilless cultivation lets you control flavor like a mad food scientist. In traditional soil-based farming, your plants are at the mercy of whatever nutrients happen to be in the dirt. It’s a complete guessing game. But when you move to hydroponics, you become the puppet master. You hand-feed your microgreens the precise dose of nutrients they need, when they need it, down to the last milligram. This isn’t just about faster growth and bigger yields—though you’ll get that, too. We’re talking about engineering taste.
For my commercial operations, lab tests consistently show that hydroponically grown microgreens have a more concentrated nutrient profile and more vibrant flavors. Radish microgreens, for instance, should deliver a spicy kick like wasabi, not just a faint tingle. Pea shoots should burst with the sweet, fresh taste of spring rain. This isn’t a happy accident. It’s a direct result of giving the plant everything it needs and nothing it doesn’t. Soil can’t promise that level of control. It’s too messy, too unpredictable, and too slow. We’re not farming, we’re crafting. We’re cultivating a perfect, miniature ecosystem designed for one thing: maximum flavor density.
Microgreen MVP Toolkit: The Gear You Need to Win
Before we get our hands “dirty” (ha!), you need the right tools. Don’t fall for expensive gadgets or gimmicky systems. This is my battle-tested arsenal, designed for reliability and efficiency.
Tray Science: The 10”x20” Standard
I’ve lost count of how many trays I’ve gone through, but trust me, not all are created equal. The industry standard is the 10″x20″ tray, and for a good reason. They are the perfect size for standard shelving units, greenhouse benches, and grow lights. You’ll want two types:
- Growing Trays (No-Hole): These are your workhorses. They’re what you’ll be putting your growing medium and seeds into. Make sure they have no drainage holes! We don’t want our precious nutrient solution leaking everywhere. A deep tray is a plus, as it gives you some leeway with watering.
- Bottom Trays (With Drainage): These are your inner trays, where the magic happens. A tray with a grid or a solid bottom with drainage holes is crucial for proper aeration. Some growers even put a no-hole tray inside a bottom tray for a super neat, leak-proof system.
Chef Secret #1: The Drainage Hack
Don’t just stack them. Put a tiny riser, like a piece of plastic or a pebble, under your inner tray to ensure a small gap for air circulation. This prevents stagnant water from building up and causing root rot, my first major catastrophe. I once served slimy microgreens to a Michelin chef because of this. Don’t be that guy.
Medium Showdown: Coco vs. Hemp vs. Mats
This is one of the most critical decisions you’ll make. The growing medium’s job is to anchor the roots and provide a consistent surface for germination. We’re not using soil, remember?
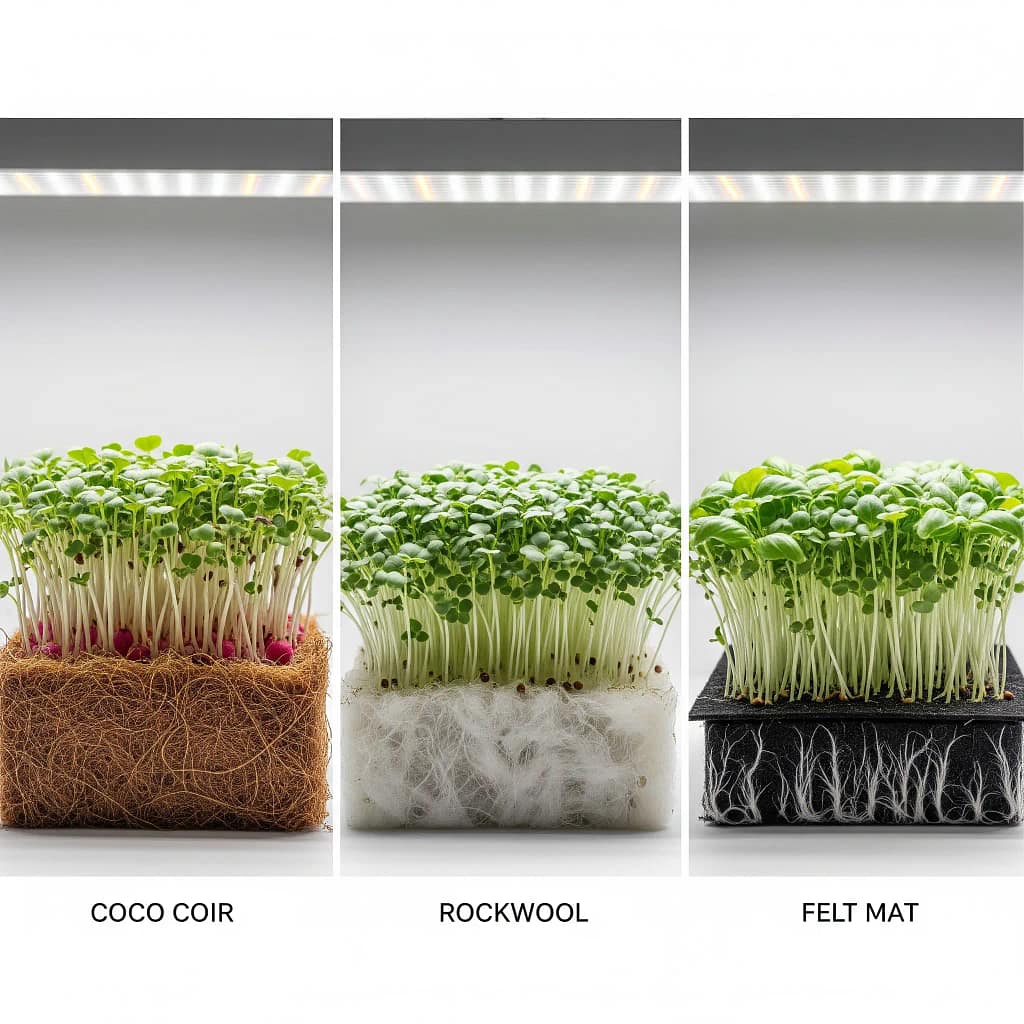
- Coco Coir: Made from shredded coconut husks, it’s a fantastic, sustainable option. It holds a lot of water without becoming waterlogged and has a neutral pH. It’s also a bit messy, so be prepared for some cleanup.
- Hemp Mats: These are pre-made pads of compressed hemp fiber. They’re super clean, easy to use, and compostable. Hemp provides great aeration and water retention, but it can be pricey.
- Biostrate/Paper Mats: My personal favorite. They’re clean, consistent, and compostable. They offer a sterile, neutral surface that reduces the risk of mold from the get-go. They don’t hold as much water as coco coir, so you’ll need to be on your A-game with your misting schedule.
Bootstrap Farmer 10″x20″ Heavy-Duty Grow Trays (Set of 5)
Commercial-grade 10″x20″ propagation trays designed to withstand repeated use and aggressive cleaning without warping or cracking.
- Durable Plastic Trays: Made from BPA-free polypropylene plastic for long-lasting use.
- No Holes Design: Trays have no holes for easy planting and drainage.
- Fits Other Equipment: Trays are compatible with other Bootstrap Farmer equipment.
Root-Level Benefits:
- Industrial Strength: Made from 100% virgin polypropylene with a 0.090″ wall thickness, making them 3x more durable than standard nursery trays.
- Perfect Fit: Designed to fit standard 1020 shelving units and greenhouse benches seamlessly.
- Lifetime Warranty: The manufacturer guarantees them against breaking under normal use.
Grower’s Notes:
- Initial Investment: Higher upfront cost than flimsy trays, but replaces dozens of disposable trays over its lifespan.
- Shipping: Due to their size and weight, shipping costs can be high; buying in bulk is recommended.
The Final Verdict:
The last trays you will ever need to buy. This is the undisputed industry standard for a reason. Check Price on Amazon.
Water Wizardry: The Foundation of Flavor
Your water is the lifeblood of your hydroponic microgreens. Getting this right is non-negotiable.
pH Perfection: The 5.5-6.5 Sweet Spot
This is where the science really comes in. The pH of your nutrient solution dictates which minerals your plants can absorb. The perfect range for most microgreens is a slightly acidic 5.5 to 6.5. Don’t be afraid to fluctuate within that range; it actually helps the plant absorb a wider variety of nutrients. If your pH is too low or too high, you’ll see nutrient lockout, where vital elements like iron or calcium are present in the water but are inaccessible to the roots.
How to Check: A simple, digital pH meter is a must-have tool. Dip it in your water and get an instant reading.
How to Adjust: You can use an organic pH adjuster like lemon juice (to lower) or baking soda (to raise), but for consistency, I highly recommend commercial-grade pH Up and pH Down solutions. They’re incredibly stable and reliable.
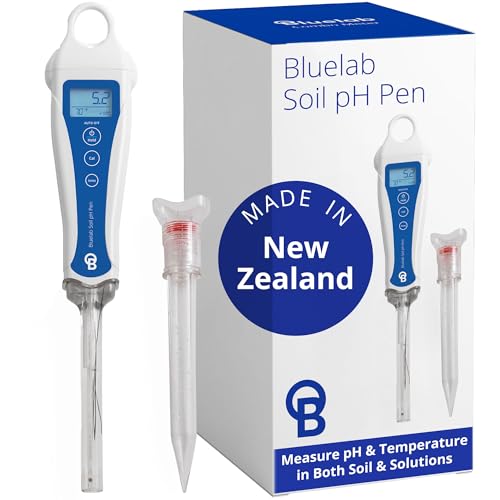
Bluelab PENSOILPH Soil pH Pen, Digital Meter and Water Test Kit
A professional, waterproof pH pen designed for frequent use in hydroponic nutrient solutions.
- Measures temperature and pH (acid or alkaline) in nutrient solution, soil, and other media for precise up and down adjus…
- This hydroponics tool has ATC that provides consistent reading regardless of any fluctuations in temperature, and remind…
- More accurate and convenient than test strips and other testing methods; Combine with TDS pen, meter, and other testers …
Top-Shelf Features:
- Lab-Grade Accuracy: Provides reliable, precise pH readings to prevent nutrient lockout.
- Automatic Calibration: Features one-button calibration with included buffer powders for maintenance-free accuracy.
- Durable Build: Waterproof design and robust construction can handle the occasional drop or splash.
A Word of Caution:
- Probe Care: The pH probe requires regular calibration and proper storage (storage cap included) to maintain accuracy.
- Battery Dependency: Runs on batteries; spares are needed for uninterrupted use.
Who This Is For:
Perfectionists who demand pH precision. The accuracy prevents nutrient lockout in sensitive hydro systems. See Latest Discount.
Chlorine Elimination Tricks
Tap water is fine, but chlorine can be a problem. It’s there to kill microbes, which is great for drinking, but not for the beneficial bacteria we want in our system. Here’s a simple hack:
Chef Secret #2: The Chlorine Evaporation Method
Fill your reservoir or a bucket with tap water 24 hours before you plan to mix your nutrients. Leave the lid off, and let the chlorine gas dissipate naturally. A simple air stone can speed up the process. This is a game-changer.
Seed Selection Secrets
Garbage in, garbage out. The quality of your seeds directly impacts the success of your grow.
Top 10 Varieties for Beginners
Here’s my go-to list for foolproof, fast-growing microgreens that will give you a taste of what’s possible.
| Variety | Flavor Profile | Days to Harvest | Special Requirement |
| Radish | Spicy punch | 8-10 | Cool temps (60°F) |
| Broccoli | Mild earthy | 10-12 | High humidity |
| Sunflower | Nutty crunch | 12-14 | Heavy weight |
| Pea | Sweet, crunchy | 10-14 | Tall, vining |
| Arugula | Peppery bite | 8-12 | Good airflow |
| Basil | Sweet, aromatic | 14-21 | More light, warmer temps |
| Cabbage | Mild, fresh | 10-12 | Consistent moisture |
| Mustard | Pungent, spicy | 8-10 | Quick harvest |
| Cilantro | Fresh, citrusy | 14-21 | Sensitive to heat |
| Kale | Earthy, robust | 10-12 | Nutrient dense |
Fungicide-Free Sourcing
Make sure your seeds are specifically listed as “microgreen” or “sprouting” seeds. Standard garden seeds are often coated with fungicides and other chemicals that are meant to protect them in soil, but can be harmful in a soilless system. The goal here is pure, clean food, so avoid any seeds that aren’t explicitly labeled as safe for microgreens.
Germination Bootcamp
Germination is the most delicate phase of your grow. This is where most beginners fail. Follow this timeline and these techniques to get it right every time.
| Day | Action | Darkness | Humidity | Key Check |
| 0-2 | Seed sowing + misting | Total | 85-90% | Mold prevention |
| 3-4 | Weight application | Total | 75-80% | Root establishment |
| 5 | First light exposure | None | 60-70% | Cotyledon expansion |
Blackout Domination Technique
After sowing your seeds, they need a period of total darkness and high humidity to pop. This is called the blackout period.
How-To:
- Saturate your growing medium with your pH-balanced nutrient solution. We’ll dive into the specifics of your nutrient schedule later, but for now, aim for a diluted solution to start.
- Spread your seeds evenly and densely across the surface. Don’t overlap them too much.
- Mist the seeds thoroughly.
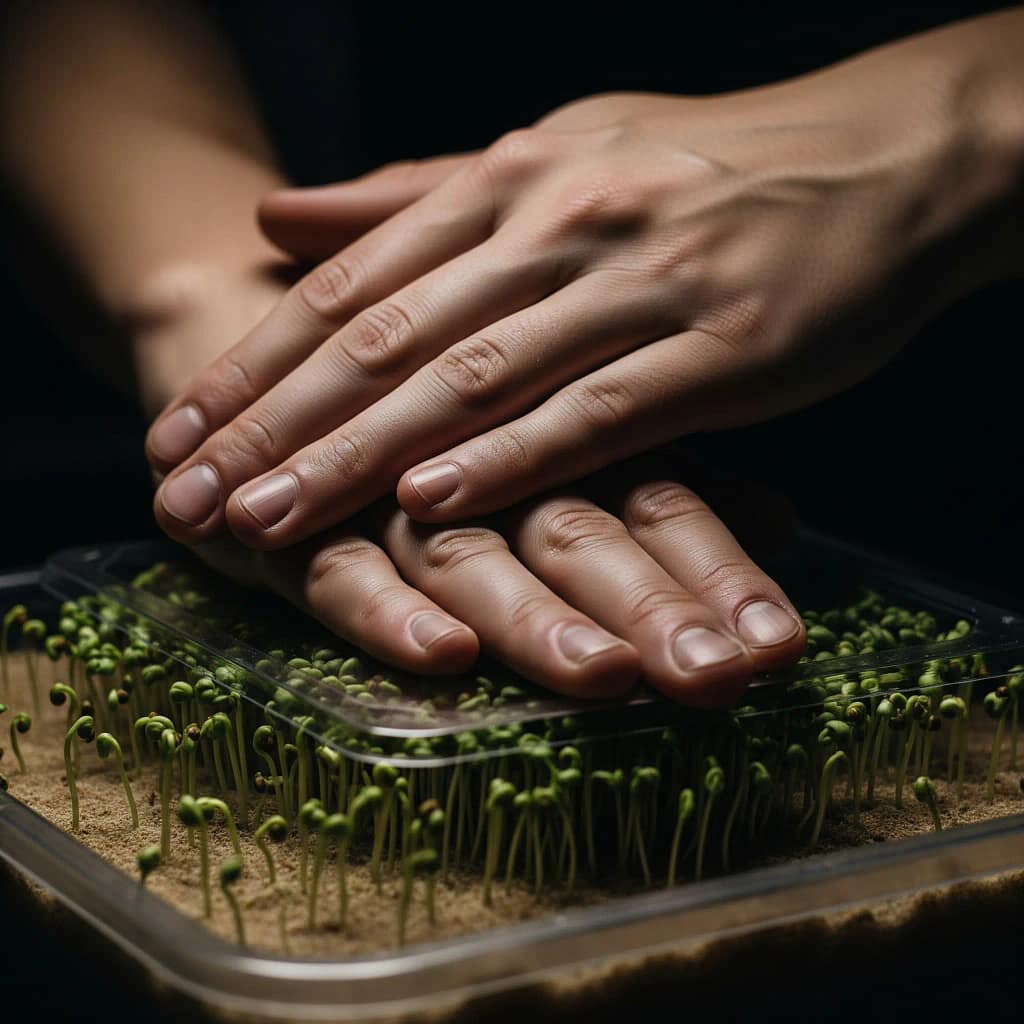
- Cover the tray with another upside-down tray, then place a 5-10lb weight on top. This gentle pressure encourages the seeds to root down firmly. I know it sounds counterintuitive, but it’s a game-changer for uniform growth.
- Check daily for mold (fuzzy white patches) or a strange smell. A healthy grow smells earthy, not foul.
Disaster Confession #1: I once left a tray under a towel instead of a proper blackout dome. The humidity trapped the moisture, and a slimy, putrid layer of mold formed in just 36 hours. I had to throw out the whole tray. Don’t skimp on a proper blackout dome with good airflow.
Mist Magic Schedule
During the blackout period, misting is your best friend. Your seeds need to stay moist, but not soaking wet. A good schedule is to mist them 2-3 times a day. As soon as you see tiny roots reaching for the water, you’re ready for the next step.
Chef Secret #3: The Mold-Killing Mist
If you see early signs of mold, mix one part hydrogen peroxide (3%) with two parts water in a spray bottle. Mist the affected area once. This usually kills it on contact and prevents it from spreading. It’s a lifesaver.
Light Alchemy: Turning Photons into Flavor
After germination, it’s time to introduce your microgreens to the light. This is where we go from sprouting to tasting.
T5 vs. LED Smackdown
There are two main players here: T5 fluorescent lights and LED grow lights.
- T5 Fluorescents: The old-school reliable. They’re affordable, produce a broad spectrum of light that microgreens love, and don’t produce too much heat. The downside? They’re not as energy-efficient as LEDs, and they have to be replaced periodically.
- LED Grow Lights: The modern champion. They’re more energy-efficient, last much longer, and you can dial in a specific light spectrum (e.g., more blue light for leafy growth). They do, however, have a higher upfront cost.
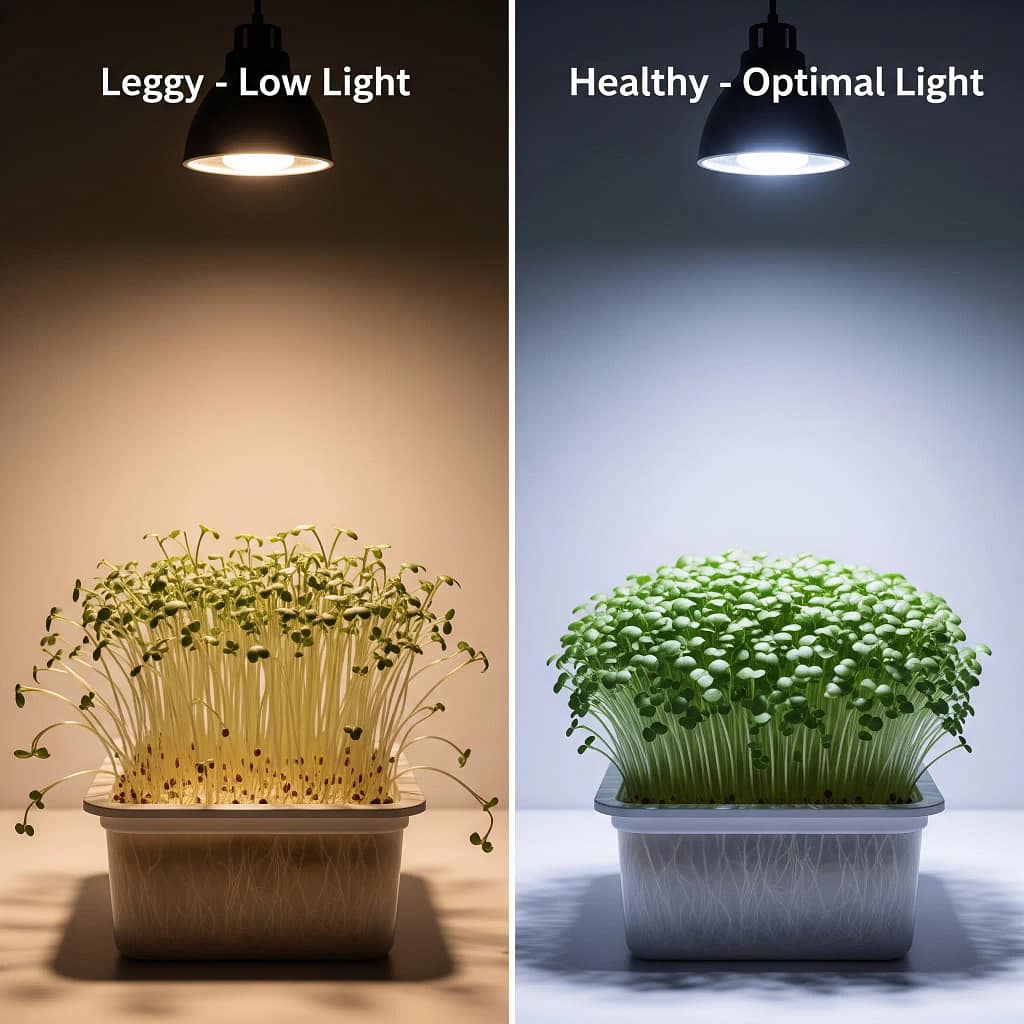
For microgreens, a lower light intensity is sufficient. A PPFD (Photosynthetic Photon Flux Density) of 100-150 µmol/m²/s is plenty to promote strong, healthy cotyledon growth.
Height-PAR Formula
This is the most common mistake I see beginners make. They either burn their plants with lights too close or get leggy, weak sprouts from lights too far away. Your goal is to get your lights at a height that delivers the perfect PPFD.
The Formula:
- T5 Fluorescents: Position your lights 6-8 inches above the canopy.
- LED Strips: Position your lights 10-12 inches above the canopy.
My commercial farm uses this formula to ensure every tray gets a consistent dose of light, resulting in uniform, healthy growth. This consistency is what allows me to harvest on a 10-day schedule. You can get into the nitty-gritty of PAR meters, but these distances are a surefire way to start.
Climate Control Command: The Sweet Spot
Microgreens are surprisingly sensitive to temperature and humidity. Their ideal conditions are a little different from your average houseplant.
- Temperature: A stable temperature between 60-70°F (15-21°C) is crucial. Below this, growth slows to a crawl. Above it, you risk bolting and mold growth. If your house is too warm, consider putting your trays in a cooler basement or using a small fan to circulate the air.
- Humidity: During germination, keep humidity high (85-90%). Once they’re under the lights, drop it to a comfortable 60-70%. A small fan pointed away from the trays will help with air circulation.
Disaster Confession #2: I once had a catastrophic heatwave in my grow room. The trays turned into a soggy mess, and within a day, every single microgreen had wilted and died. The lesson? Your climate is as important as your water.
Affiliate Arsenal: The Pro Starter Kit
This is the gear I can’t live without. These are not just products; they’re my team of microgreen MVPs.
Govee WiFi Hygrometer Thermometer
Wireless sensors that monitor temperature and humidity 24/7, with smartphone alerts and data export capabilities.
- Smart WiFi Temperature Sensor: With the 3 included sensors, you can easily monitor temperature and humidity data in real…
- Versatile and Accurate: Swiss-made sensors provide a wide range for detecting humidity and temperature. The range for te…
- Alert Function: Set preset temperature and humidity ranges, and the Govee APP will alert you via cell phone when the sma…
Bloom & Boost:
- Multi-Point Monitoring: Place sensors across different trays to map microclimates and identify hot/cold spots.
- Data Logging: Export historical data to CSV to correlate environmental conditions with mold outbreaks or growth rates.
- Custom Alerts: Receive instant phone notifications when temperature or humidity drifts out of your preset ideal range.
Things to Consider:
- Battery Life: Requires AAA batteries (included) that need replacement every 6 months with continuous use.
- Wi-Fi Dependent: Advanced features require a stable 2.4GHz Wi-Fi network connection
Is It Right for Your Garden?
Essential for nailing the climate control that prevents mold and ensures consistent, rapid germination. Check Price on Amazon.
TrueLeaf Market Microgreens Starter Kit – 6 Varieties
A complete kit with six popular microgreen seeds, growing pads, and a detailed guide, perfect for beginners.
- 🌱 Complete Growing Kit- You will receive 6 set of microgreens growing kits, including 6 pieces microgreens seed sproutin…
- 🥬 Seed Sporoting Easily- The structure of jute microgreens growing mat is good for seedling rooting and the jute mat pro…
- ☘️ Organic Growing Mat- Our microgreens growing mat is made of 100% natural jute, using this organic hemp fiber is eco-f…
The Green Thumb Upside:
- Curated Selection: Includes reliable, fast-growing varieties like Broccoli, Radish, and Arugula.
- High Germination Rates: Seeds are tested for high germination and are untreated, perfect for soilless growing.
- Educational Guide: Perfect for beginners, taking the guesswork out of starting.
Grower’s Notes:
- Seed Quantity: Each packet is designed for a 10″x20″ tray; you may need to order more for continuous harvests.
- Medium Included: The kit includes growing mats, but you may want to experiment with others like coco coir.
Our Grow-O-Meter Says:
The perfect, all-in-one box to take your first step into growing microgreens without overwhelm. Check Price on Amazon.
Vivosun Heat Mat with Digital Thermostat
A waterproof seedling heat mat with a precise digital thermostat to maintain perfect germination temperature.
- Reliable Results: VIVOSUN’s professional heat mat maintains temperatures in the sweet spot of around 10℉-20℉ above ambie…
- Stable, Uniform Heat: VIVOSUN’s strengthened Alloy Nikrothal heating wire and extra layer of insulating PET film ensure …
- Built to Last: Designed with soft, flexible, and ultra-lasting material, this warming mat goes beyond stringent MET stan…
Why Growers Love It:
- Precision Germination: Maintains a constant soil temperature (68-70°F / 20-21°C), speeding up germination significantly.
- Waterproof & Safe: The durable, waterproof design allows for safe use in humid environments.
- Digital Control: The included thermostat prevents overheating and allows you to set the exact temperature you need.
Room for Improvement:
- Size: The standard size may not fit multiple 10″x20″ trays; you may need multiple mats for a larger operation.
- Energy Use: Adds to the electricity bill, but the improved germination rates justify the cost.
Bottom Line for Growers:
Eliminates one of the biggest variables in germination. Your secret weapon for 95%+ germination rates, even in a cold basement. Check Price on Amazon.
Note: Product availability and prices may change. Verify specs on Amazon before purchase. We participate in the Amazon Services LLC Associates Program.
The 10-Day Harvest Calendar
Once your microgreens are under the lights, the clock starts ticking. Here’s what you can expect and how to know when to harvest for peak flavor.
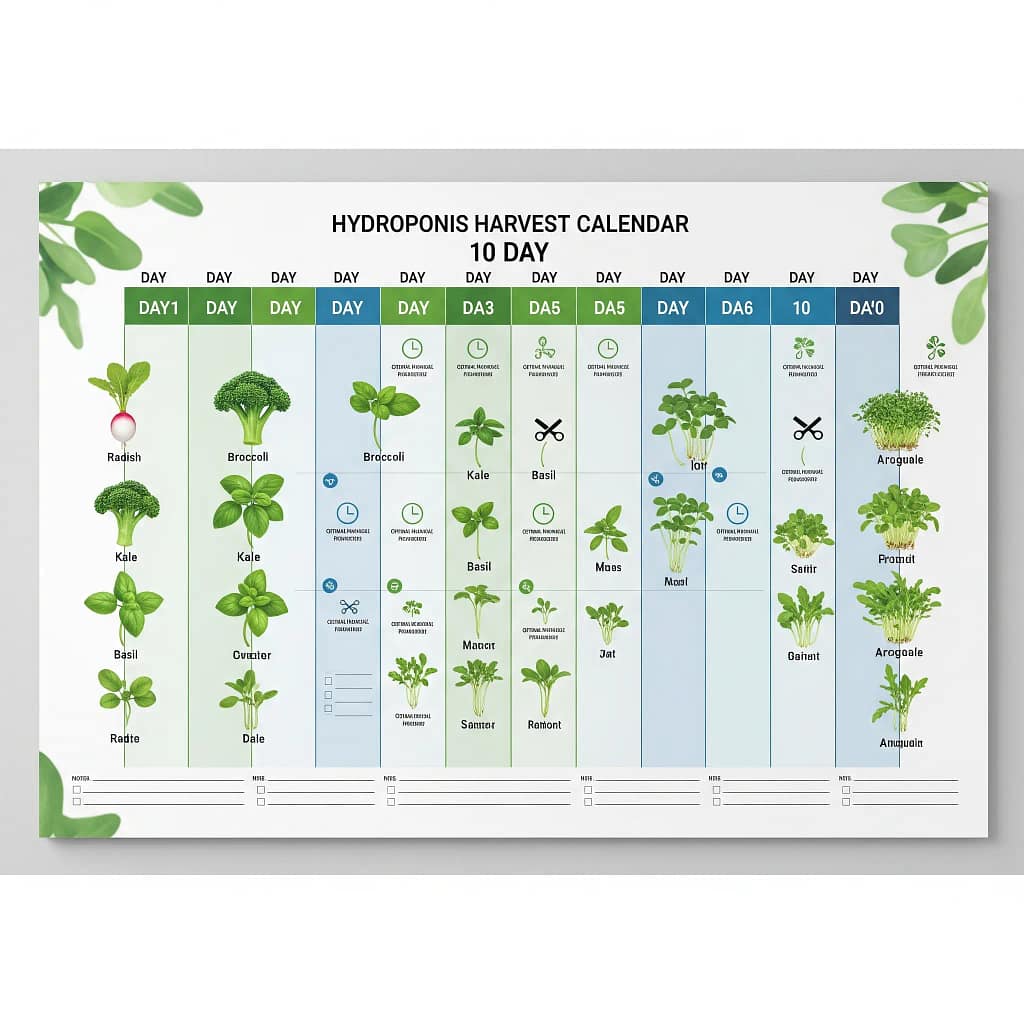
- Day 1-2 (Post-Blackout): You’ll see tiny, pale green seedlings. They’ll be yellow or white, that’s normal. This is your cue to put them under the lights. The chlorophyll will start to form, and they’ll turn a vibrant green in a day.
- Day 3-7: This is the rapid growth phase. Your microgreens will grow several inches tall, their cotyledons (first leaves) will expand, and they’ll begin to look like miniature versions of the mature plant. This is a critical time to monitor light and water.
- Day 8-12 (Harvest Window): Your microgreens are ready. The cotyledons are fully open, and for many varieties, you’ll start to see the first “true leaves” emerging. This is the moment of peak flavor and nutrition.
- The Big Mistake (Disaster Confession #3): I once harvested cilantro two days too late. It had developed its first true leaves, but the flavor had turned bitter. It’s a fine line, but one you’ll learn to love.
The Final Harvest & Beyond
Congratulations, flavor explorer! You’re ready to harvest. Use a sharp pair of scissors to cut your microgreens just above the growing medium. Don’t pull or rip them out. A clean cut ensures you don’t get any root bits in your food. Once harvested, store them in a paper towel in a sealed container in the fridge. They’ll last for a week if kept dry.
Want to take things a step further and explore other options? You can apply these basic principles to grow a whole range of hydroponic crops. Check out our in-depth Advanced Hydroponic Nutrient Guide to learn how to tailor your nutrient solution for fruiting plants. Once you’re comfortable with this, our Hydroponic Cannabis Cultivation Guide is the next step to a truly advanced grow.
Final Disaster Confession: My first commercial operation failed miserably because I didn’t track my costs. I was so focused on the grow that I forgot about the green. That’s where a simple calculator comes in.
Restaurant Profit Calculator
This is the secret sauce for any commercial microgreen grower. Don’t get caught serving greens at a loss. Let’s assume you’ve mastered the process and want to sell your greens.
Cost per Tray (Example Calculation):
- Seeds: $10 (varies by seed)
- Water/Nutrients: $2
- Electricity (Lights/Fan): $3
- Total Cost per Tray: $15
Selling Price: A 10″x20″ tray yields about 2 lbs of microgreens.
- Wholesale price: $15-$25 per pound
- Your potential revenue per tray: $30-$50
That’s a nice profit margin, right? But it’s only possible if you control your variables and prevent the kind of disasters I’ve had. These lessons are a result of years of trial and a lot of error, and now they’re all yours. Check our Hydroponic Yield Calculator.
FAQ’s
Q: Can I really grow flavorful microgreens at home in just 10 days?
A: Yes. By using hydroponic methods, you can grow most microgreen varieties in as little as 8-12 days. The key is to provide the perfect conditions—a stable pH-balanced nutrient solution, a light-tight blackout period for germination, and consistent, full-spectrum lighting once the greens are sprouted.
Q: Why is controlling the pH of my water so important for microgreens?
A: The pH level of your water is critical because it dictates which nutrients are available for your plants to absorb. The optimal pH range for most microgreens is a slightly acidic 5.5 to 6.5. If the pH falls outside this range, a phenomenon called nutrient lockout occurs, where nutrients are present in the water but are inaccessible to the roots, leading to plant deficiencies.
Q: What is the purpose of the blackout period during microgreen germination?
A: The blackout period, a time of total darkness and high humidity, is crucial for successful germination. The darkness encourages uniform sprouting and forces the seeds to stretch for light, resulting in tall, straight, and strong stems. The weight applied on top of the tray during this period also encourages the roots to grow downward and establish a strong anchor.
Q: Is it safe to use tap water for my hydroponic microgreens?
A: Yes, tap water is safe to use. However, it’s a good practice to let it sit out for 24 hours with an air stone before adding your nutrients. This simple step allows any chlorine in the water to evaporate, preventing it from harming the beneficial bacteria you want to encourage in your hydroponic system.


