Cloning in Hydroponics: The Engineer’s Guide to Vegetative Propagation

Table of Contents
- The Biological Mechanics of Adventitious Rooting
- Parent Plant Pre-Conditioning Protocols
- Exact Extraction and Processing Procedures
- Hormone Chemistry: Accelerating Root Initiation
- Media Selection and Moisture Dynamics
- Microclimate Engineering: VPD and Lighting
- Hardening Off and Transplant Integration
- Frequently Asked Questions
- System Integration and Next Steps
- Watch: Precision Plant Cloning & Rooting Science
Disclosure: MistCulture summarizes verified product specs, engineering data, and community feedback. We may earn an affiliate commission if you purchase through our links. Regulations vary by location; this content is for educational purposes only.
Vegetative propagation transforms a single high-performing plant into an infinite, self-sustaining crop cycle. When you take a cutting from a donor plant, you are extracting a precise genetic duplicate. The new plant retains the exact phenotypical expressions of the parent, including growth habit, flavor profiles, disease resistance, and harvest timing. Relying on seeds introduces genetic variability. Commercial facilities rely on cloning because uniformity drives predictable revenue. A bench of identical clones matures at the same rate, requires the exact same nutrient loads, and is ready for harvest on the exact same day.
Rooted cuttings skip the fragile seedling phase entirely. A fresh clone can hit the vegetative growth stage in 7 to 14 days, shaving weeks off the production timeline. Managing a perpetual harvest system requires a steady pipeline of healthy, vigorous clones ready to replace mature plants immediately after extraction. Success in cloning demands rigorous environmental control, strict sterilization protocols, and a deep understanding of plant hormones. This guide details the biological mechanics, exact environmental math, and standard operating procedures required to achieve near-perfect rooting rates in any hydroponic system.
The Biological Mechanics of Adventitious Rooting
Explaining how a severed stem transforms into a functional root system involves cellular dedifferentiation and the targeted accumulation of natural auxins.
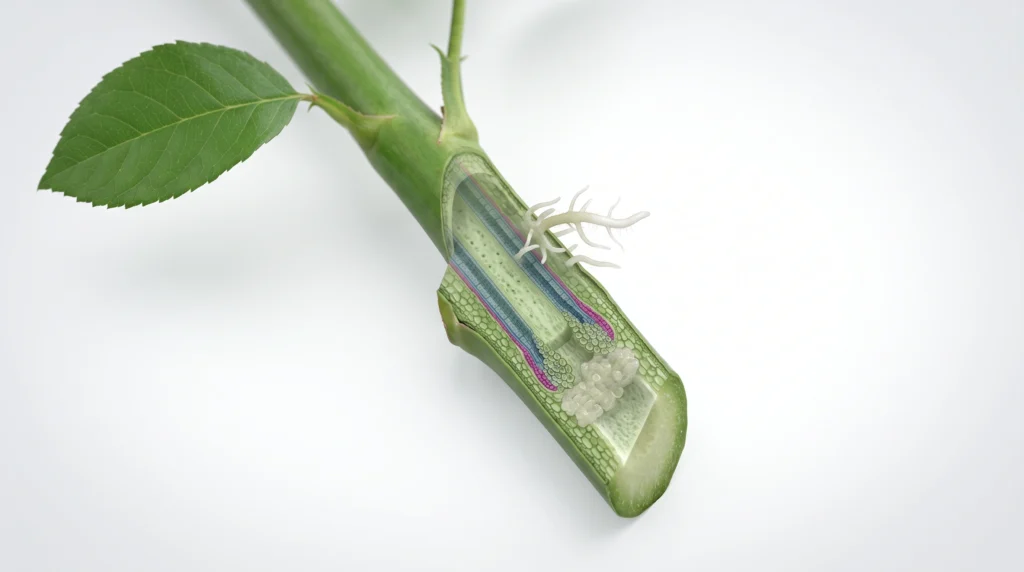
When a stem is cut, the plant registers the physical trauma and seals the wound by forming a mass of unspecialized cells called a callus. Endogenous auxins; naturally occurring plant hormones produced in the apical meristem (the top of the plant), travel down the phloem to gather at the site of the cut. These auxins trigger the callus cells to dedifferentiate. Instead of remaining stem tissue, the cells alter their biological programming and develop into root primordia.
These primordia eventually burst through the epidermal tissue as adventitious roots. Adventitious simply means roots forming from non-root tissue. The speed and volume of this root development dictate the health of the resulting clone. A cutting separated from its root system has zero capacity to uptake water or minerals through standard pathways. The stem relies entirely on stored carbohydrates for energy while using its stomata to absorb ambient moisture from the air.
If the cutting exhausts its carbohydrate reserves before striking roots, it cannibalizes its own foliage, leading to yellowing leaves and eventual collapse. Managing the environment limits transpirational water loss, allowing the plant to redirect maximum energy into root production.
Parent Plant Pre-Conditioning Protocols
Conditioning the donor plant before taking cuttings dictates the carbohydrate load and rooting vigor of the extracted shoots.
Healthy cuttings come from healthy parents. Taking cuttings from a stressed, nutrient-deficient, or flowering plant drastically reduces rooting success. The donor plant (often called a mother plant) must be in an active state of vegetative growth.
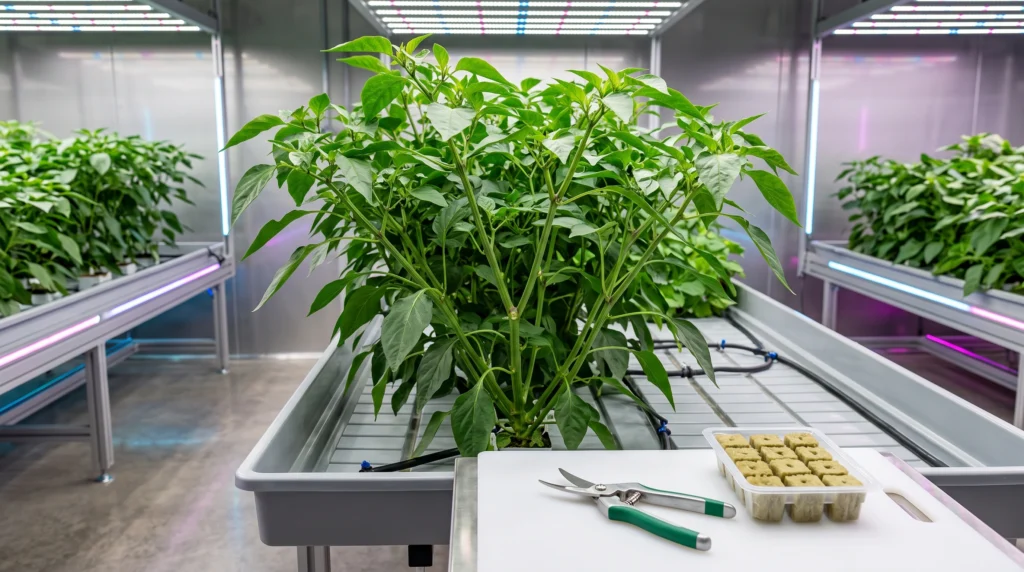
Nitrogen promotes rapid shoot growth, but high nitrogen levels in a cutting inhibit root formation. Seven days before taking cuttings, reduce the nitrogen concentration in the donor plant’s reservoir by 20% to 30%. Maintain steady levels of phosphorus and potassium, as these elements support ATP production and cellular division. You can calculate precise elemental adjustments using a standard hydroponic nutrient calculator.
The donor plant must be fully hydrated. Take cuttings early in the day, shortly after the lighting cycle begins. During the dark period, plants accumulate carbohydrates in their shoots. Extracting cuttings while these carbohydrate reserves are at their peak provides the clone with the maximum fuel required to survive the stressful rooting process.
Selecting the Target Shoots
Not all stems make good clones. Avoid soft, overly green, and highly pliable tips; these lack the structural integrity and carbohydrate reserves to survive. Likewise, avoid old, woody stems found near the base of the plant. Woody tissue is heavily lignified, making it difficult for new root primordia to break through the epidermis.
Target the middle zone of the plant. Look for semi-hardwood shoots that are firm but still green. The shoot should be 10 to 15 cm long with at least three distinct nodes. Nodes are the biological intersections where leaves branch off the main stem. Meristematic cells are highly concentrated at the nodes, making them the prime location for explosive root growth.
Exact Extraction and Processing Procedures
Precision processing prevents vascular blockages, reduces transpiration stress, and maximizes the surface area available for root emergence.
Air is the immediate enemy of a fresh cutting. The xylem tissue inside the stem acts as a series of micro-straws that pull water upward. When you cut the stem, the negative pressure inside the xylem can pull an air bubble into the vascular tissue. This air embolism blocks the upward flow of water, leading to rapid and irreversible wilting.
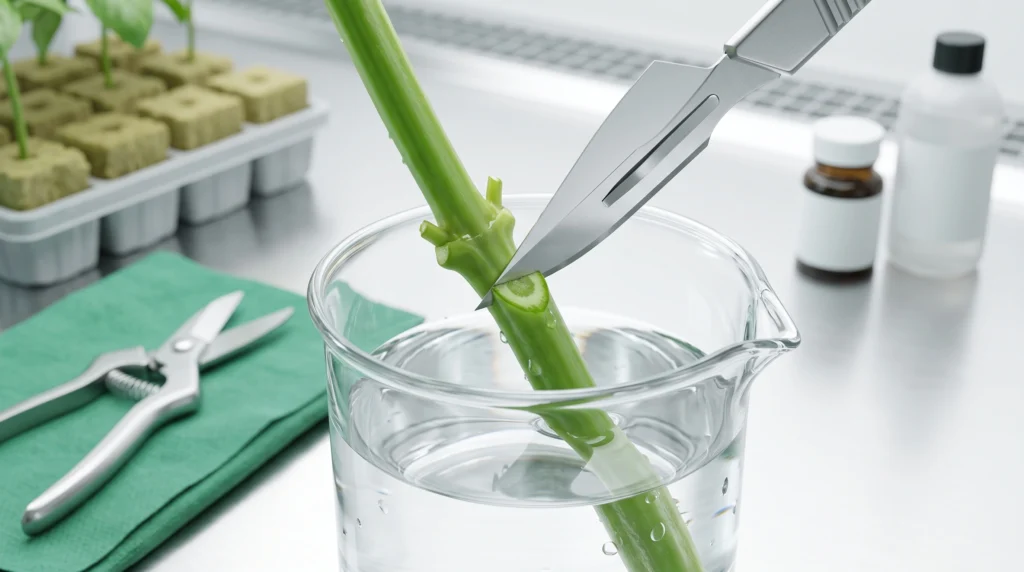
To execute the extraction flawlessly, follow a strict procedural sequence:
- Sterilize all equipment: Wipe blades, trays, and work surfaces with 70% isopropyl alcohol or a 10% bleach solution.
- Prepare a water bath: Fill a clean container with room-temperature, pH-balanced water (5.8 to 6.0 pH).
- Make the primary cut: Snip the selected shoot from the parent plant using clean shears. Immediately plunge the cut end into the water bath.
- Perform the secondary cut underwater: While the stem is submerged, use a sterilized scalpel or razor blade to make a fresh 45-degree angle cut exactly 0.5 cm below the lowest node. The steep angle maximizes the exposed surface area for water absorption and hormone uptake. Cutting underwater guarantees no air enters the xylem.
- Remove lower foliage: Strip the leaves from the bottom two nodes. Any foliage buried inside the propagation media will rot, introducing pathogens to the vulnerable stem.
- Clip the remaining fan leaves: Reduce the surface area of the top leaves by cutting them in half horizontally. Rootless clones lose moisture rapidly through transpiration. Trimming the leaves reduces transpirational demand and prevents the leaves from overlapping and trapping stagnant moisture, which breeds fungal pathogens.
- Lightly scrape the stem: Use the edge of the scalpel to gently scrape the epidermal layer off the bottom 1 cm of the stem. Do not gouge the stem. Scraping exposes the cambium layer, providing a massive surface area for root primordia to erupt.

Why it’s necessary: Crushing the stem tissue with dull scissors destroys the vascular pathways, preventing moisture uptake and causing rot. Precision titanium or stainless steel snips create clean, surgical cuts that heal efficiently.
Key Spec: Stainless steel blades / Spring-loaded return
Hormone Chemistry: Accelerating Root Initiation
Exogenous auxins applied to the cut stem override the plant’s natural timeline, forcing immediate and aggressive cellular dedifferentiation.
While many plants root successfully in plain water, rooting hormones guarantee consistency and speed. Hormone application reduces the time to root from 14 days down to 5 or 7 days. Commercial rooting products contain synthetic auxins that mimic the plant’s natural rooting triggers.
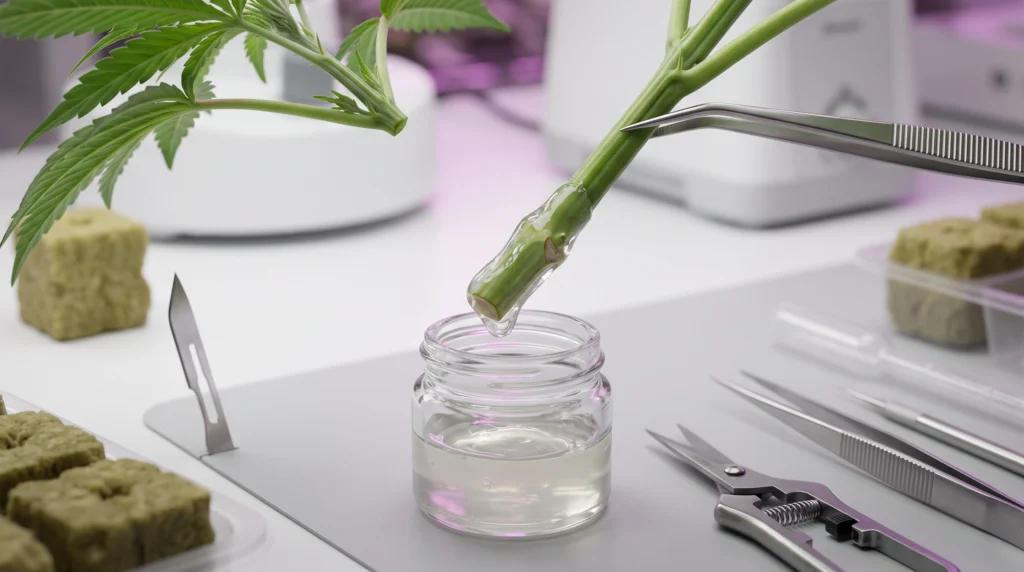
The two primary synthetic auxins used in propagation are:
- IBA (Indole-3-butyric acid): The industry standard. IBA is highly stable, remaining active at the cut site longer than other auxins. It promotes strong, uniform root systems.
- NAA (1-Naphthaleneacetic acid): Highly potent and often used in conjunction with IBA. NAA drives aggressive root mass but can be toxic in high concentrations, causing stem burn.
Rooting compounds come in three forms: powders, liquids, and gels. Powders are inexpensive but easily wash away when the cutting is placed into a wet media. Liquid solutions are excellent for large commercial operations utilizing bulk dipping, but they require precise dilution math. Gels are the superior choice for small to medium-scale growers. A thick gel coats the scraped stem, sealing the wound against air and pathogens while delivering a sustained dose of IBA directly to the cambium layer.
To apply rooting gel, pour a small amount into a separate sterile shot glass. Never dip a cutting directly into the original container; doing so contaminates the entire bottle with plant matter and potential pathogens. Swirl the bottom 2 cm of the prepared cutting in the gel, ensuring the scraped area and the lowest node are completely coated. Insert the cutting immediately into your chosen propagation media.

Why it’s necessary: A viscous gel seals the cut tissue to prevent embolisms while delivering a sustained 3,000 ppm concentration of IBA directly to the node, forcing rapid root generation.
Key Spec: 0.3% Indole-3-butyric acid (IBA) / Water-soluble base
Media Selection and Moisture Dynamics
Propagation media must strike a delicate balance between air-filled porosity and water holding capacity to prevent drowning the delicate stem tissue.
Root primordia require high levels of dissolved oxygen to develop. If the propagation media is saturated and heavy, the lack of oxygen induces anaerobic decay, rotting the stem before roots can form. Review our root rot prevention protocols to understand the biology of anaerobic pathogens.
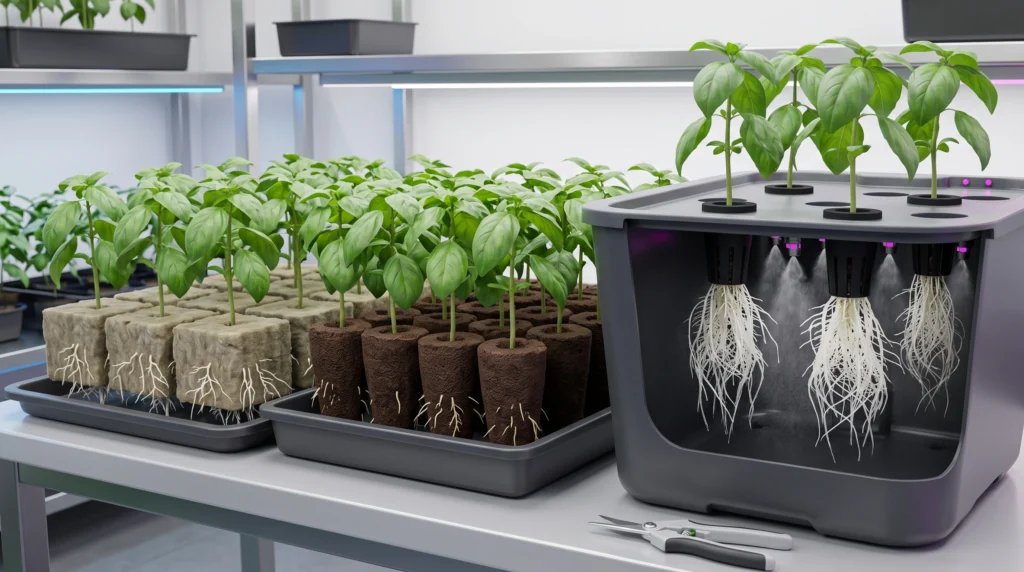
Rockwool Cubes
Rockwool is the undisputed king of commercial cloning. Spun from molten basalt rock, it provides a completely sterile, inert environment. Standard 1.5-inch starter cubes have excellent water retention but must be prepared correctly to ensure adequate aeration.
Rockwool is naturally alkaline. Before inserting cuttings, buffer the cubes by soaking them for 30 minutes in water adjusted to 5.5 pH. After soaking, gently shake the cubes to remove free water. Never squeeze or wring out rockwool. Compressing the cube destroys its internal micro-structure, ruining its air-filled porosity and turning it into a dense, water-logged sponge.
Peat and Coco Plugs
Organic plugs made from bound peat moss or coco coir offer excellent aeration and are heavily favored by growers transitioning clones into organic or hybrid systems. These plugs are pre-buffered and hold an ideal air-to-water ratio even when thoroughly watered. They are highly forgiving and rarely suffer from the compaction issues seen in mishandled rockwool.
Aeroponic Cloning Machines
Aeroponic cloners eliminate solid media entirely. The cuttings are suspended in neoprene collars, hanging freely inside a dark plastic reservoir. A high-pressure water pump drives a manifold of misting nozzles, constantly bathing the suspended stems in highly oxygenated water.
Aeroponic cloning achieves the fastest rooting times of any method, often producing roots in 4 to 5 days. Because there is no media to hold excess moisture against the stem, the risk of stem rot is virtually zero. However, aeroponic cloners are reliant on electricity. A power failure that stops the pump will kill the entire batch of clones within hours. If you are integrating aeroponic clones into other setups, consult a DWC vs NFT vs Aeroponics breakdown to understand transition mechanics.

Why it’s necessary: Spun basalt rock provides a sterile, perfectly uniform matrix. When handled correctly, the structured fibers hold the exact air-to-water ratio required for adventitious roots to breathe and expand without rotting.
Key Spec: 1.5-inch footprint / Pre-dibbled planting holes
Microclimate Engineering: VPD and Lighting
Rootless cuttings cannot uptake water from the root zone; survival depends entirely on engineering the atmospheric vapor pressure deficit to halt transpiration.
A severed cutting will dehydrate rapidly if placed in a standard growing environment. Without roots, the plant must absorb water vapor through its stomata. To facilitate this, the immediate atmosphere must hold maximum humidity.
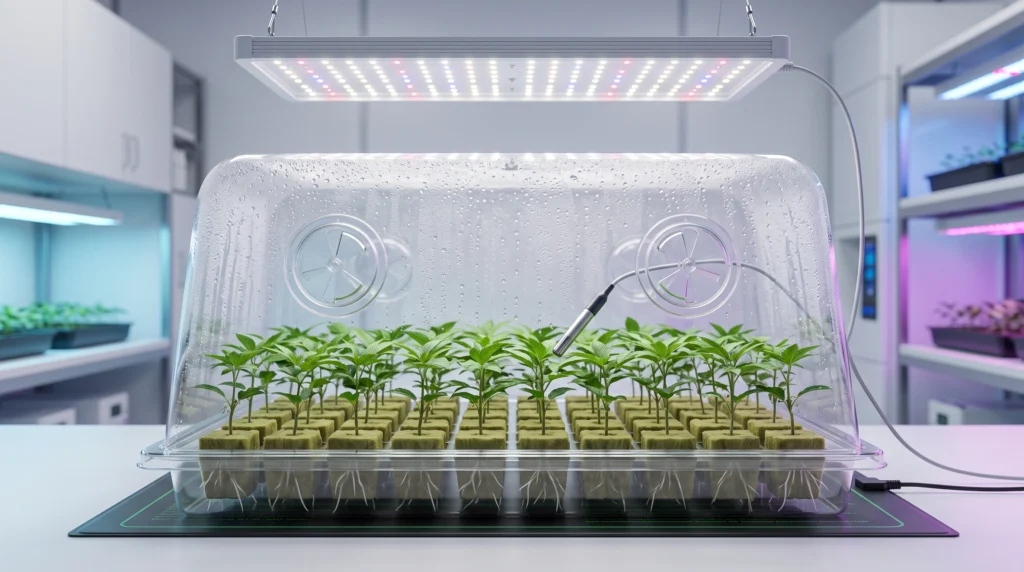
Propagation domes (humidity domes) are non-negotiable for clones rooted in rockwool or peat plugs. The dome traps moisture transpiring from the leaves and evaporating from the media, locking the relative humidity (RH) between 85% and 95%.
Vapor Pressure Deficit (VPD) Targeting
VPD measures the drying power of the air. It calculates the pressure difference between the moisture inside the plant leaf and the moisture in the surrounding air. High VPD means the air is dry and pulls moisture from the plant. Low VPD means the air is saturated, halting transpiration.
For unrooted clones, the target VPD is extremely low: 0.2 kPa to 0.4 kPa.
To calculate VPD, you need the air temperature and the relative humidity. At a standard propagation temperature of 24 C (75 F), the Saturated Vapor Pressure (SVP) of the air is 2.98 kPa. If your dome humidity is 90%, the Actual Vapor Pressure (AVP) is 2.68 kPa.
VPD = SVP – AVP
VPD = 2.98 – 2.68
VPD = 0.30 kPa
At 0.30 kPa, the air exerts almost no drying pressure on the cutting, allowing it to survive on stored carbohydrates while roots form.
Lighting Metrics (PPFD)
Exposing fresh clones to high-intensity grow lights will scorch them. High light levels force the plant to attempt rapid photosynthesis, creating a severe demand for water that the rootless stem cannot provide.
Light intensity is measured in Photosynthetic Photon Flux Density (PPFD). Fresh clones require a very low PPFD range of 75 to 150 µmol/m²/s. Use cool-spectrum LED bars or T5 fluorescent tubes positioned 30 to 40 cm above the dome. Provide 18 to 24 hours of continuous light.
To determine the exact Daily Light Integral (DLI) your clones receive, use this formula:
DLI = (PPFD * 3600 seconds * Light Hours) / 1,000,000
Example for 100 PPFD running for 18 hours:
DLI = (100 * 3600 * 18) / 1,000,000
DLI = 6.48 mol/m²/day.
This is the perfect daily light target for developing root primordia. Adjust your fixtures using precise LED distance guidelines.
Temperature Gradients
Root generation accelerates in warm conditions, but high air temperatures promote mold. The engineering solution is to create a temperature differential between the root zone and the canopy. Maintain ambient air temperatures around 22 C to 24 C (72 F to 75 F). Use a thermostatic heat mat under the propagation tray to warm the media to 25 C to 26 C (77 F to 79 F).
Warm media combined with cooler air drives the plant’s metabolic energy downward into the media to build roots rather than upward into shoot growth.

Why it’s necessary: A heavy-duty dome traps evaporating moisture to maintain the 0.3 kPa VPD required to prevent fresh cuttings from wilting, while adjustable top vents allow for controlled hardening off.
Key Spec: 7-inch vertical clearance / Adjustable rotary vents
Hardening Off and Transplant Integration
Shocking delicate roots with sudden environmental changes causes irreversible stalling. Clones must be systematically acclimated to lower humidity and higher nutrient concentrations.
Once roots push visibly through the sides and bottom of the rockwool cube or plug, the clone is functionally alive and ready for the next phase. However, moving a plant from a 90% humidity dome directly into a 50% humidity grow room will induce extreme osmotic shock. The stomata, which have remained wide open inside the dome, will suddenly dump the plant’s internal moisture into the dry air.
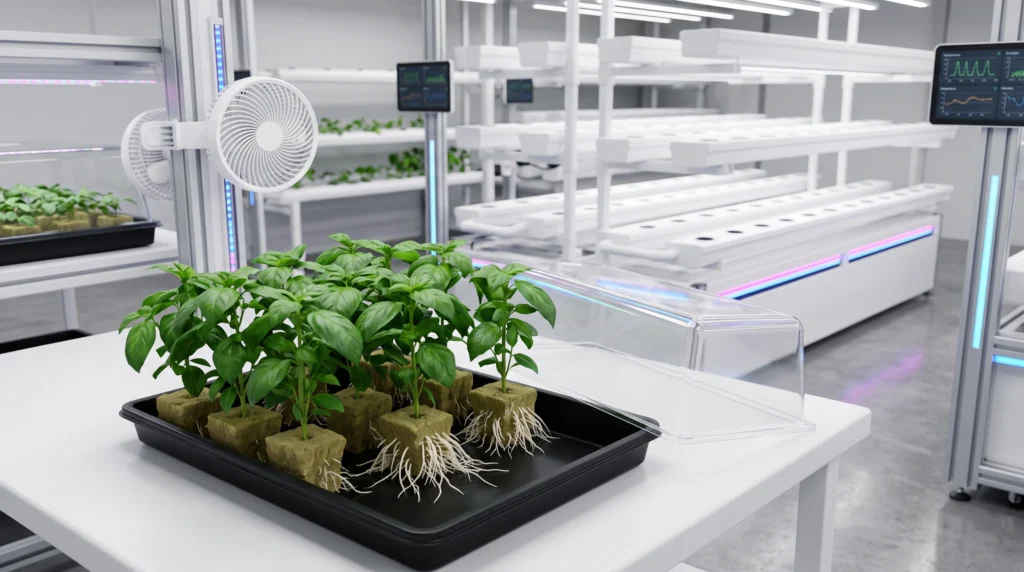
The 72-Hour Hardening Protocol
Hardening off is the process of training the stomata to regulate transpiration again.
- Day 1: When roots are visible, open the rotary vents on top of the propagation dome to 50%. This drops the humidity from 95% to roughly 80%.
- Day 2: Open the vents to 100%. Slide the dome slightly off-center to create a 1 cm gap around the edge of the tray. Humidity drops to 70%.
- Day 3: Remove the dome completely. Monitor the clones closely for the next two hours. If severe wilting occurs, spray them with a light mist and replace the dome for 12 more hours. If they stand firm, they are fully hardened and ready for transplant.
Nutrient Adjustment
During the initial rooting phase, plain pH-balanced water is required. Exposing fresh, raw roots to heavy nutrient salts causes tip burn. Once hardened off, the clones must be fed. Prepare a vegetative nutrient mix at exactly half the strength recommended by the manufacturer. Target an Electrical Conductivity (EC) of 0.8 to 1.0 mS/cm. Calibrate the reservoir using specific hydroponic nutrient guidelines.
Place the rooted cubes into your primary system—whether DWC, NFT, or drip. Ensure the irrigation flow is gentle enough not to tear the fragile new root hairs.
Quarantine Protocols
Never introduce fresh clones sourced from an outside facility directly into your main grow room. A single clone carrying spider mites or powdery mildew can trigger a catastrophic failure across your entire crop. Always isolate external clones in an entirely separate room for 7 to 10 days. Inspect the undersides of the leaves with a 60x loupe. Apply a preventative organic foliar spray, such as cold-pressed neem oil or a citric acid wash, before clearing them for integration. Reference advanced hydroponic IPM protocols for complete decontamination procedures.
Frequently Asked Questions
How long does it take for a hydroponic cutting to root?
Visible root emergence takes 7 to 14 days for most herbaceous plants and fruiting crops. Woody plants like rosemary may take 18 to 21 days. The timeline is highly dependent on ambient temperatures. Maintaining a root zone temperature of 25 C (77 F) using a dedicated heat mat guarantees the fastest possible cell division. Aeroponic cloning machines often shave 3 to 5 days off this timeline due to constant oxygen bombardment.
Why are the leaves on my clones turning yellow?
Yellowing leaves (chlorosis) on rootless clones is a sign that the cutting is cannibalizing its own mobile nutrients (like nitrogen and magnesium) to fuel root production. Mild yellowing on the lowest leaves is a normal biological response. Severe, rapid yellowing across the entire cutting indicates the light intensity is too high, forcing photosynthesis and depleting carbohydrate reserves too quickly. Dim your lights or raise the fixture higher above the dome.
Do I really need to use a rooting hormone?
Many plants, such as tomatoes, mint, and basil, readily push adventitious roots in plain water without any chemical assistance. For harder-to-root species, or in commercial setups where speed and 100% uniformity are required, Indole-3-butyric acid (IBA) hormones are essential. Hormones act as cheap insurance, guaranteeing dense root clusters and eliminating the variable waiting game of natural propagation.
Why do my cuttings develop brown, mushy stems instead of roots?
A brown, soft stem is the result of anaerobic decay, commonly caused by Pythium or Fusarium pathogens. This occurs when the propagation media is completely water-logged, stripping all oxygen from the root zone. If using rockwool, you likely compressed or squeezed the cube, destroying its porous structure. Always allow excess water to drain naturally from your media, and ensure the cuttings are not sitting in pools of stagnant water at the bottom of the propagation tray. Review hydroponic troubleshooting procedures for pathogen eradication.
Can I clone a plant while it is flowering?
Taking a cutting from a flowering plant is possible, but it requires a process called “monster cropping.” The cutting will be filled with florigen (flowering hormones) and will resist rooting. It must be forced back into a vegetative state by applying an 18/6 or 24/0 light cycle. The clone will look deformed for several weeks, throwing out single-blade leaves and strange growth patterns before reverting to normal vegetative growth. It is highly inefficient and should be reserved only for salvaging a genetic line.
System Integration and Next Steps
Vegetative propagation is an exact science governed by strict rules of humidity, temperature, and biology. Master the 45-degree underwater cut, enforce a 0.3 kPa VPD microclimate, and treat your rockwool with precision. By isolating the mechanical variables of transpiration and hormone application, you eliminate the guesswork and achieve maximum clone survival rates.
With a tray of hardened, vigorously rooted clones ready for deployment, the next phase relies entirely on managing your primary system architecture and nutrient chemistry.
Dial in your operational parameters by consulting our Hydroponic pH and EC Mastery Guide.
Watch: Precision Plant Cloning & Rooting Science
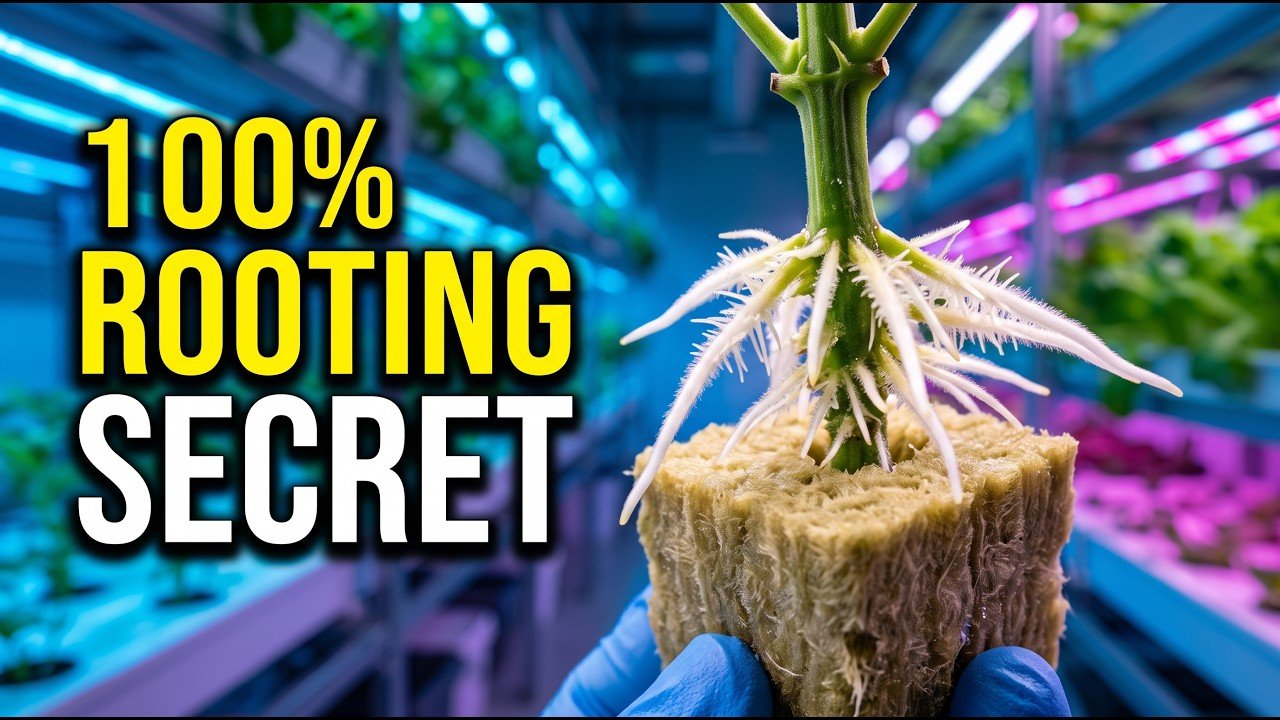
Before you take your next cuttings, watch our comprehensive video breakdown of the cloning process. We demonstrate the exact underwater 45-degree angle technique to prevent xylem embolisms, show you how to apply synthetic IBA hormone gels for rapid callousing, and explain how to maintain a strict 0.2 to 0.4 kPa VPD microclimate for 100% rooting success.

Continue Your Learning Journey