How Much Does a Hydroponic System Cost? Budget Breakdowns for Every Setup

Table of Contents
- Core Component Cost Hierarchy
- Tier 1: Passive Systems ($20 - $80)
- Tier 2: Basic Active Pump Systems ($100 - $400)
- Tier 3: Mid-Range Systems ($400 - $1,500)
- Tier 4: Commercial and Semi-Commercial Setup ($1,500+)
- The Hidden Costs: OPEX and Recurring Expenses
- Calculating Ongoing Nutrient Costs
- ROI & Break-Even: When Does Hydroponics Save You Money?
- Pre-Built Kits vs. DIY Assembly
- Frequently Asked Questions (FAQ)
- Final Setup and Next Steps
Disclosure: MistCulture summarizes verified product specs, engineering data, and community feedback. We may earn an affiliate commission if you purchase through our links. Regulations vary by location; this content is for educational purposes only.
Asking for the exact price of a hydroponic system is like asking for the price of a vehicle. You can spend $20 on a functional, stripped-down setup that gets the job done, or you can drop tens of thousands of dollars on a high-tech automated environment. The average expenditure means nothing when planning your specific grow space. Your exact hydroponic system cost scales directly with your chosen crop, the physical footprint of your grow area, and the level of automation you require. Understanding the true financial commitment requires breaking down the initial capital expenditures against the recurring operational costs that catch new growers off guard.
Core Component Cost Hierarchy
Building a hydroponic setup requires funding six primary functional areas: water containment, root anchoring, nutrient delivery, environmental monitoring, aeration, and lighting. Hardware durability and capacity dictate the initial spend for each category.
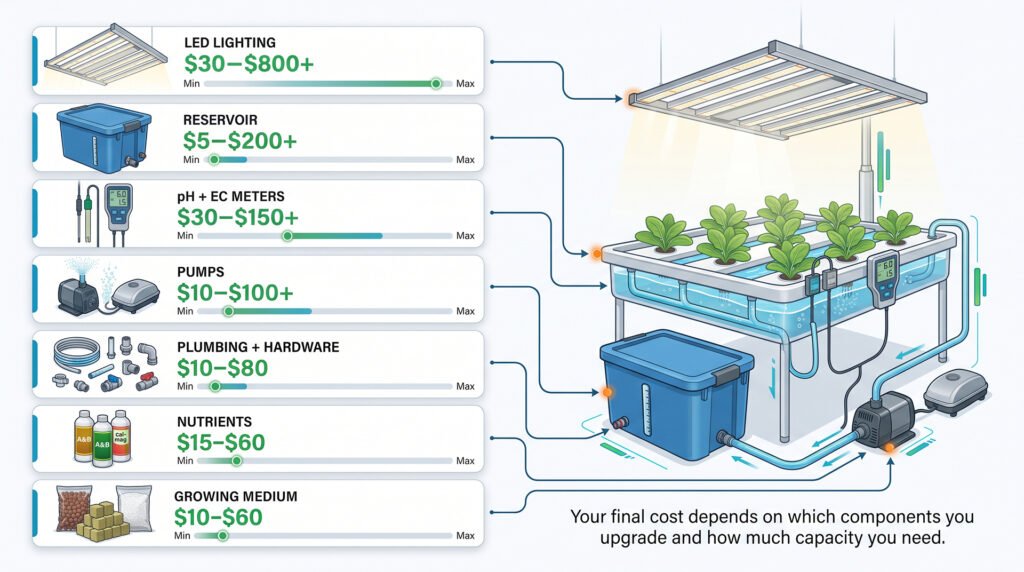
Every indoor water-based growing method relies on a baseline set of components. The price gap between entry-level and professional-grade gear usually comes down to material safety, sensor accuracy, and motor lifespan.
| Component Category | Function in the System | Average Cost Range |
|---|---|---|
| Container / Reservoir | Holds the nutrient solution and physically supports the plants. | $5 to $200+ |
| Growing Medium | Anchors roots without altering water chemistry (e.g., perlite, clay pebbles). | $10 to $60 |
| Nutrient Solutions | Supplies exact elemental ratios required for plant growth. | $15 to $60 per set |
| pH and EC Meters | Measures water acidity and electrical conductivity for nutrient loads. | $30 to $150+ |
| Pumps (Air or Water) | Moves nutrient solution or forces dissolved oxygen into the reservoir. | $10 to $100+ |
| Lighting (Indoor) | Replaces the sun using high-efficiency diodes (LEDs) for photosynthesis. | $30 to $800+ |
| Hardware & Plumbing | Timers, PVC pipes, bulkheads, and quick-connect fittings. | $10 to $80 |
Buying cheap plastics can leach endocrine disruptors into your water, which explains why food-grade, high-density polyethylene (HDPE) reservoirs cost noticeably more than standard storage totes. The same logic applies to electronics. A standard aquarium pump might last a few months pushing water through a low-pressure manifold, while a magnetic-drive submersible pump rated for continuous duty will run for years but demands a higher upfront premium.
Tier 1: Passive Systems ($20 – $80)
Passive setups eliminate moving parts, relying entirely on capillary action and static air gaps to deliver water and oxygen. They are the absolute cheapest way to start growing leafy greens and herbs at home.
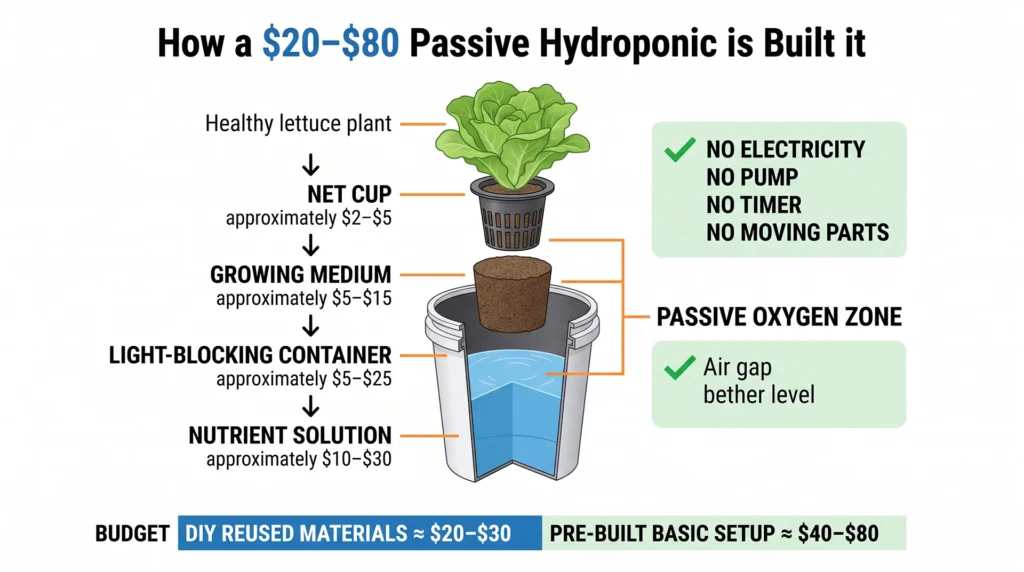
The Kratky method and basic wick systems strip hydroponic engineering down to its bare minimum. These setups require zero electricity, zero moving parts, and zero specialized plumbing. You provide a light-proof container, a net cup, a small handful of growing medium, and nutrient-enriched water. As the plant consumes the liquid, the water line drops, creating an expanding air gap that allows the upper roots to absorb atmospheric oxygen while the lower roots drink the solution.
If you are repurposing materials, a Kratky system costs almost nothing. A recycled glass jar covered in opaque tape, a bulk-bought net cup, a few clay pebbles, and a baseline nutrient mix will keep your expenses under $30 per plant. If you want to scale up slightly, purchasing a pre-drilled 5-gallon bucket with a heavy-duty net pot lid will push the cost closer to $40.
Because passive systems lack mechanical aeration, they are strictly reserved for fast-growing, low-water-demand crops like lettuce, basil, and spinach. You will rarely see successful fruiting crops like tomatoes grown in a purely passive setup because the static water depletes rapidly, causing aggressive pH swings that ruin fruit development.
Many growers living in small flats rely entirely on these methods. If you want to design a compact, low-cost urban garden, check our guide on hydroponic systems for apartments.
Tier 2: Basic Active Pump Systems ($100 – $400)
Active systems introduce mechanical aeration and water movement, enabling the cultivation of larger, heavy-feeding crops. The introduction of air pumps and timers shifts the budget from tens of dollars to the low hundreds.
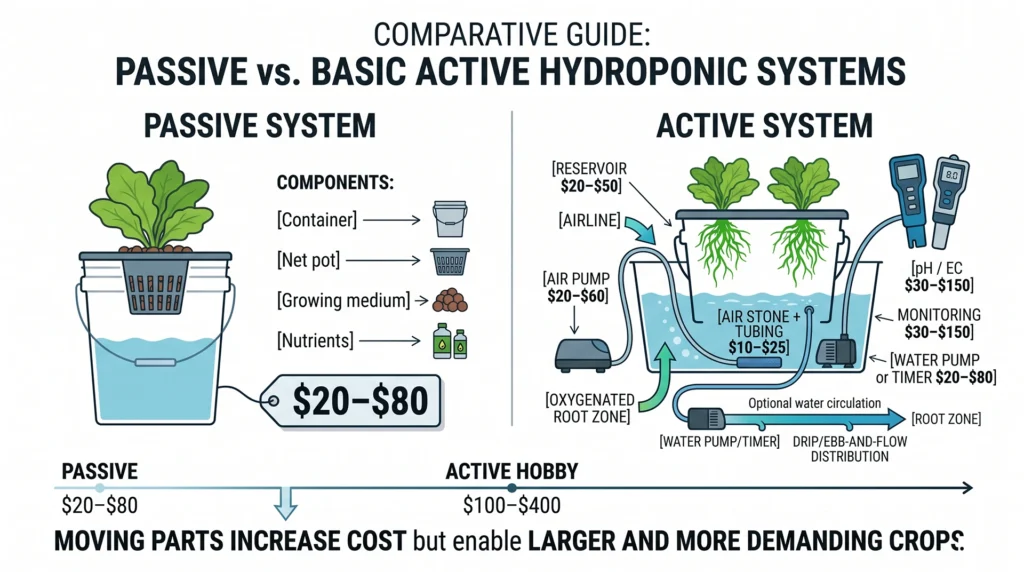
When you transition from passive growing to active growing, you introduce dissolved oxygen dynamics. Deep Water Culture (DWC) and small Ebb-and-Flow (Flood and Drain) setups represent the sweet spot for serious hobbyists.
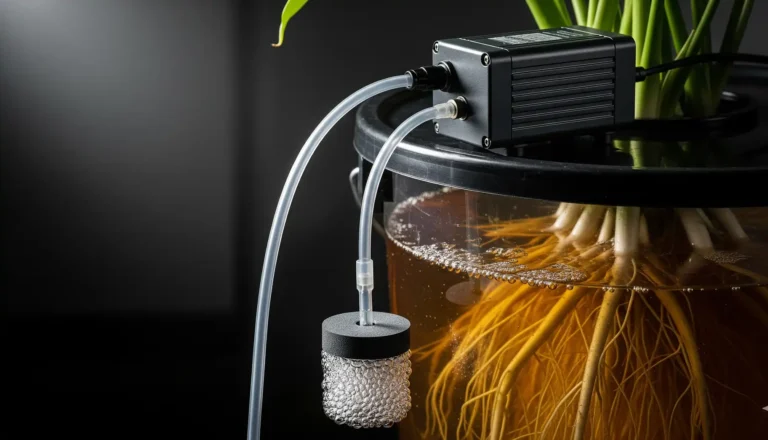
A standard DWC setup requires a 5-gallon bucket, a net pot lid, a dedicated air pump, airline tubing, and an air stone. Building a single-bucket DWC system yourself usually costs between $50 and $120. The variation in cost depends entirely on the quality of your air pump and the precision of your sensors. If you run a loud, cheap diaphragm pump, you save money but sacrifice your sanity. Upgrading to a high-quality, insulated air pump increases the price but keeps your living space livable. You can review the exact hardware needed to build a noise-free setup in our DIY DWC quiet setup breakdown.
Small Ebb-and-Flow kits introduce water pumps and digital timers. A 20-gallon reservoir beneath a 2×2 foot flood tray requires a submersible water pump capable of lifting the nutrient solution against gravity. The hardware alone for a modest Ebb-and-Flow tray, reservoir, pump, and bulkhead fittings will run between $150 and $300 before you even buy the growing medium.

Why it’s necessary: Basic aquarium pumps fail quickly against the backpressure of heavy nutrient reservoirs. This commercial-grade pump features a multi-outlet manifold to drive heavy oxygenation across several DWC buckets simultaneously.nnKey Spec: 45 liters per minute (LPM) output with 6 outlets.
Tier 3: Mid-Range Systems ($400 – $1,500)
Moving to multi-site recirculating systems and climate-controlled grow tents pushes the capital expenditure above $500. Lighting and ventilation hardware become the dominant expenses at this tier.
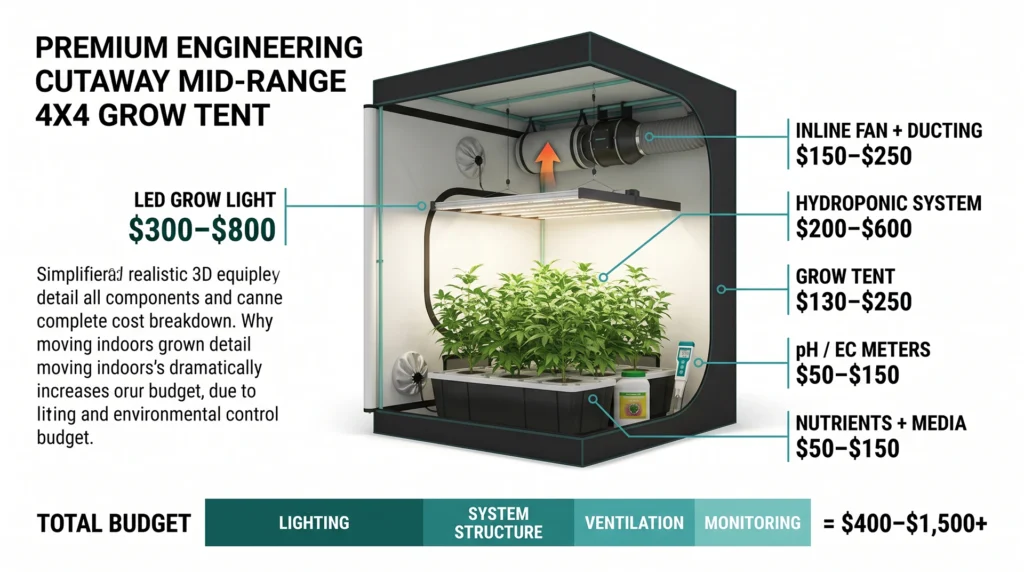
Mid-range budgets apply to growers who want to produce substantial yields indoors regardless of the season. This tier includes Recirculating Deep Water Culture (RDWC) arrays, long-run Nutrient Film Technique (NFT) PVC channels, and fully enclosed grow tents.
Building a 4-site RDWC system requires connecting multiple 5-gallon or 8-gallon buckets with large-diameter PVC pipes (usually 2-inch or 3-inch) to a central controller reservoir. You must buy specialized uniseals or bulkhead fittings to ensure the connections do not leak, alongside a heavy-duty inline water pump to circulate the liquid through the entire manifold. A well-designed RDWC structural build costs between $400 and $800. If you are calculating the exact head pressure needed to move liquid through these networks, reference our hydroponic pump sizing guide.
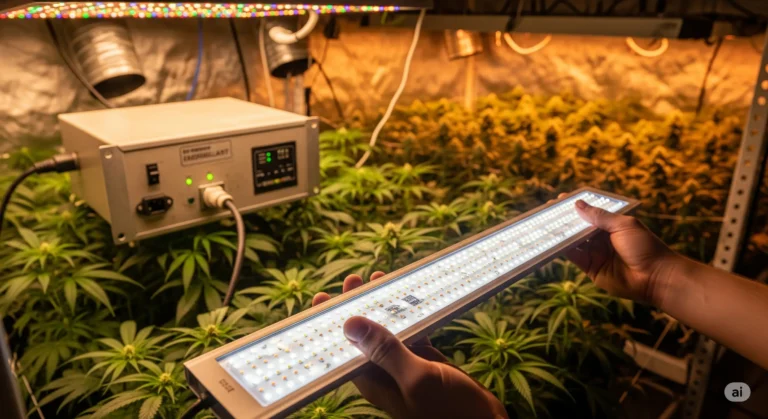
However, the real financial hit at this tier comes from environmental control. Growing high-yield fruiting crops indoors requires a light-proof environment and high-intensity lighting. A quality 4×4 foot grow tent costs $130 to $250. To light that 16-square-foot footprint properly, you need a full-spectrum LED board utilizing top-tier diodes (like Samsung LM301H or LM301B). A genuine 400-watt to 600-watt LED fixture will cost between $300 and $800. You cannot skimp on photons if you want dense yields. Ensure you are providing the correct photon density by consulting our LED PPFD distance guide.
Ventilation also becomes mandatory. A 6-inch inline exhaust fan paired with a carbon filter and ducting adds another $150 to $250 to your invoice. Without this exhaust system, the heat from the lights will bake your plants, and the humidity will trigger powdery mildew. For a complete breakdown of tent enclosures, review our grow tent buying guide.
To achieve optimal canopy coverage in a 3×3 or 4×4 footprint without generating excessive heat, a commercial-grade bar style fixture is essential. The most efficient, budget-friendly option in this class is the VIPARSPECTRA KS3000.
VIPARSPECTRA KS3000 LED Grow Light
Best Uniform Coverage for 3×3 / 4×4 Grow Tents
- Uniform PAR Distribution: Bar-style design prevents hot spots in the center and weak light at the corners.
- Premium Diodes: Equipped with Samsung LM301H diodes for high-efficiency spectral output.
- Passive Cooling: Large aluminium heatsinks run completely silent while protecting your tent’s temperature.
- Precise Dimming: 0-100% dimmer dial allows you to scale intensity from seedling to bloom.
Tier 4: Commercial and Semi-Commercial Setup ($1,500+)
Scaling up to warehouse racks or advanced greenhouse environments shifts the focus from basic plant survival to heavy automation, HVAC management, and rigorous climate sensing.
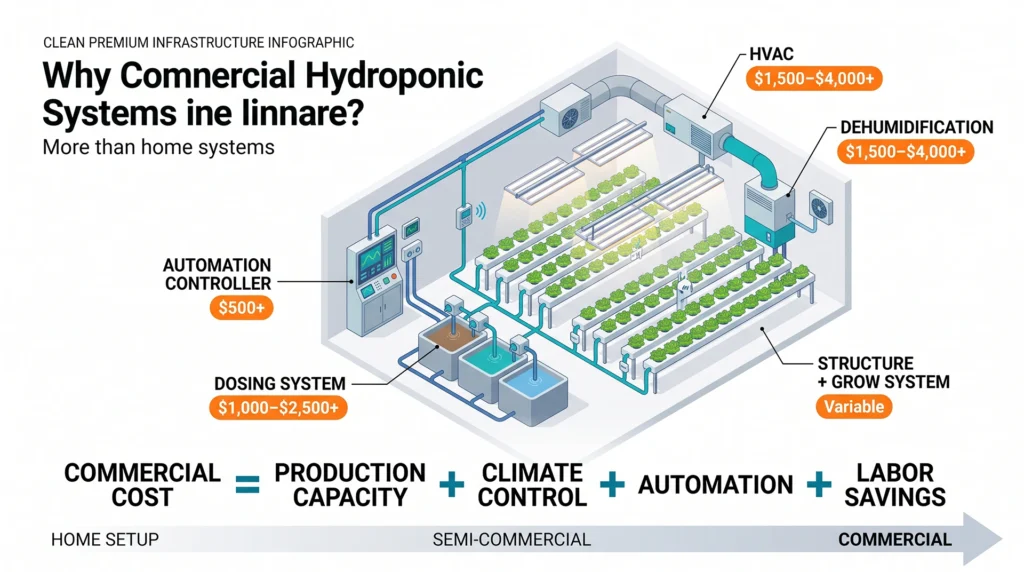
When you cross the $1,500 threshold, you are no longer just buying plastic tubs and air stones; you are building an agricultural infrastructure. Commercial systems rely on advanced climate automation, heavy-duty structural racks, commercial dehumidification, and automated nutrient dosing systems.
A standard commercial installation requires calculating precise Vapor Pressure Deficit (VPD) metrics. You must regulate temperature and humidity perfectly to ensure the stomata on the plant leaves remain open. Managing this requires split-unit air conditioners (Mini-Splits) and commercial-grade dehumidifiers (like Quest or Anden units) that cost between $1,500 and $4,000 each.
Automation replaces manual labor at this stage. Instead of mixing nutrients in a bucket by hand, commercial growers use peristaltic dosing pumps tied to digital controllers. These controllers sample the water chemistry continuously and inject exact milliliters of Part A, Part B, and pH buffers to maintain absolute stability. A base-level environmental controller capable of managing lights, humidity, temperature, and CO2 injection will cost over $500, with complete dosing manifolds easily exceeding $2,500. To navigate entry-level automation hardware, see our review of the best hydroponic controllers under $200.
If you are planning a facility build-out and need to project your return on investment against these heavy capital costs, you should map out your exact production limits using our hydroponic yield calculator.
The Hidden Costs: OPEX and Recurring Expenses
Building the system is only the first financial hurdle. Electricity, calibration fluids, replacement parts, and nutrient refills form a continuous operational expense (OPEX) that must be budgeted accurately.
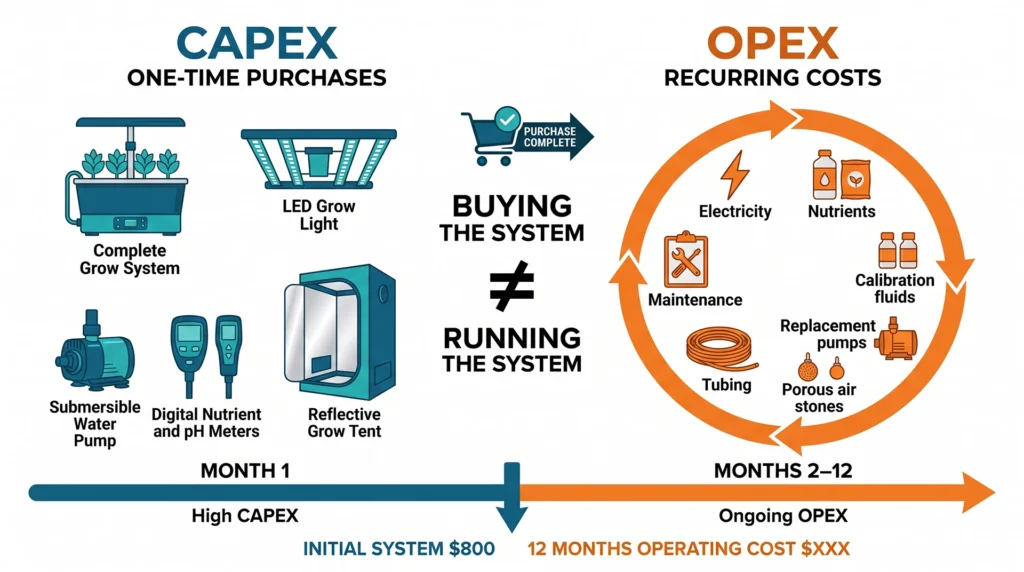
Many beginners spend their entire budget constructing the physical system and forget they have to operate it for months. Operational expenditures can drain your wallet fast if you fail to run the math on your baseline utilities and consumables.
Electrical Consumption
Indoor lighting and climate control run up the electric bill quickly. To find your exact cost, you must look at the true wattage draw of your hardware, multiply it by the hours it runs per day, and calculate it against your local kilowatt-hour (kWh) rate.
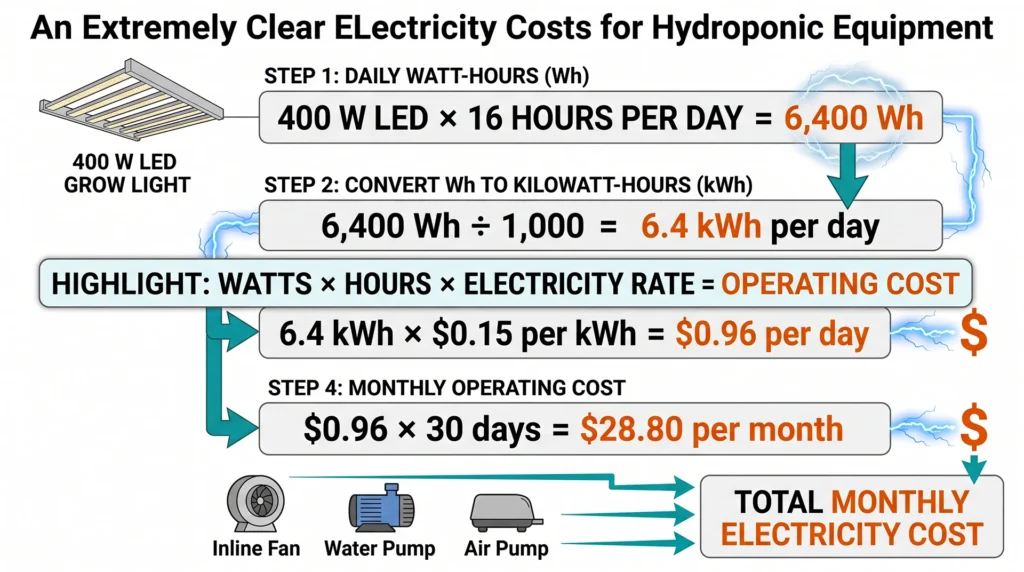
Real-World Electricity Example
Assume you are running a 400-watt LED fixture for 16 hours a day during a vegetative growth phase.
When you add inline fans running 24 hours a day, water pumps, and air compressors, a standard 4×4 grow tent usually costs between $35 and $55 a month in electricity. If you need strategies to mitigate this constant drain, read our hydroponic power savings guide.
Water & Seed Consumables
While power and nutrients are your primary recurring costs, a complete budget must account for water and crop starter materials.
Meter Calibration and Maintenance
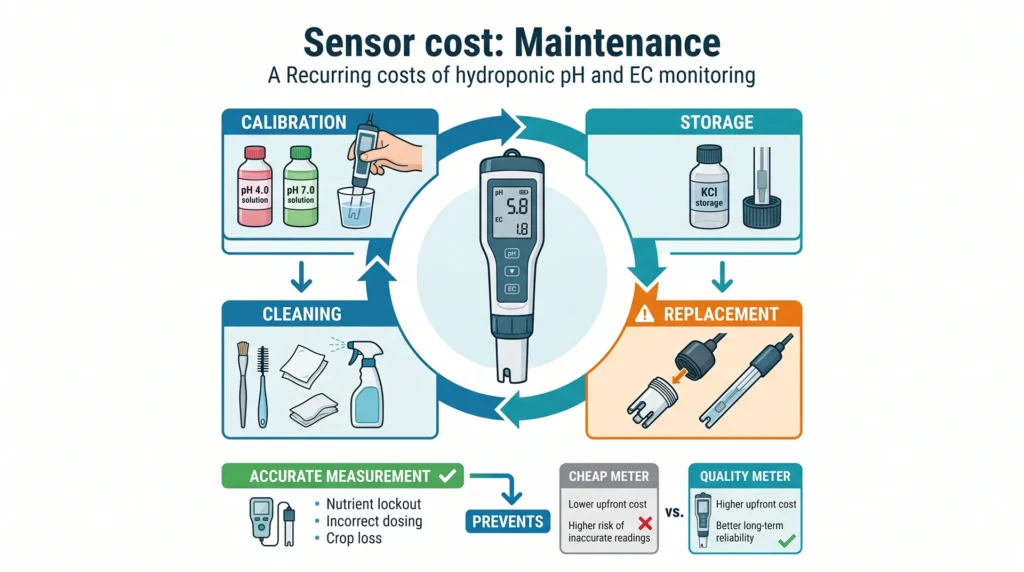
Relying on cheap pH meters will destroy your crop. A $15 yellow pH pen from an online marketplace will lose its calibration quickly, causing you to chase false readings and accidentally lock out nutrient absorption. You need a reliable meter (like a Bluelab or Apera instrument) which costs between $50 and $150.
These meters require constant upkeep. You must purchase pH 4.0 and pH 7.0 calibration fluids regularly. You also need electrode storage solution (KCl) to keep the glass bulb wet; if the bulb dries out, the $100 meter is permanently ruined. Budget at least $30 to $50 a year just in calibration and storage fluids. Mastering this routine is non-negotiable, so review our hydroponic pH and EC mastery guide.
Wear and Tear Replacements
Hydroponic systems degrade. Submersible water pumps suffer from calcium scaling and impeller wear, usually requiring replacement every 18 to 24 months. Air stones clog with mineral deposits and bio-slime, heavily reducing dissolved oxygen output. You should replace cheap air stones every 3 to 6 months. Vinyl tubing exposed to intense light will grow algae internally and harden over time, requiring periodic replacement to prevent leaks.
While you can find cheap pH pens online for $10, they drift constantly and fail within months—often leading to toxic nutrient lockouts. To protect your crop, investing in a reliable, professional-grade monitoring instrument is the smartest move you can make.
Calculating Ongoing Nutrient Costs
💰 Hydroponic Cost Estimator PRO v3.0
Precision cost planning with CAPEX/OPEX breakdown, per‑plant analysis, and energy projections. Auto‑saves
🔗 Embed This Tool
Embed just the cost estimator (no extra page elements) on your own site. The iframe auto‑adjusts its height.
Powered by MistCulture
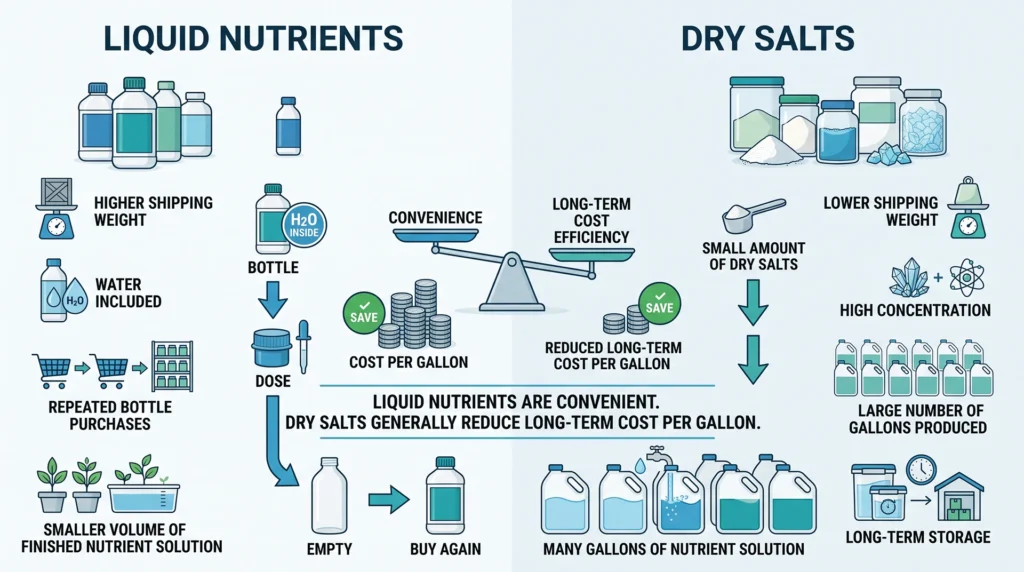
Nutrient pricing relies on the concentration ratios of the fertilizer. Dry salt nutrients cost significantly less per gallon of mixed reservoir water than pre-mixed liquid nutrient bottles.
Nutrient costs catch many beginners off guard. Buying flashy bottles of pre-mixed liquid nutrients at the local hydro shop feels convenient, but you are largely paying to ship water. Liquid nutrient programs often require mixing 10ml to 15ml of product per gallon of reservoir water. If you run a 40-gallon RDWC system and change the water every two weeks, you will burn through a quart-sized bottle of liquid nutrients in a single month. A three-part liquid flora series usually costs around $40 per set.
Alternatively, shifting to dry agricultural salts (like Masterblend or Jack's Nutrients) slashes your operational expenditure. Dry salts require you to mix the calcium nitrate, magnesium sulfate, and base N-P-K powders yourself. A $40 bulk kit of dry salts can yield hundreds of gallons of mixed nutrient solution, lasting a home grower over a year. To dial in the exact parts-per-million (PPM) values for your dry or liquid salts, input your reservoir volume into our hydroponic nutrient calculator.
ROI & Break-Even: When Does Hydroponics Save You Money?
The primary financial barrier to hydroponics is the initial setup cost. However, because ongoing seed, water, and nutrient costs are incredibly low, high-yield systems can pay for themselves surprisingly fast.
Hydroponic ROI & Break-Even Timelines
If you consume organic lettuce, kale, and sweet basil weekly, a $100 DWC setup will pay for itself in less than half a year compared to buying costly, pre-packaged supermarket greens.
Producing premium vine tomatoes, strawberries, or peppers indoors requires high-intensity LED lighting, pushing upfront costs into the mid-range tier. However, because of the massive yields per square foot, you can expect to break even within your first full year of operation.
Pre-Built Kits vs. DIY Assembly
Buying a pre-built kit guarantees structural compatibility and faster setup times, but building a DIY system offers superior customization and massive savings on hardware margins.
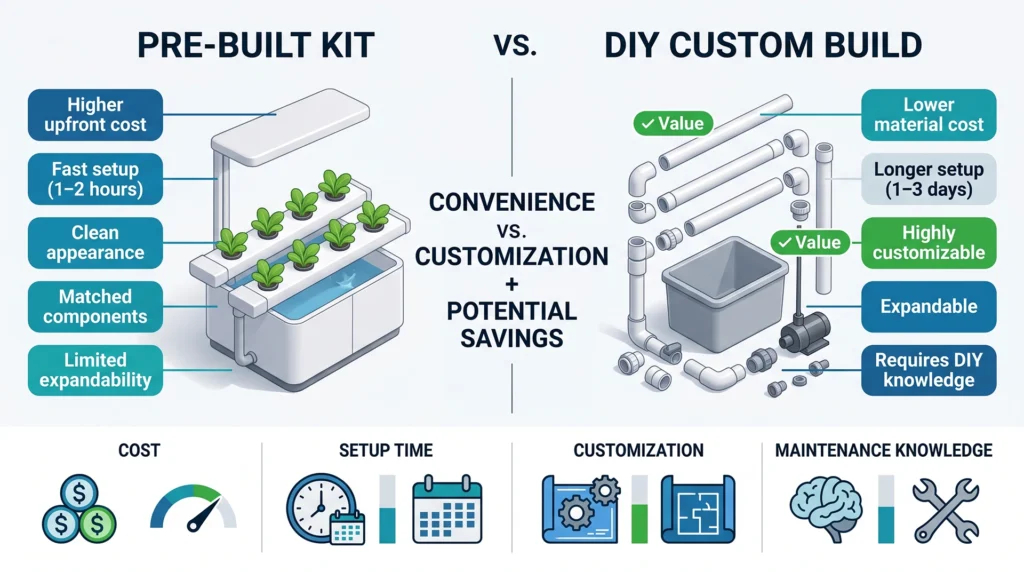
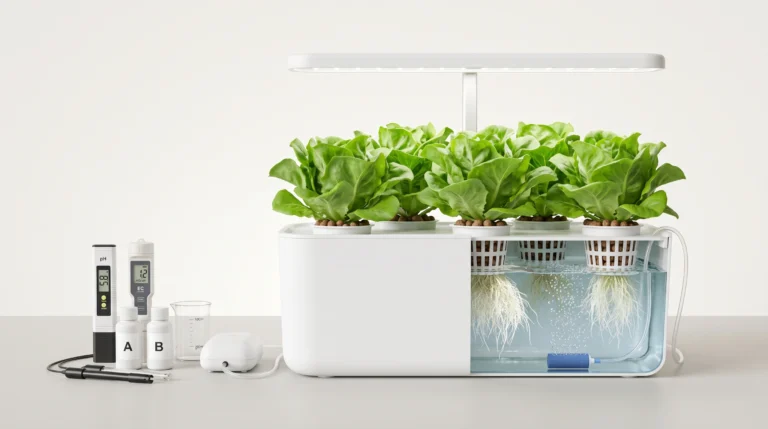
Deciding between a manufactured kit and a DIY build impacts both your wallet and your setup time. Commercial kits package the reservoir, medium, pumps, and structural racks into one clean box. They look excellent in a living room and take the guesswork out of plumbing dynamics. For a complete analysis of commercial offerings, see our hydroponic kits review.
However, you pay a steep convenience tax for these kits. A brand-name vertical tower system often retails for $600 to $900. By comparison, you can construct a highly effective PVC vertical tower using standard 4-inch sewer pipe, a 5-gallon bucket, a submersible pump, and a heat gun. The DIY materials for a high-yield vertical tower rarely exceed $100. If you are willing to measure, cut, and glue your own plumbing, follow our guide to build a DIY vertical hydroponic tower under $100.
| Core Factor | 🏆 DIY Custom Builds (Editor's Choice) | Pre-Built Commercial Kits |
|---|---|---|
| Upfront Cost | Ultra Low: pay for raw materials only. Standard vertical tower can cost under $100. | High Premium: steep retail markups for convenience. Towers average $600 - $900+. |
| Aesthetics | Utilitarian, functional, and industrial. Easy to hide with vinyl wrap if desired. | Sleek, clinical, high-gloss finishes designed for living room placement. |
| Expandability | Infinite: easily integrated with custom manifolds, 3D printed parts, or scaled pipes. | Restricted: heavily reliant on proprietary snap-locks, tubes, and replacements. |
| Setup Time | Requires 1 to 3 days of cutting, drilling, and plumbing adjustments. | Plugs in 1 to 2 hours out of the box with custom instructional manuals. |
| Maintenance | Highly intuitive; since you built it, you know exactly how to fix plumbing blocks. | Varies; simple to operate but can require expensive proprietary parts when a pump fails. |
Bluelab PENPH pH Pen
The Gold Standard for Accurate Hydroponic pH Testing
- Laboratory Grade Accuracy: Fully temperature-compensated readings prevent misleading pH swings.
- Double Junction Probe: Tough glass sensor provides a longer lifespan and faster readings.
- Simple Calibration: Quick, successful calibration indicator keeps your measurements on track.
- Fully Waterproof: Rugged design floatable in reservoirs—built to survive commercial grow rooms.
Frequently Asked Questions (FAQ)
What is the absolute cheapest hydroponic system I can build?
The Kratky method is the cheapest approach. You only need a container that blocks light (like a painted coffee can or mason jar), a net cup, some growing medium, and nutrient solution. It requires no electricity and costs less than $20 to set up.
Is growing hydroponically cheaper than buying vegetables at the grocery store?
Yes, but only after you pass the break-even point on your initial hardware investment. Once your system is built, the cost of seeds, water, and exact nutrient doses makes growing leafy greens and herbs significantly cheaper per ounce than buying premium organic produce at the store.
How much does electricity for a hydroponic system cost per month?
A basic setup with a small air pump costs less than $2 a month. A fully loaded 4x4 grow tent running a 400W LED light, exhaust fans, and water pumps will cost between $30 and $60 a month, depending on your local kWh utility rate.
Why are hydroponic nutrients so expensive?
You are paying for highly refined, water-soluble minerals that leave zero residue or heavy metal buildup in the reservoir. Liquid nutrients cost more because you pay for the water weight and shipping. Dry salt nutrients are far more cost-effective for budget-conscious growers.
Do I have to buy an expensive pH meter?
While you can use chemical pH drop kits for $10, they are difficult to read accurately if your nutrient solution is dark or dyed. A reliable digital pH meter prevents nutrient lockout and is highly recommended if you are growing sensitive or high-value crops.
Are commercial hydroponic kits worth the premium price?
If you lack DIY skills, tools, or the time to troubleshoot plumbing leaks, a commercial kit is a worthwhile investment. They provide matched components that work perfectly out of the box. If you are handy, you can replicate almost any commercial kit for a fraction of the price.
Final Setup and Next Steps
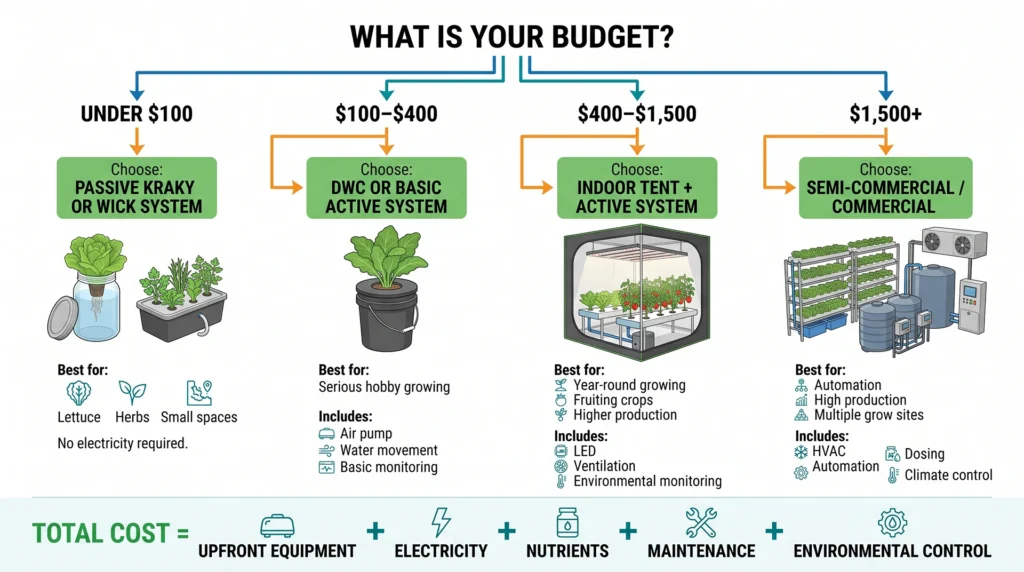
Evaluating your hydroponic system cost requires looking past the physical buckets and pipes. You must account for the ongoing costs of lighting, HVAC infrastructure, pH management, and nutrient consumption. Whether you opt for a highly efficient $40 passive system on your windowsill or a $2,000 active RDWC array inside a climate-controlled tent, proper budgeting guarantees that your garden stays operational over the long haul.
Map your expected expenditures against the specific crops you intend to grow. If you are ready to start planning your specific resource load, run your numbers through our comprehensive suite of calculators on the Tools and Resources Hub to ensure your nutrient dilutions and yield expectations match your hardware investments.
Prefer Visual Learning? Watch the Complete Video Guide
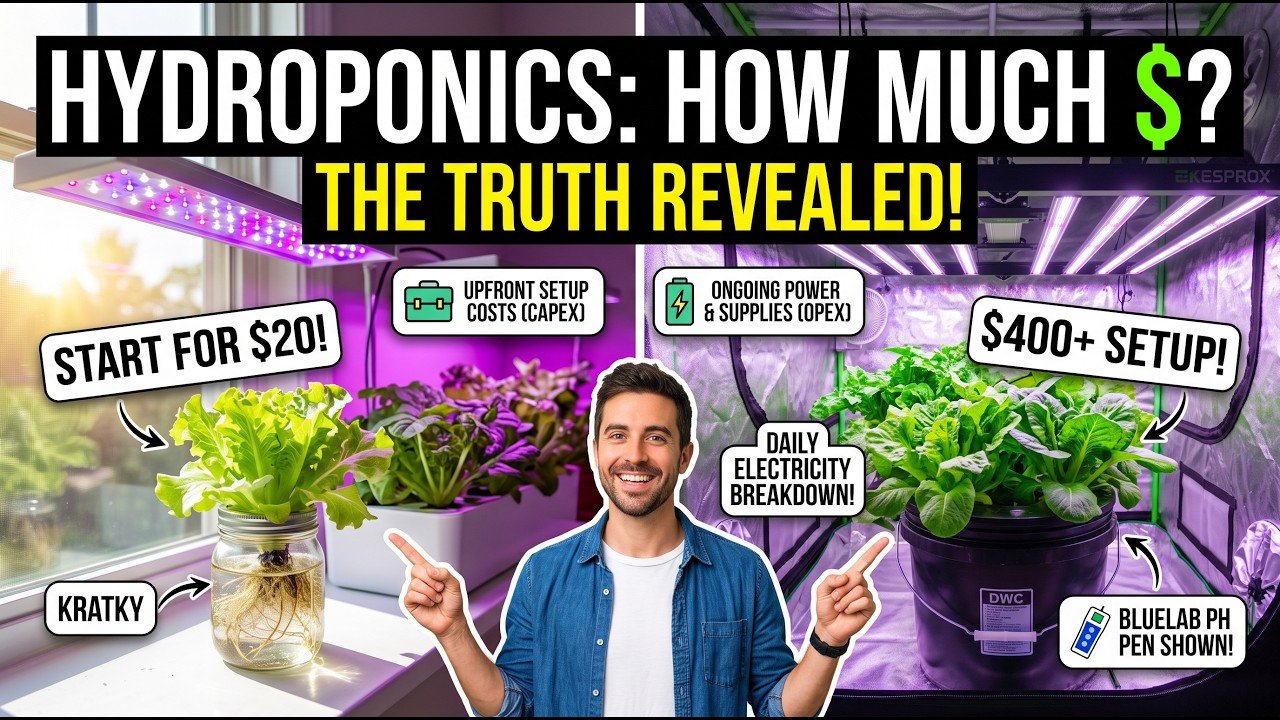
If you want to see these budget tiers and systems in action, we’ve put together an exhaustive video breakdown.
We compare the visual footprints of simple $20 window setups against high-tech commercial rigs, while guiding you step-by-step through grow light electricity calculations and hidden upkeep expenses. Watch below to visual-proof your indoor growing budget before spending a single dollar.

Continue Your Learning Journey