10 Biggest Hydroponic Mistakes Beginners Make (And How to Avoid Them)

Table of Contents
- 1. Water Chemistry Volatility: Solving pH Drift, Carbonate Alkalinity, and EC Antagonism
- 2. Anoxic Root Zones and Overwatering in Substrates
- 3. Depleting Dissolved Oxygen in Water-Culture Systems
- 4. Overfeeding and Salt Toxicity (Nutrient Burn)
- 5. Light Leakage in Reservoirs and Algae Colonization
- 6. Mismatched Crop Selection for Beginner System Architectures
- 7. Skipping the Daily System Audit (The 5-Minute Checklist)
- 8. Reactive Over-Correction vs. Systematic Diagnosis
- 9. Germination Errors & Transplant Placement
- 10. Transform Crop Failure into Actionable Data
- Master Hydroponic Troubleshooting & Diagnostic Matrix
- Frequently Asked Questions (FAQ)
- Conclusion & Next Steps
Disclosure: MistCulture summarizes verified product specs, engineering data, and community feedback. We may earn an affiliate commission if you purchase through our links. Regulations vary by location; this content is for educational purposes only.
Soilless culture offers unparalleled growth rates and precise control over plant development, but removing soil strips away the natural buffer capacity that protects roots from environmental and chemical volatility. In soil, organic matter, clay particles, and microbial networks buffer temperature swings, absorb excess mineral salts, and maintain chemical equilibrium around root systems. In hydroponic culture, plant roots are directly exposed to the nutrient solution and substrate environment. A minor calculation error in fertilizer concentration, a two-degree rise in water temperature, or an unchecked pH shift can cause severe crop stress or plant death within forty-eight hours.
Most crop failures in home setups, greenhouses, and commercial vertical farms stem from a predictable set of mistakes. Understanding the underlying physics, chemistry, and plant physiology behind these operational errors makes every problem predictable, measurable, and straightforward to correct.
1. Water Chemistry Volatility: Solving pH Drift, Carbonate Alkalinity, and EC Antagonism
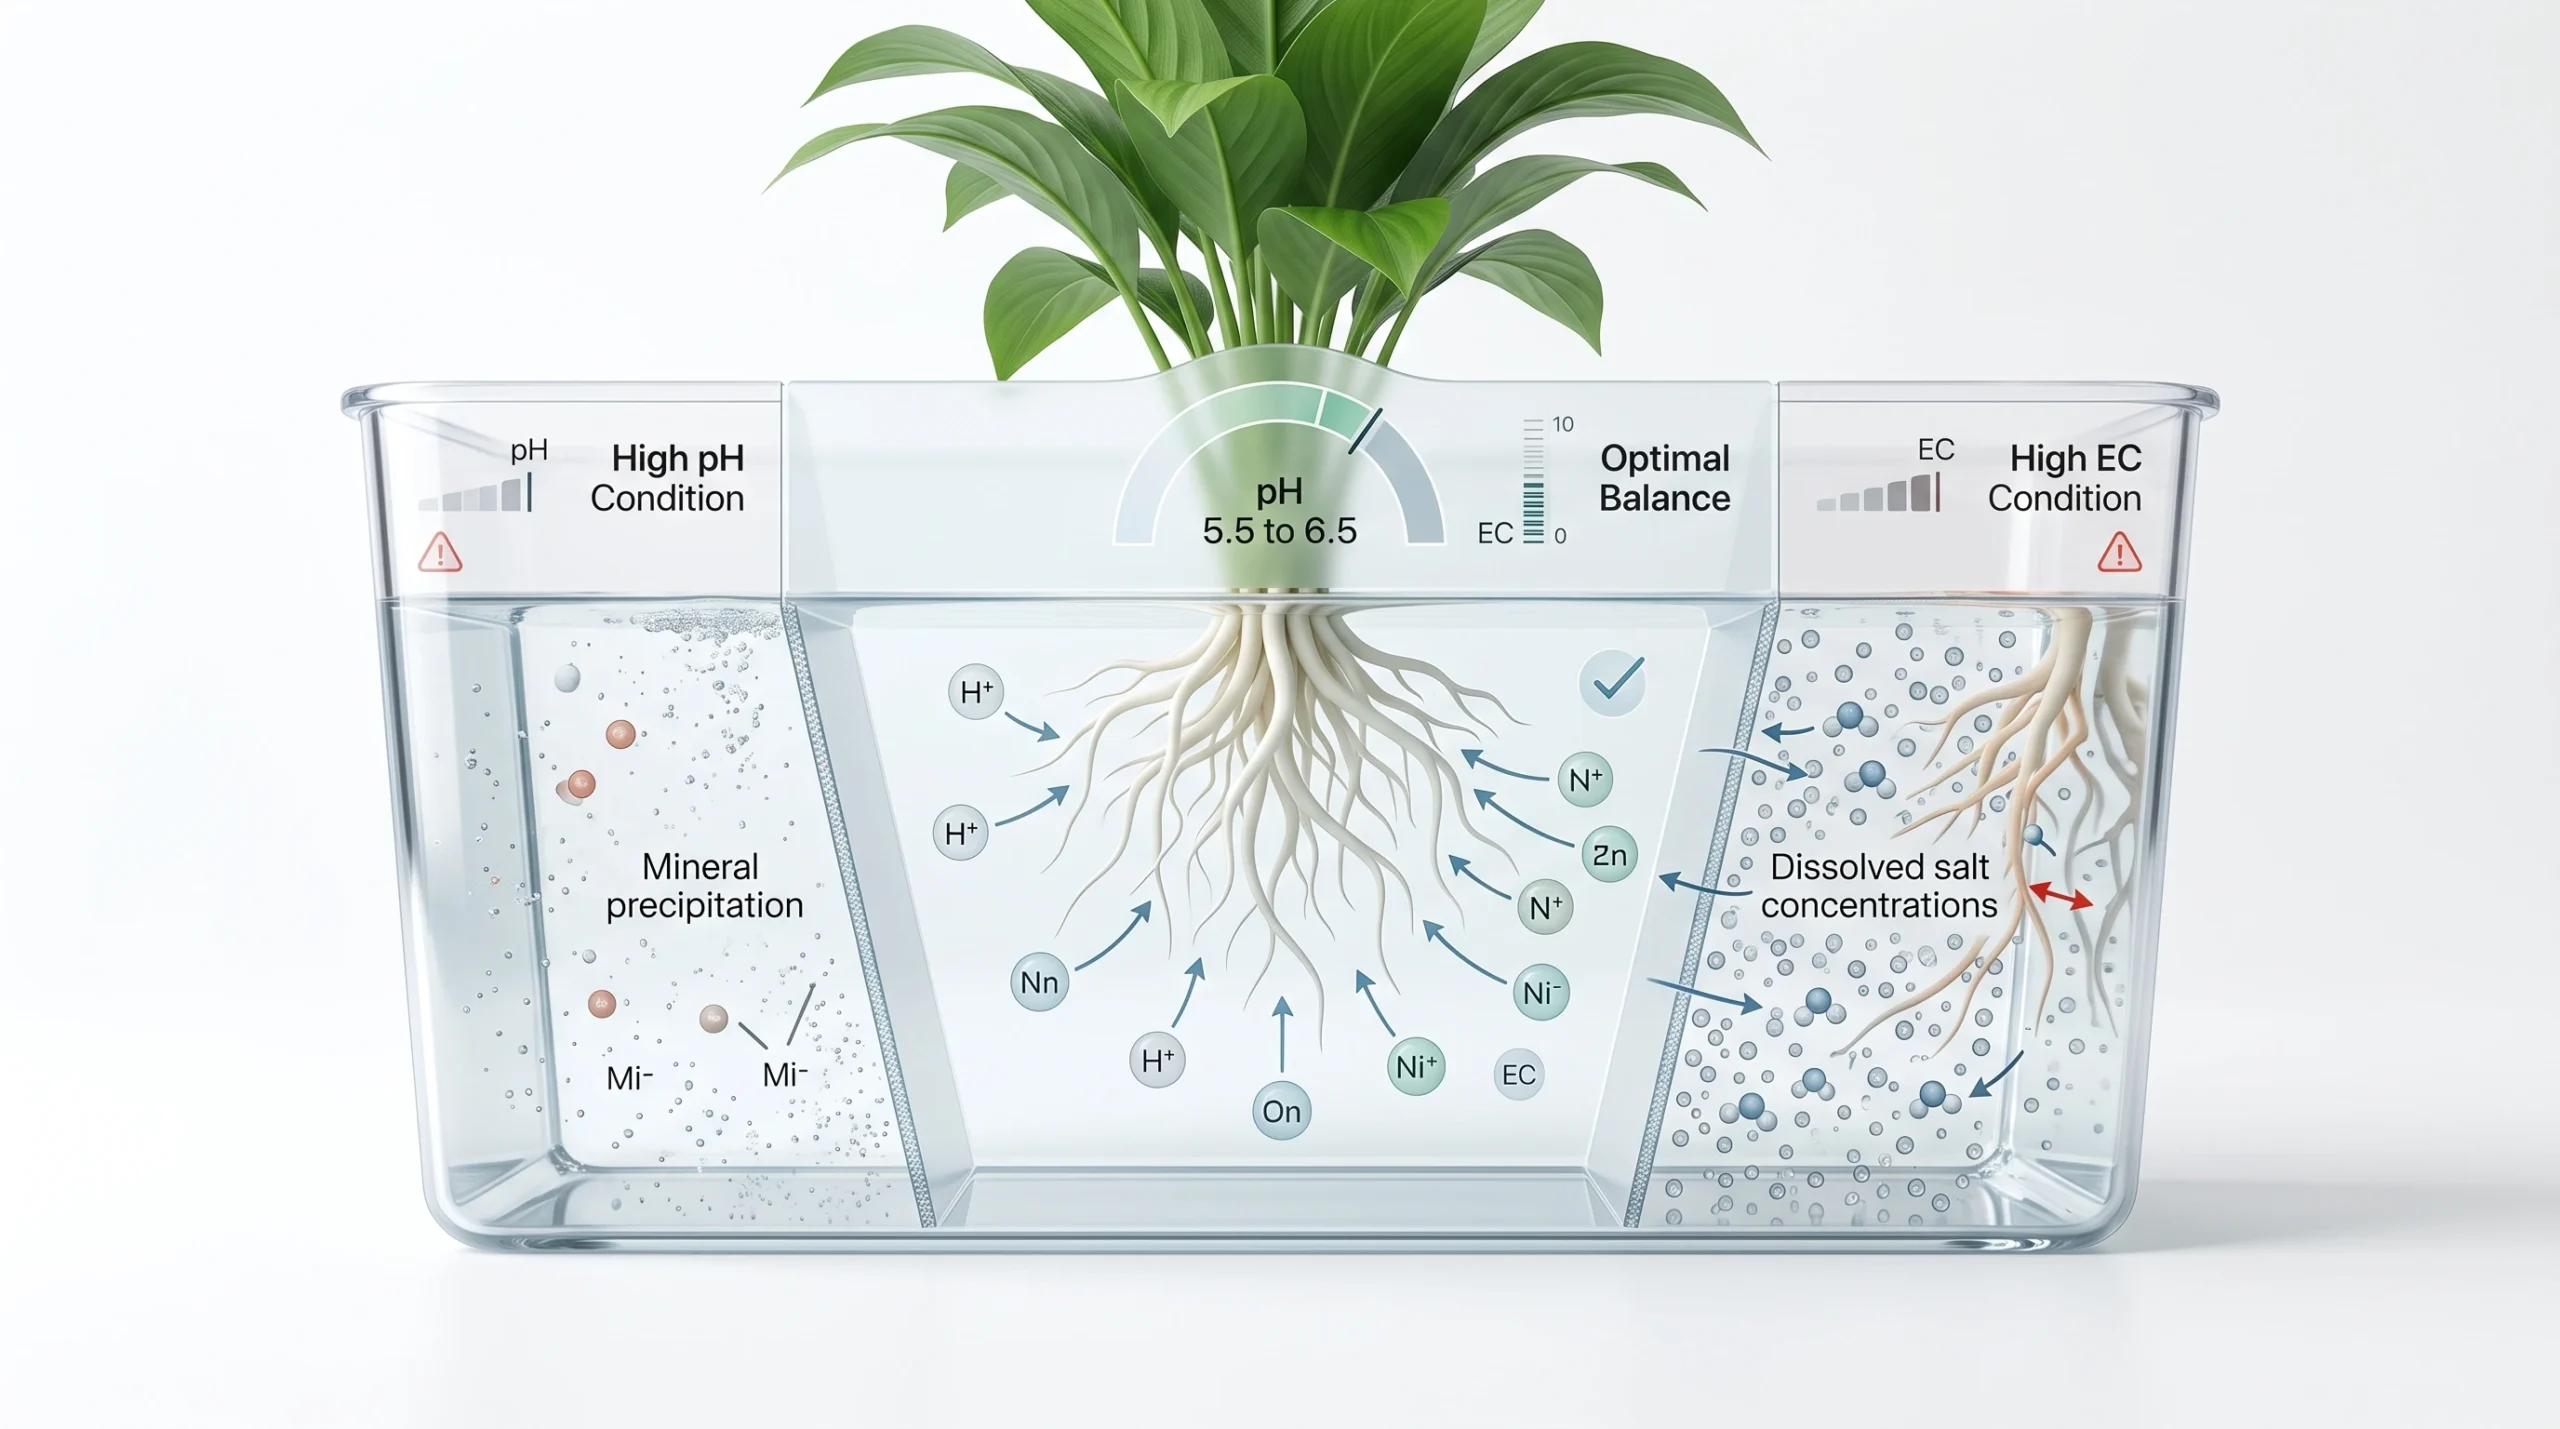
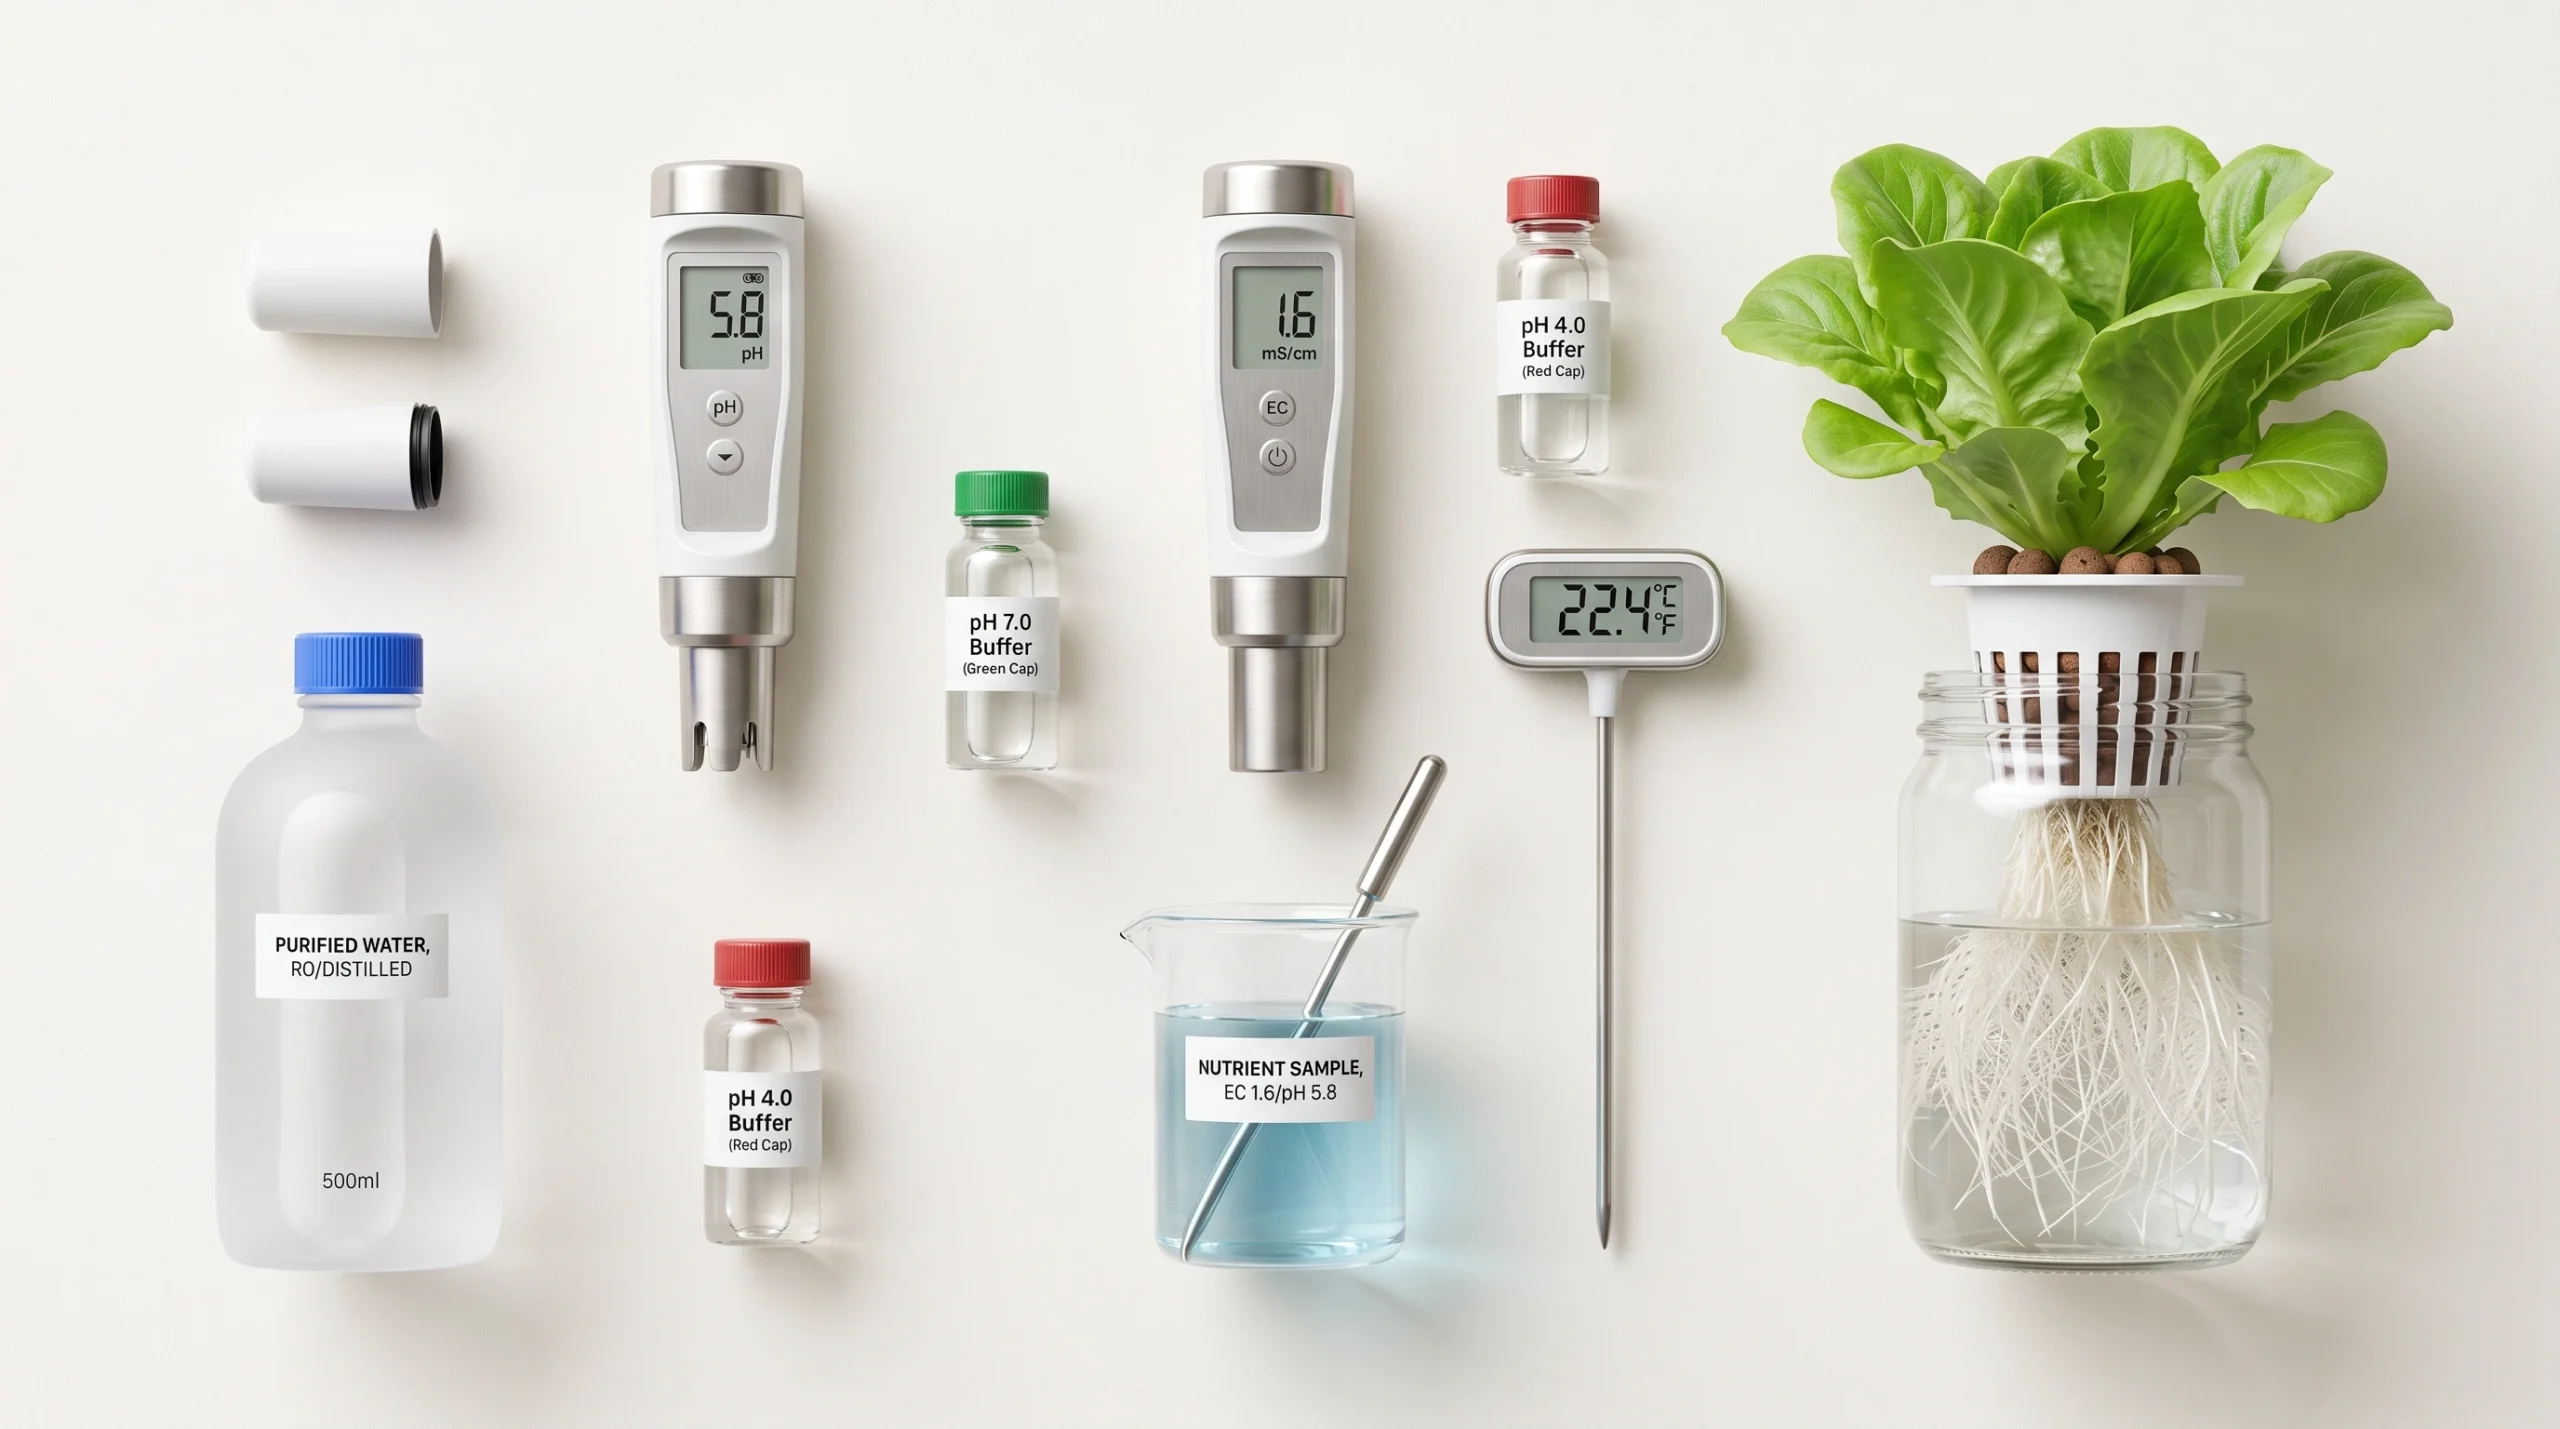
Water chemistry is the foundation of hydroponic crop production. The two primary metrics that dictate solution balance are pH (hydrogen ion activity) and Electrical Conductivity (EC, measured in mS/cm or µS/cm). The pH scale is logarithmic, meaning a single pH unit change represents a tenfold change in hydrogen ion (H+) concentration. In hydroponic systems, maintaining solution pH between 5.5 and 6.5 ensures that all essential mineral elements remain in a soluble, plant-available form. When solution pH rises above 6.5, iron (Fe2+/Fe3+), manganese (Mn2+), and zinc (Zn2+) form insoluble hydroxides and oxides, precipitating out of solution as a solid residue at the bottom of the reservoir. Conversely, when pH drops below 5.5, calcium (Ca2+), potassium (K+), and magnesium (Mg2+) absorption drops significantly, while the availability of micronutrients like manganese increases to toxic levels.
⚠️ Master-Level Chemistry Note: pH vs. Total Alkalinity Many beginners confuse water pH with total alkalinity. pH measures the active concentration of hydrogen ions, whereas alkalinity is a measure of the water’s buffering capacity—specifically, its ability to neutralize acids (primarily due to dissolved carbonate and bicarbonate ions).
- Low Alkalinity (Soft Water): If your starting tap water is low in minerals, its pH may be high (e.g. 8.0) but it has low buffering capacity. Adding a tiny amount of pH Down will permanently drop the pH.
- High Alkalinity (Hard Water): If your water is high in carbonates, adding pH Down will temporarily lower the pH, but the carbonate buffer will absorb the acid, causing the pH to “bounce” back up within 24 hours. If your tap water has an alkalinity above 100 mg/L (as CaCO3), you must use a Reverse Osmosis (RO) system or a specialized “Hard Water” nutrient formulation rich in nitric/phosphoric acid to neutralize the carbonates.
Electrical Conductivity measures the total concentration of dissolved ionic salts in the solution. While EC indicates the strength of the fertilizer mix, it does not reveal the individual ratios of specific elements. High EC levels raise the osmotic pressure of the nutrient solution relative to the internal fluid of the root cells. When the external solution becomes hypertonic (excessively high EC), roots cannot take up water via osmosis. In severe cases, water is drawn out of root cells into the solution, causing cell plasmolysis, leaf margin necrosis, and root dieback.
💡 The Secret to Preventing Iron Lockout: Chelate Selection When pH drifts above 6.0, standard iron EDTA (the cheap chelate found in most basic hydroponic fertilizers) begins to degrade and precipitate, causing interveinal chlorosis (leaf yellowing). For bulletproof nutrient uptake, use fertilizers formulated with Fe-DTPA (stable up to pH 7.0) or Fe-EDDHA (stable up to pH 9.0). Standardizing on Fe-DTPA ensures that iron remains fully plant-available even during standard daily pH drifts up to 6.8. Read our master comparison guide on iron chelation in hydroponics for a complete chemical breakdown.
Worked Example: Adjusting EC and Calculating Dilution
If a 100-liter reservoir has drifted up to an EC of 2.8 mS/cm due to plant water uptake, and the target EC for vegetative lettuce is 1.2 mS/cm, calculate the volume of fresh water (Vw) required to drop the EC to the target level using the mass balance dilution formula:
- C1 = 2.8 mS/cm (Initial EC)
- V1 = 100 Liters (Initial Volume)
- C2 = 1.2 mS/cm (Target EC)
- V2 = Final Volume
V2 = 280 ÷ 1.2 = 233.33 Liters
Vw (Added Volume) = V2 − V1 = 233.33 − 100 = 133.33 Liters
Understanding these chemical relationships prevents long-term lockout issues. Review our complete guide to hydroponic pH and EC chemistry to learn how carbonates affect water buffering. You can also run precise salt adjustments with our free hydroponic nutrient calculator.
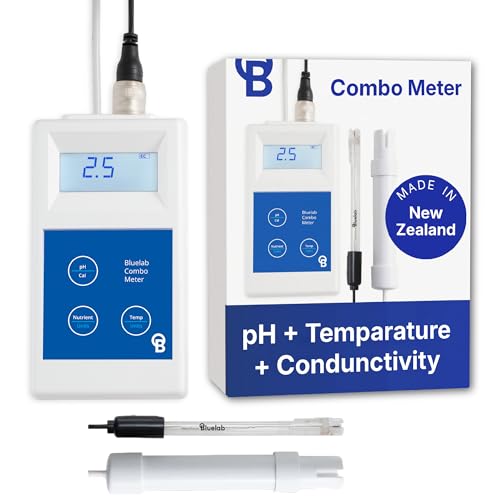
- Monitor 3 parameters in water: Conductivity (TDS) level to ensure plants get a balanced feed, pH up and down, and temper…
- This hydroponics meter has ATC that provides consistent reading regardless of any fluctuations in temperature; pH probe …
- Combine with Bluelab meters and controllers for full indoor garden nutrients monitoring in water and soil; pH probe requ…
🛠️ Interactive Hydroponic System Tools
Calculate dilution ratios, estimate dissolved oxygen, and complete your daily checklist dynamically below!
2. Anoxic Root Zones and Overwatering in Substrates
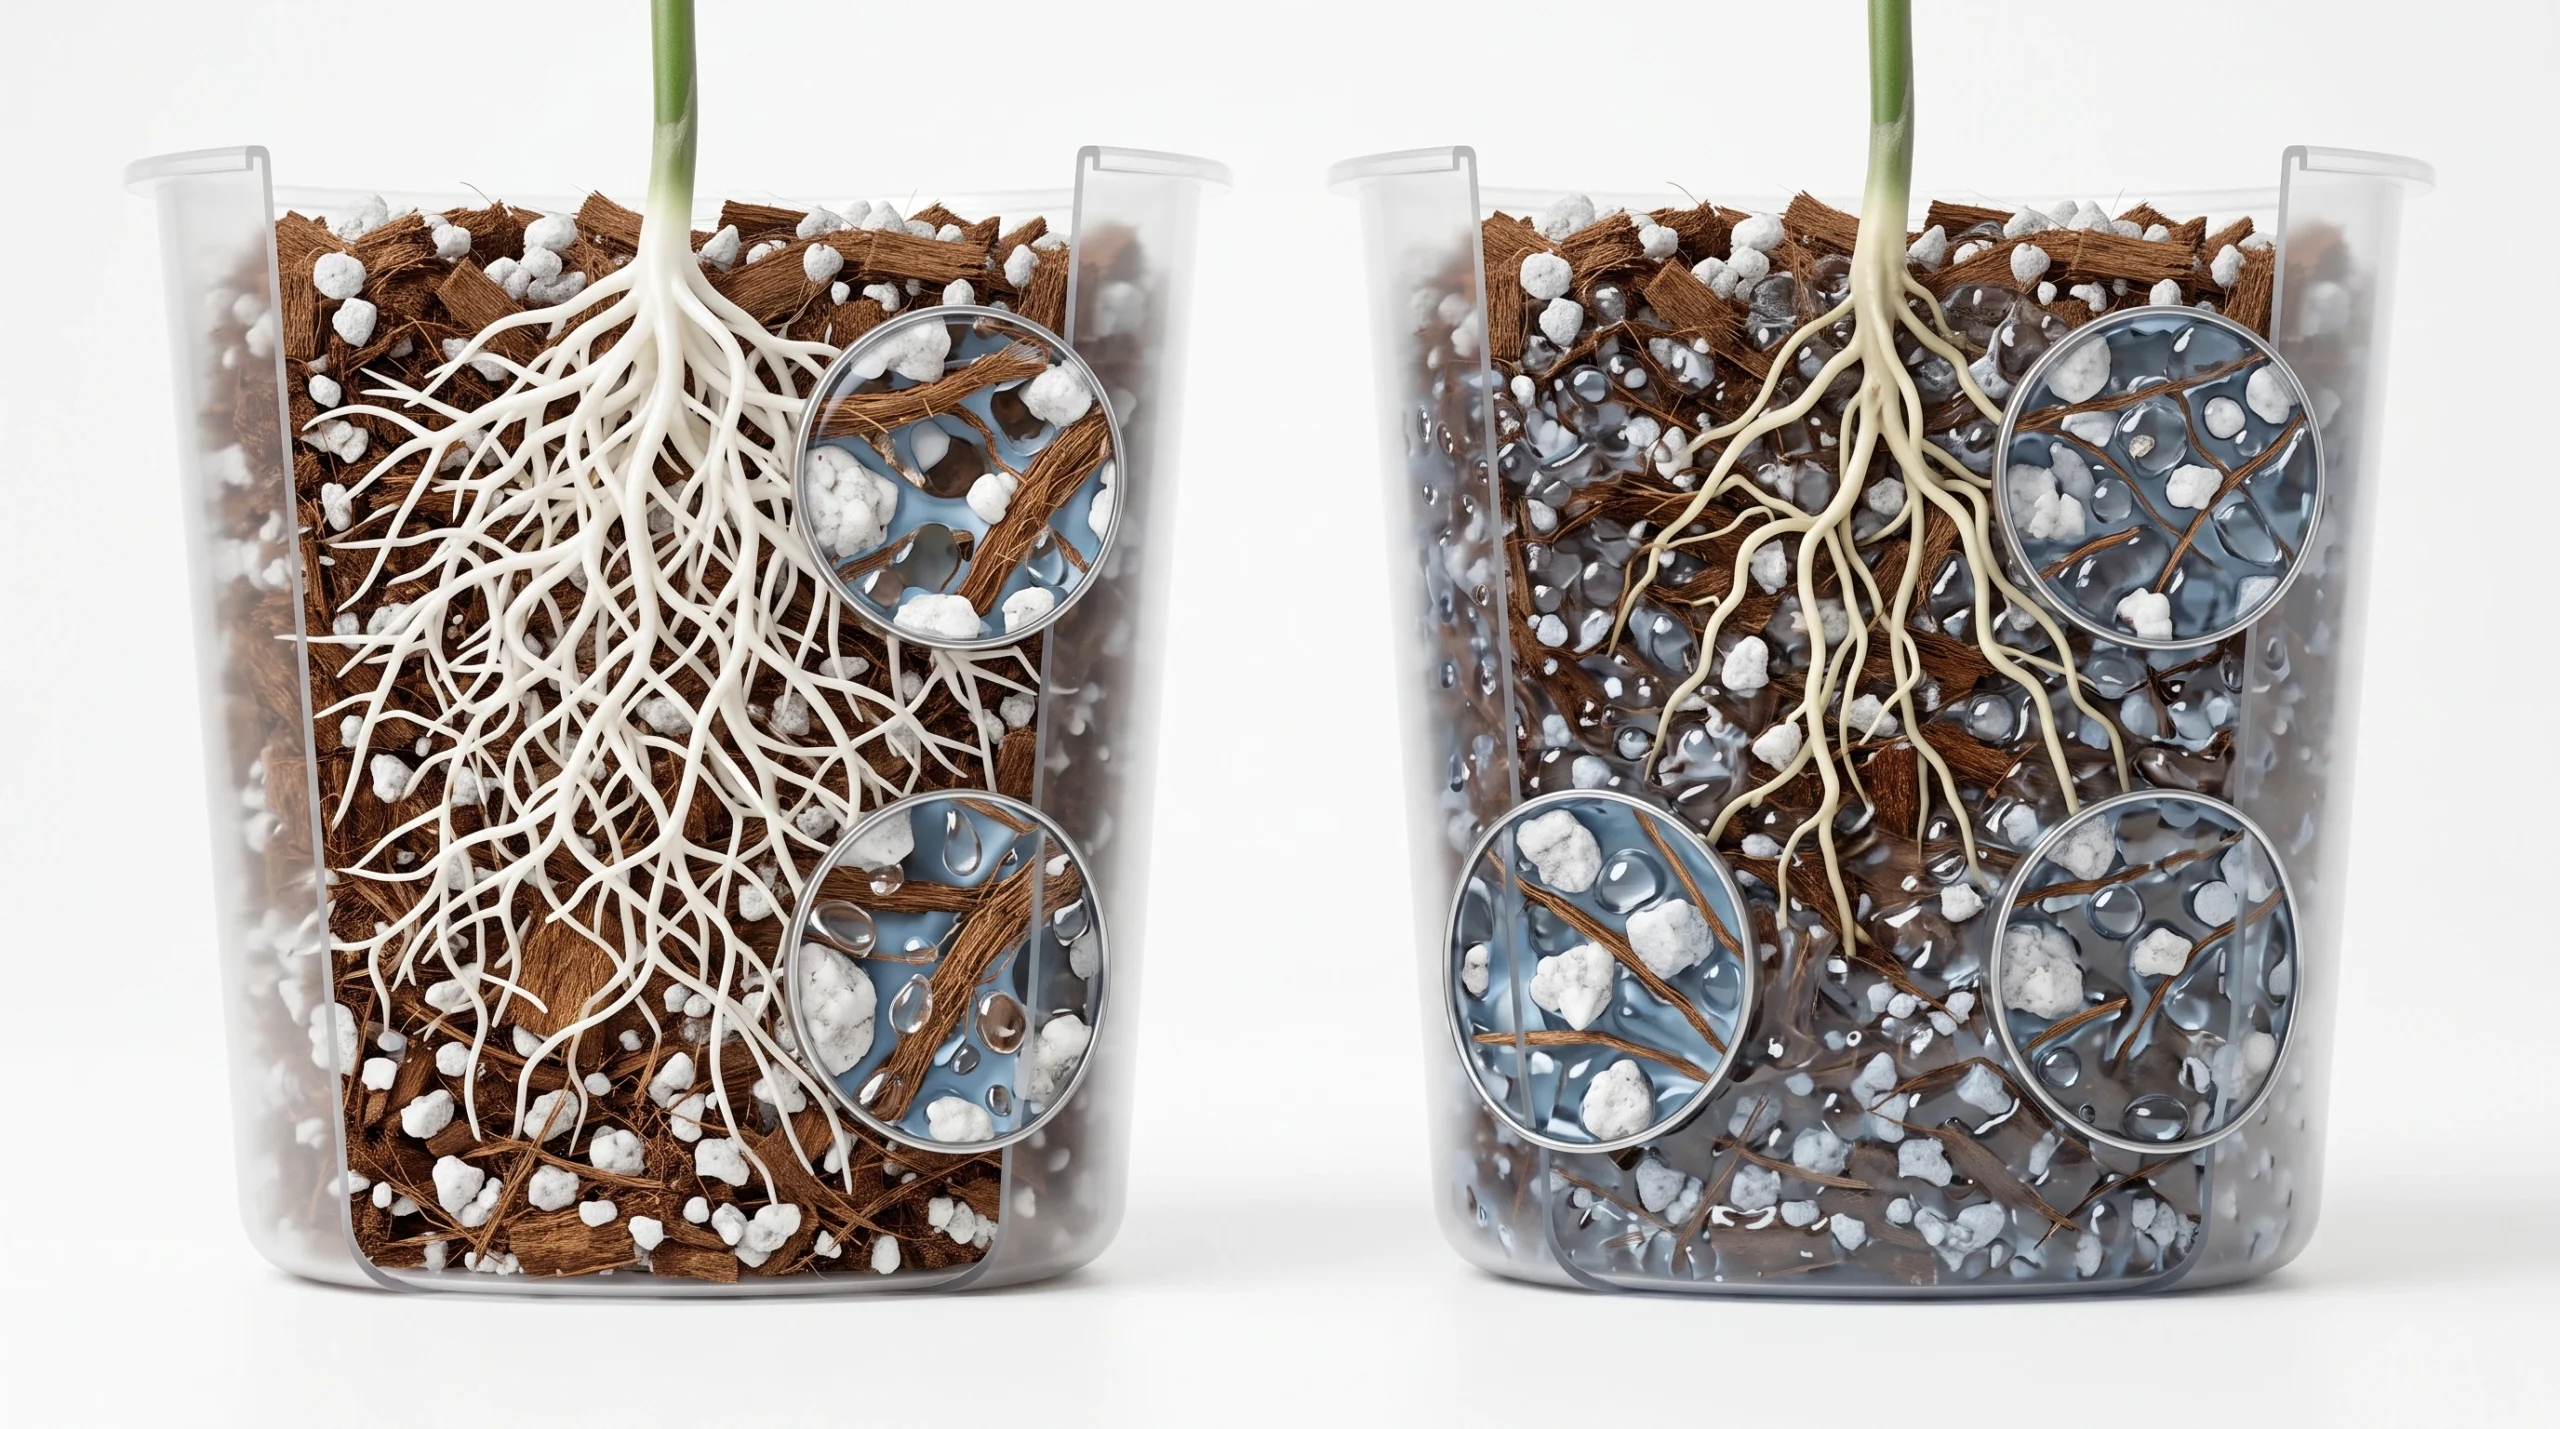
Overwatering in substrate-based hydroponic systems (such as drip, ebb and flow, or drain-to-waste media beds) does not mean applying too much water; it means watering too frequently without allowing air exchange within the substrate pore space. Every growing substrate possesses three primary physical traits:
When a substrate like stone wool or fine coco coir is irrigated too frequently, the pore spaces remain completely filled with capillary water. This drops the air-filled porosity near zero, creating an anoxic (oxygen-depleted) environment around the root zone. Root cells require oxygen to drive oxidative phosphorylation, the metabolic process that produces adenosine triphosphate (ATP). ATP powers active ion transport across root cell membranes. Without oxygen, ATP production collapses, root cells stop absorbing nutrients, and roots begin to decay.
Anoxic conditions trigger root exudation of ethanol and sugars, which attract mobile zoospores of pathogenic fungi such as Pythium ultimum and Phytophthora. Once these zoospores land on compromised root tissue, they penetrate the outer cortex, causing root rot.
🛡️ Substrate Management Protocol To keep air space high and prevent root rot inside grow media:
- Target a 10% to 20% drainage fraction (run-off) per irrigation cycle to flush out accumulated salts and pull fresh air into the substrate.
- Allow the substrate weight to drop by 30% to 50% between irrigation events before re-applying solution.
- Incorporate high-AFP media like coarse perlite (particle size 3-6 mm) into fine coco coir to increase air space.
Learn how to identify and treat early fungal infections with our detailed guide on preventing hydroponic root rot and review our submersible water chiller comparison.
3. Depleting Dissolved Oxygen in Water-Culture Systems
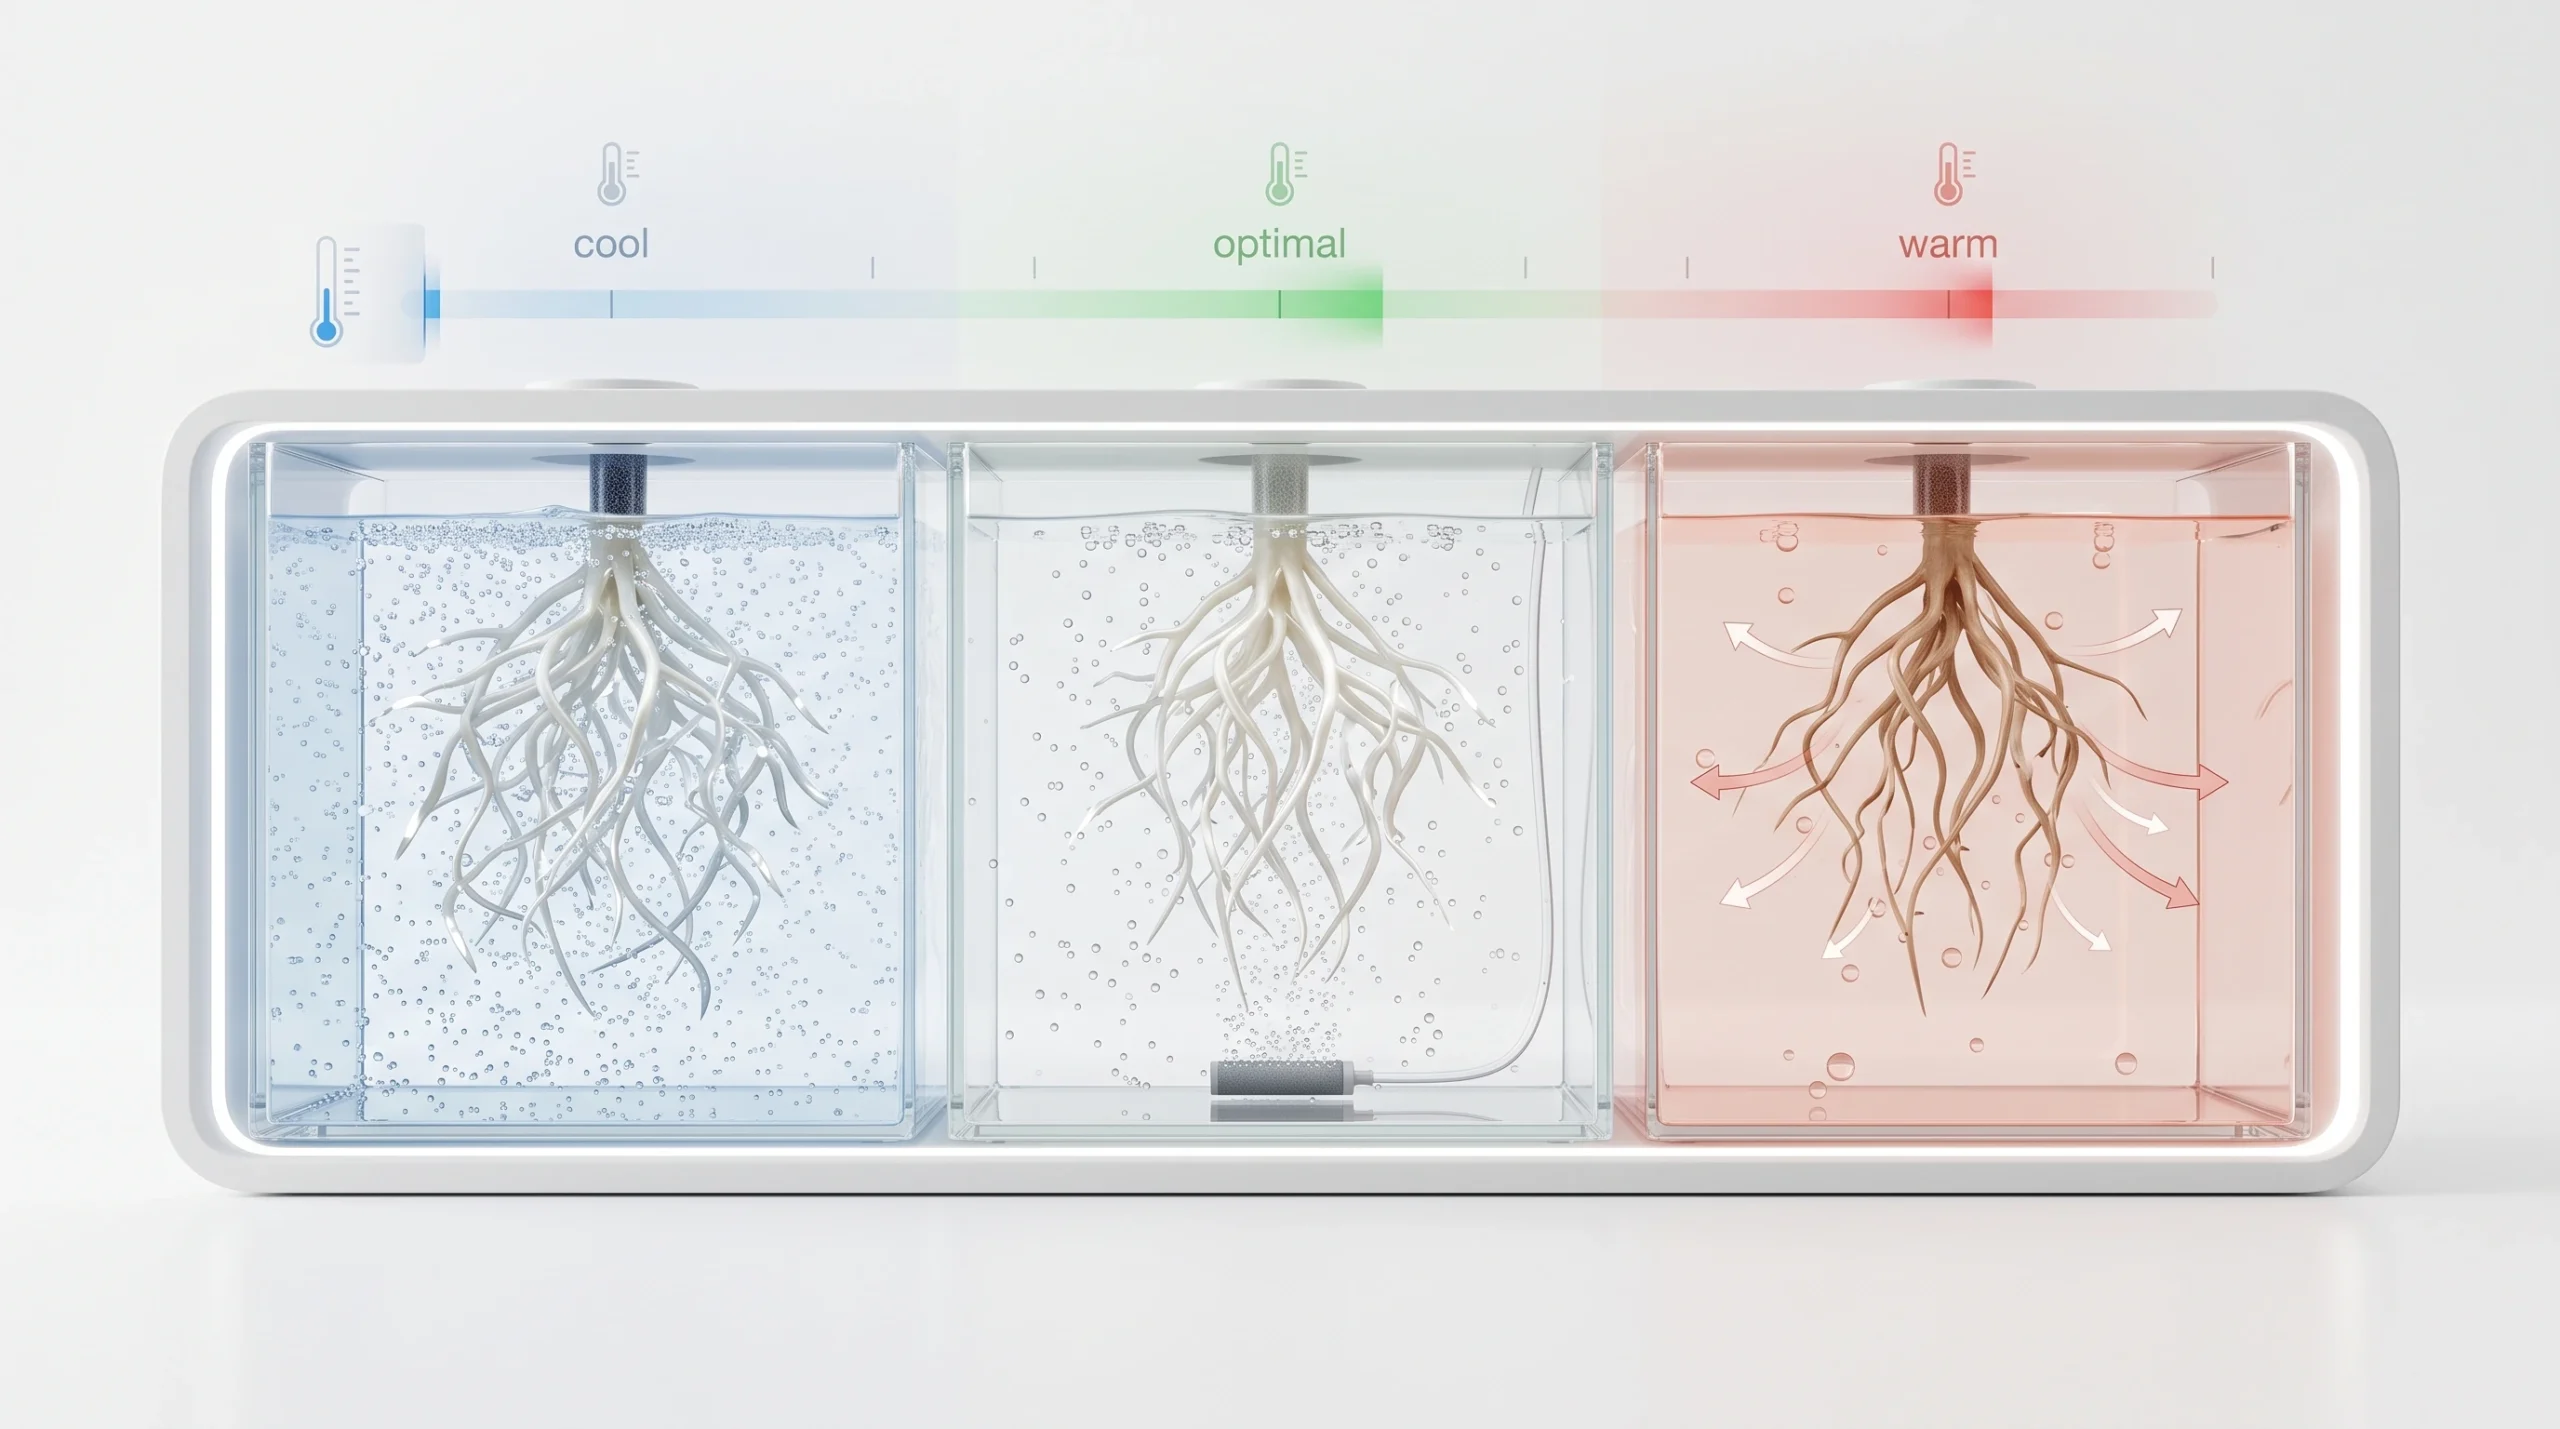
In water-culture systems—such as Deep Water Culture (DWC), Nutrient Film Technique (NFT), and Aeroponics—roots do not sit in a porous solid substrate; they are submerged directly in or sprayed with the nutrient solution. These systems rely entirely on dissolved oxygen (DO) maintained in the liquid phase.
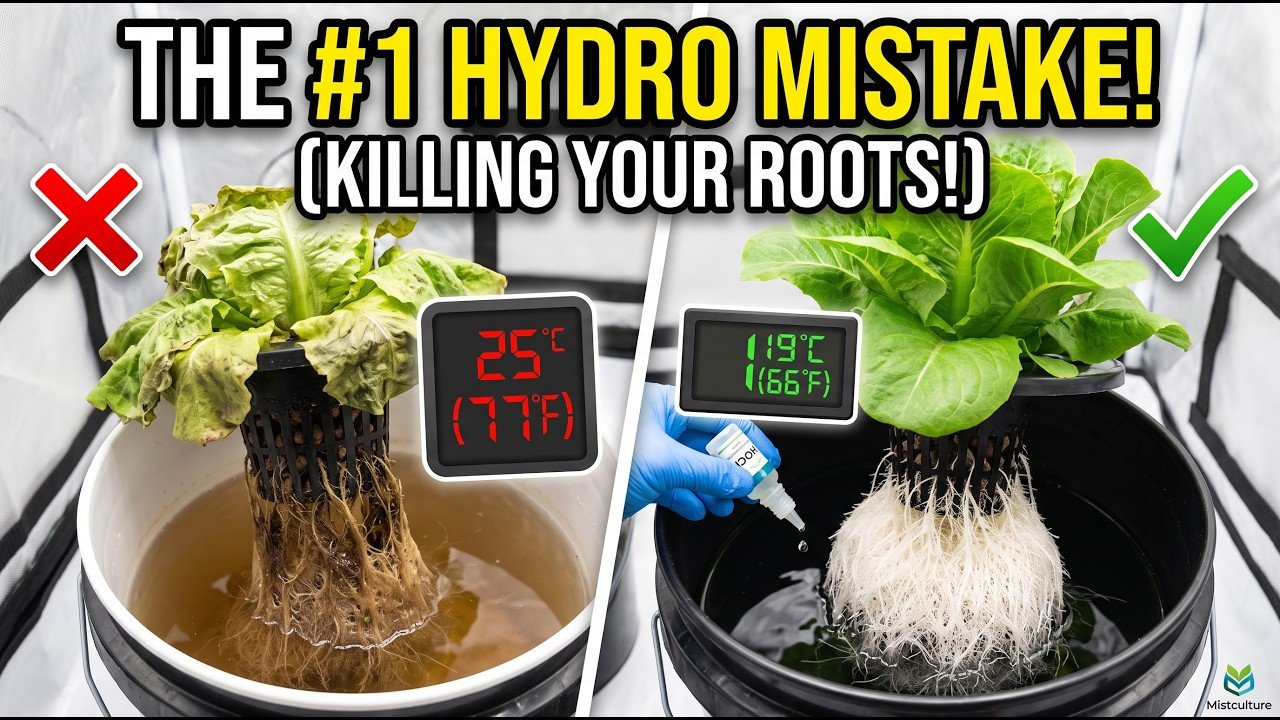
Oxygen solubility in water follows Henry's Law, decreasing as liquid temperature increases. As water temperature rises from 18°C (64°F) to 28°C (82°F), maximum DO saturation drops from 9.3 mg/L to 7.8 mg/L. At the same time, higher temperatures accelerate plant root respiration, doubling the root system's oxygen demand. This creates a dangerous imbalance: oxygen demand spikes precisely when the solution's oxygen capacity drops. When DO levels fall below 5.0 mg/L, root health rapidly declines. Roots turn brown, lose their delicate root hairs, and stop absorbing water and minerals.
Required Airflow (LPM) = Reservoir Volume (Liters) ÷ 1.5
Pair your air pump with fine-pore silica air stones or micro-bubble diffusers. Smaller bubbles dramatically increase the total surface area contact between the gas and liquid phases, raising oxygen transfer efficiency far beyond what large, coarse bubbles can achieve.
❄️ The Hardware Reality: Air Stones Cannot Cool Water A common beginner mistake is adding more air stones to lower water temperatures. Air stones merely transfer oxygen; they do not alter liquid thermodynamics. In fact, large magnetic air pumps run hot and can actually transfer kinetic heat into your water. To maintain the gold-standard reservoir temperature of 18°C to 20°C (64°F to 68°F) in a warm grow room, you must invest in an active thermo-electric or compressor-based water chiller. Keeping the water cool is the single most effective way to guarantee high DO retention and naturally suppress fungal pathogens without relying heavily on sterilizing chemicals.
Review our technical breakdown of the best air pumps for DWC systems to select the right equipment for your specific reservoir volume.

- PROFESSIONAL PUMP: Ideal for pond, growing projects and running several Waterfarms or multiple air stones at once
- HIGH QUALITY: Electrical magnetic air compressor in a high-quality aluminum alloy case that comes with a multi-outlet di...
- STEADY OUTPUT: Special artificial rubber to keep a steady air flow output and pressure that can be adjusted freely
4. Overfeeding and Salt Toxicity (Nutrient Burn)
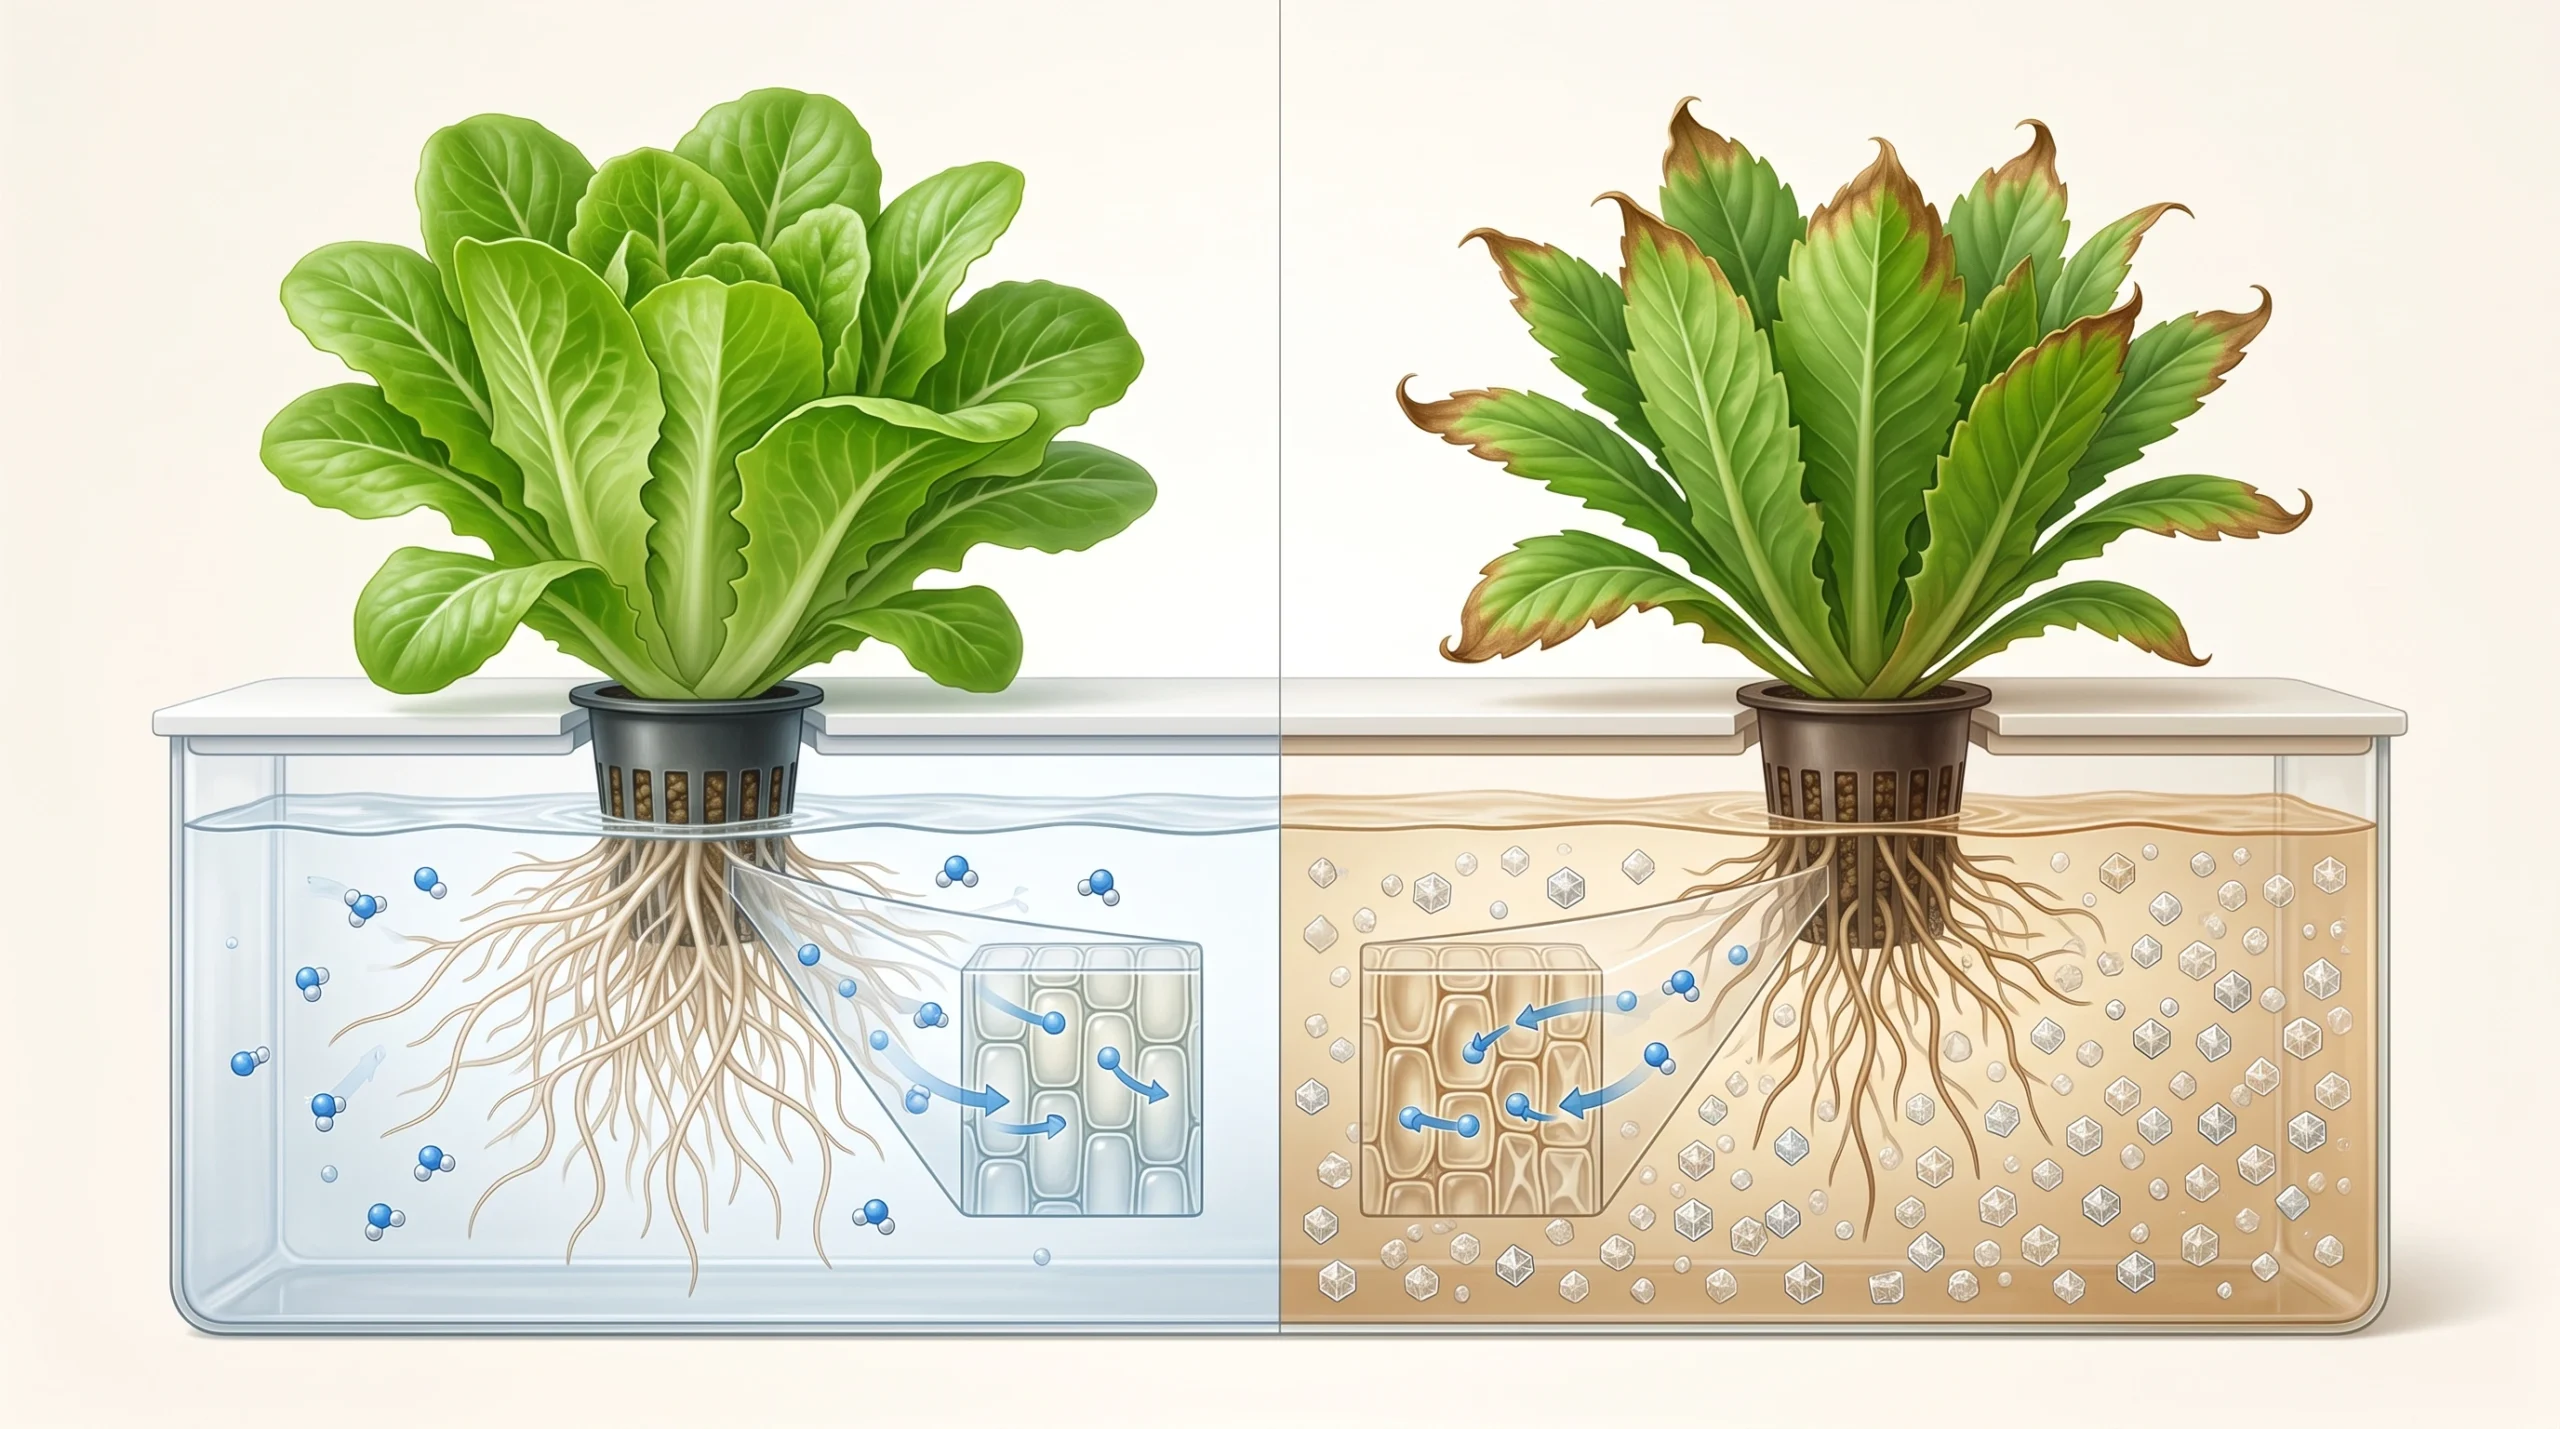
Beginner growers often assume that higher fertilizer concentrations lead to faster plant growth. However, crop development rates depend on ambient light intensity, temperature, and carbon dioxide levels—not excess mineral availability. Dosing fertilizer beyond the genetic threshold of your crops does not accelerate photosynthesis; instead, it triggers a physical and chemical crisis.
Balanced Solution (EC 1.2)
Cells
(Low Salt)
Overfed Solution (EC 3.2)
Cells
(High Salt)
When fertilizer salts are added to a reservoir, they dissociate into positive cations (such as Calcium Ca2+, Potassium K+, Magnesium Mg2+, and Ammonium NH4+) and negative anions (such as Nitrate NO3-, Phosphate HPO42-, and Sulfate SO42-). Adding too much fertilizer spikes the solution's Electrical Conductivity (EC), which exponentially increases its osmotic pressure.
If the solution's osmotic pressure exceeds the internal osmotic pressure of the root tissue, water movement via osmosis slows down or completely reverses. This physical process, known as plasmolysis, literally sucks water out of the root cells and back into the reservoir—causing your plants to wilt and dehydrate despite being completely submerged in liquid water.
Furthermore, excessive concentrations of specific ions trigger chemical and physiological nutrient antagonisms as mapped out in Mulder's Chart. For instance, an excess of Potassium (K+) directly inhibits the root absorption of Calcium (Ca2+) and Magnesium (Mg2+). Similarly, excess Phosphorus (H2PO4-) binds with Iron (Fe2+) and Zinc (Zn2+), precipitating them into insoluble solids and causing secondary micronutrient deficiencies even when those elements are technically abundant in the reservoir.
Symptoms of Nutrient Burn
- Dark green leaf coloration combined with aggressive downward clawing of leaf tips.
- Necrotic, papery brown margins on mature leaves.
- Stunted root growth with thick, brown, non-branching root tips.
To avoid salt toxicity, feed young vegetative plants at 30% to 50% of the fertilizer manufacturer's labeled recommendation. Only increase EC when visual inspection and daily EC tracking show that the crop is actively drawing down solution strength. Read our guide on choosing hydroponic nutrients and our tutorial on using Cal-Mag correctly to prevent ion lockouts.
5. Light Leakage in Reservoirs and Algae Colonization
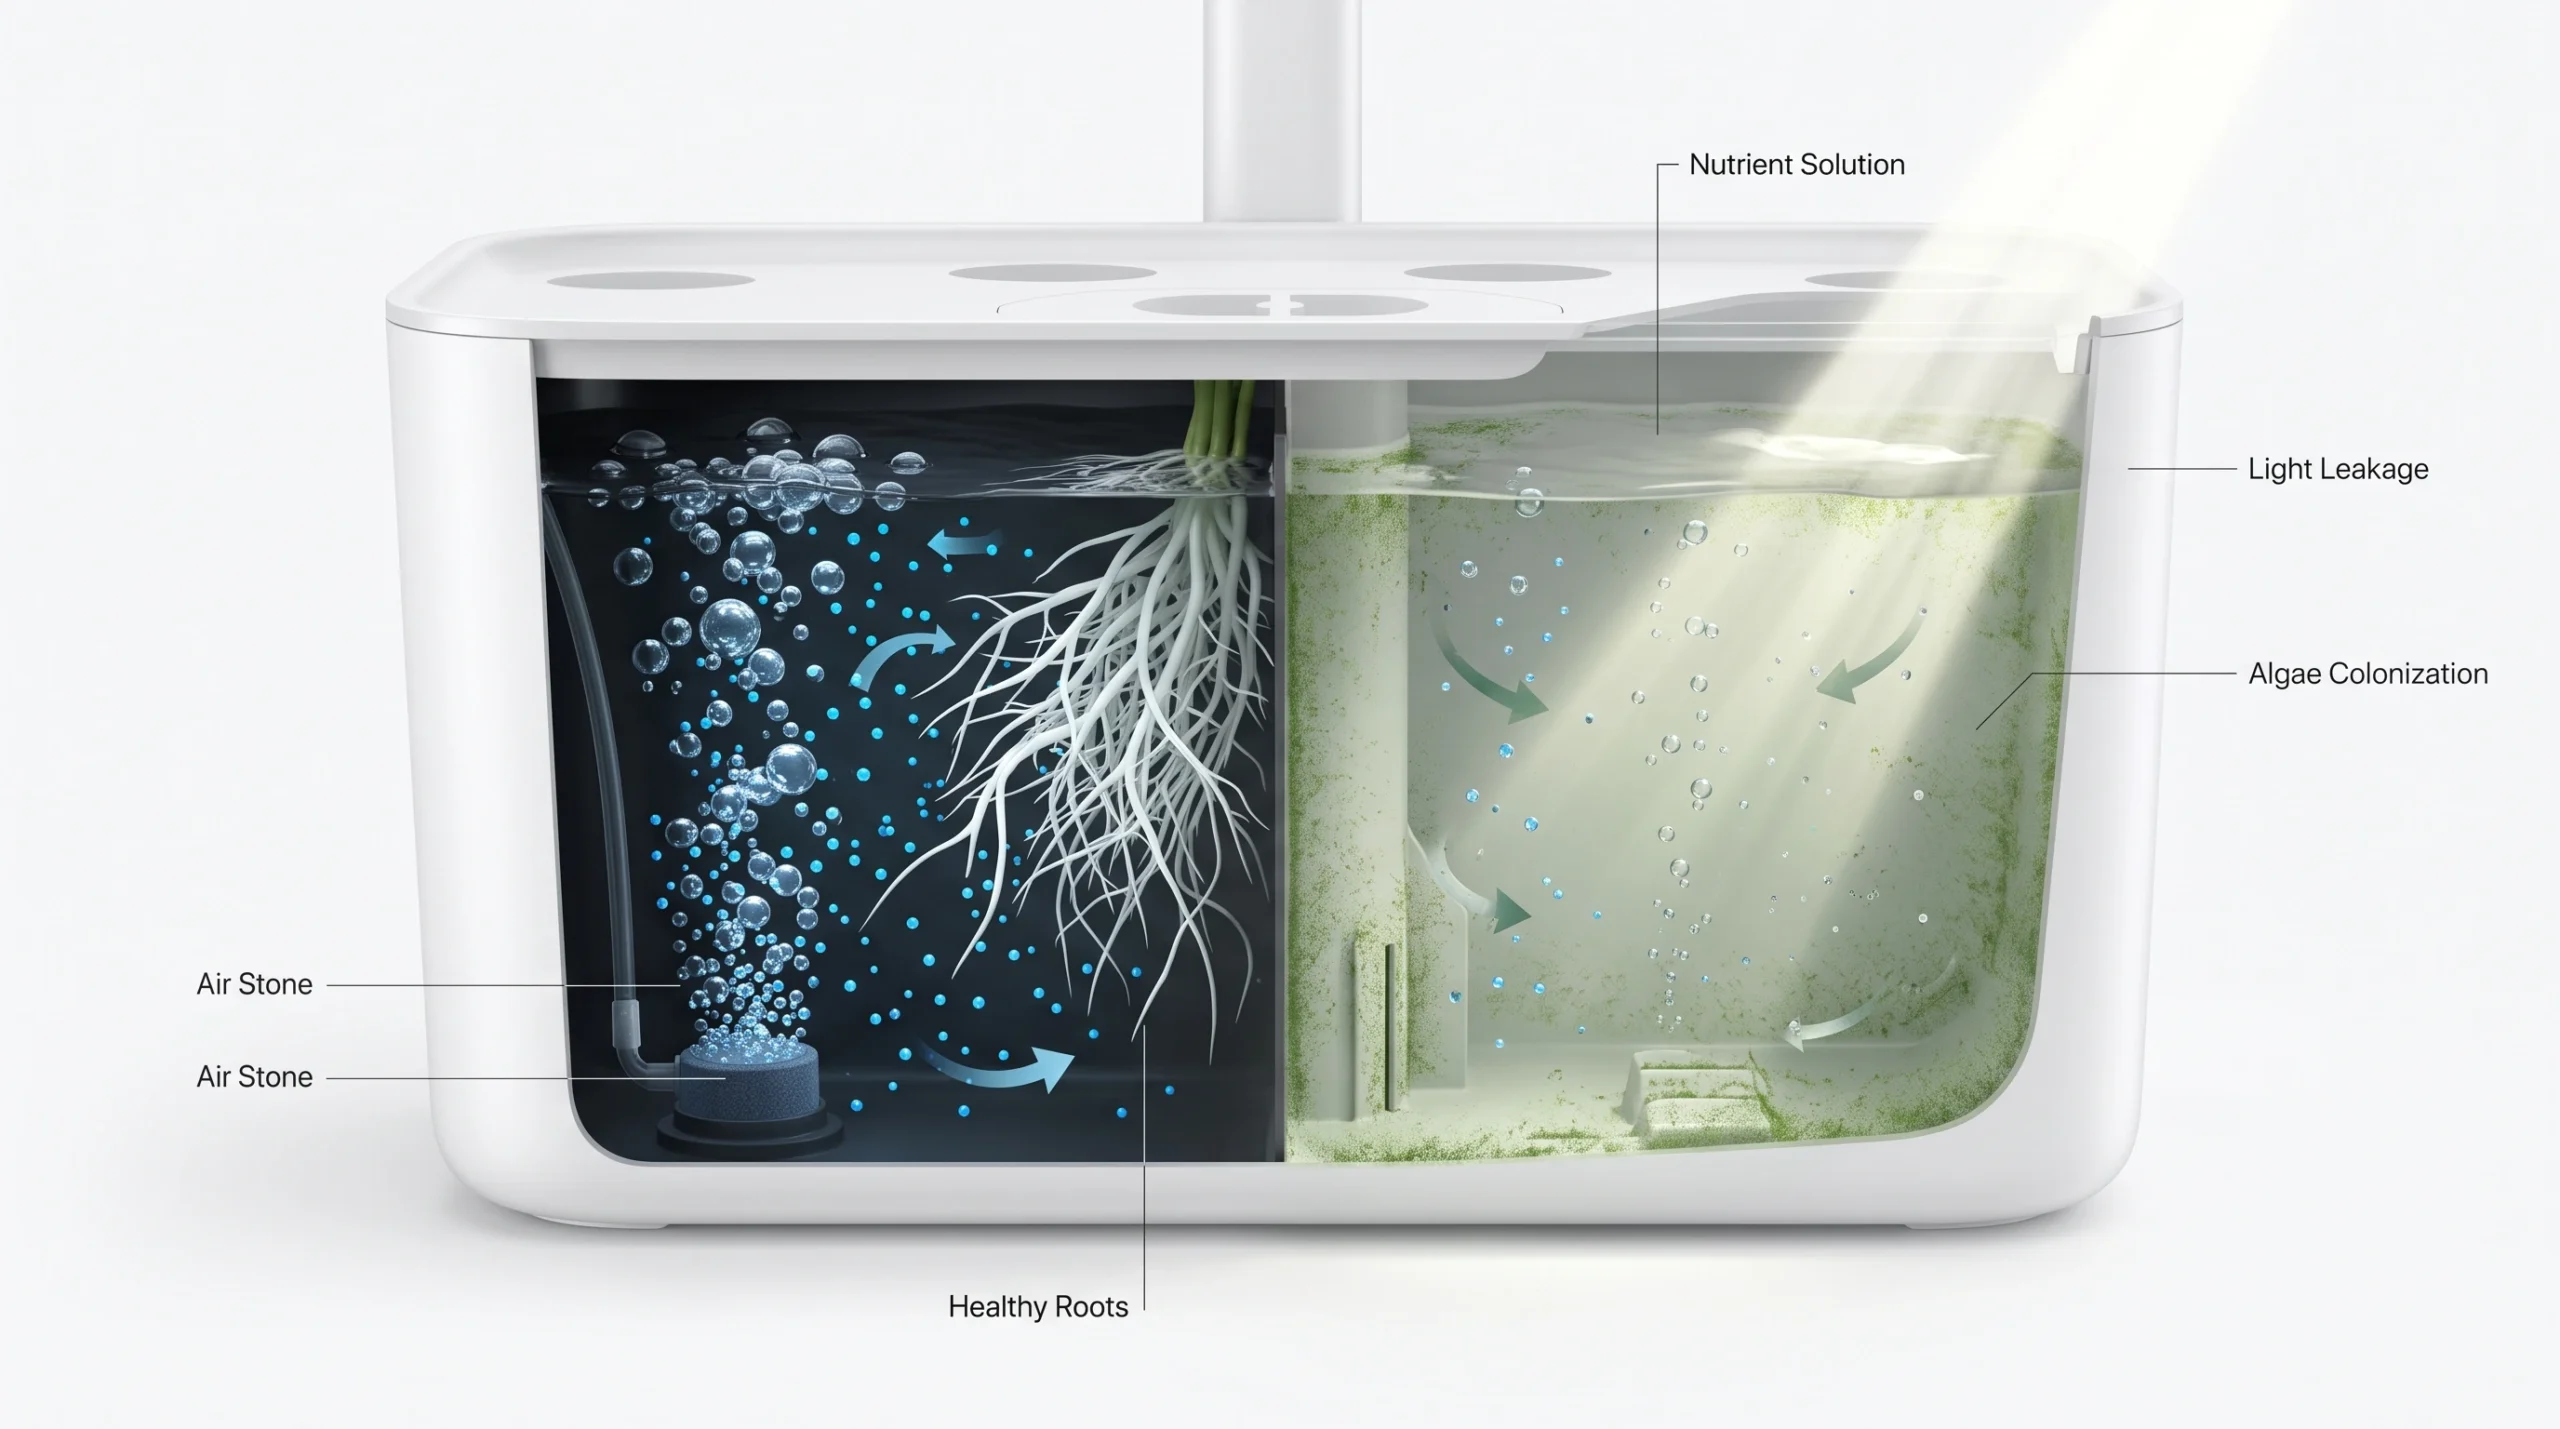
Algae spores exist everywhere in the air and rapidly colonize any environment where light, water, and dissolved inorganic nutrients are present. Using clear or translucent plastic containers—such as standard storage totes, clear vinyl tubing, or unpainted PVC channels—allows photosynthetically active radiation (PAR) to reach the nutrient solution.
Light Period
CO2
Up (7.5+)
Dark Period
O2
(<4.0 PPM)
Algae growth is not merely a cosmetic issue; it actively sabotages water parameters and root-zone physiology in three distinct ways:
- pH Instability: During light periods, algae rapidly absorb dissolved carbon dioxide (CO2) for photosynthesis, driving solution pH up past 7.5. When the lights go out, photosynthesis stops and algae respire, releasing CO2 back into the liquid, forming carbonic acid (H2CO3) and causing the pH to plummet. These severe daily pH swings stress delicate root hairs. To learn how to counter these swings, check out our complete pH drift fixing guide.
- Dissolved Oxygen Depletion: During dark periods, algae compete directly with plant roots for dissolved oxygen, causing DO levels to crash overnight. This leaves your crops vulnerable to acute suffocation. You can review our technical solutions in our master guide to dissolved oxygen and reservoir aeration.
- Mechanical Blockages: Dying algae cells create organic sludge that clogs drip emitters, fouls water pumps, and feeds saprophytic bacteria, creating ideal conditions for root rot. To prevent these failures, read our blueprint on preventing hydroponic root rot.
Algae Eradication and Prevention Protocol
While the chemical target is 1.0 to 2.0 ppm active chlorine, beginners often struggle to calculate this from concentrated bottles. Here is how to dose standard commercial HOCl formulations:
- For a standard 0.028% active HOCl solution (such as UC Roots or Clear Line), dose 1.5 to 3.0 mL per gallon (0.4 to 0.8 mL per liter) of reservoir water.
- Apply this dose during initial reservoir refills and repeat every 3 to 4 days to maintain continuous water sterility.
For more details on maintaining clean, sterile reservoirs, read our breakdown of hydroponic microbes and sterile reservoir management.
6. Mismatched Crop Selection for Beginner System Architectures
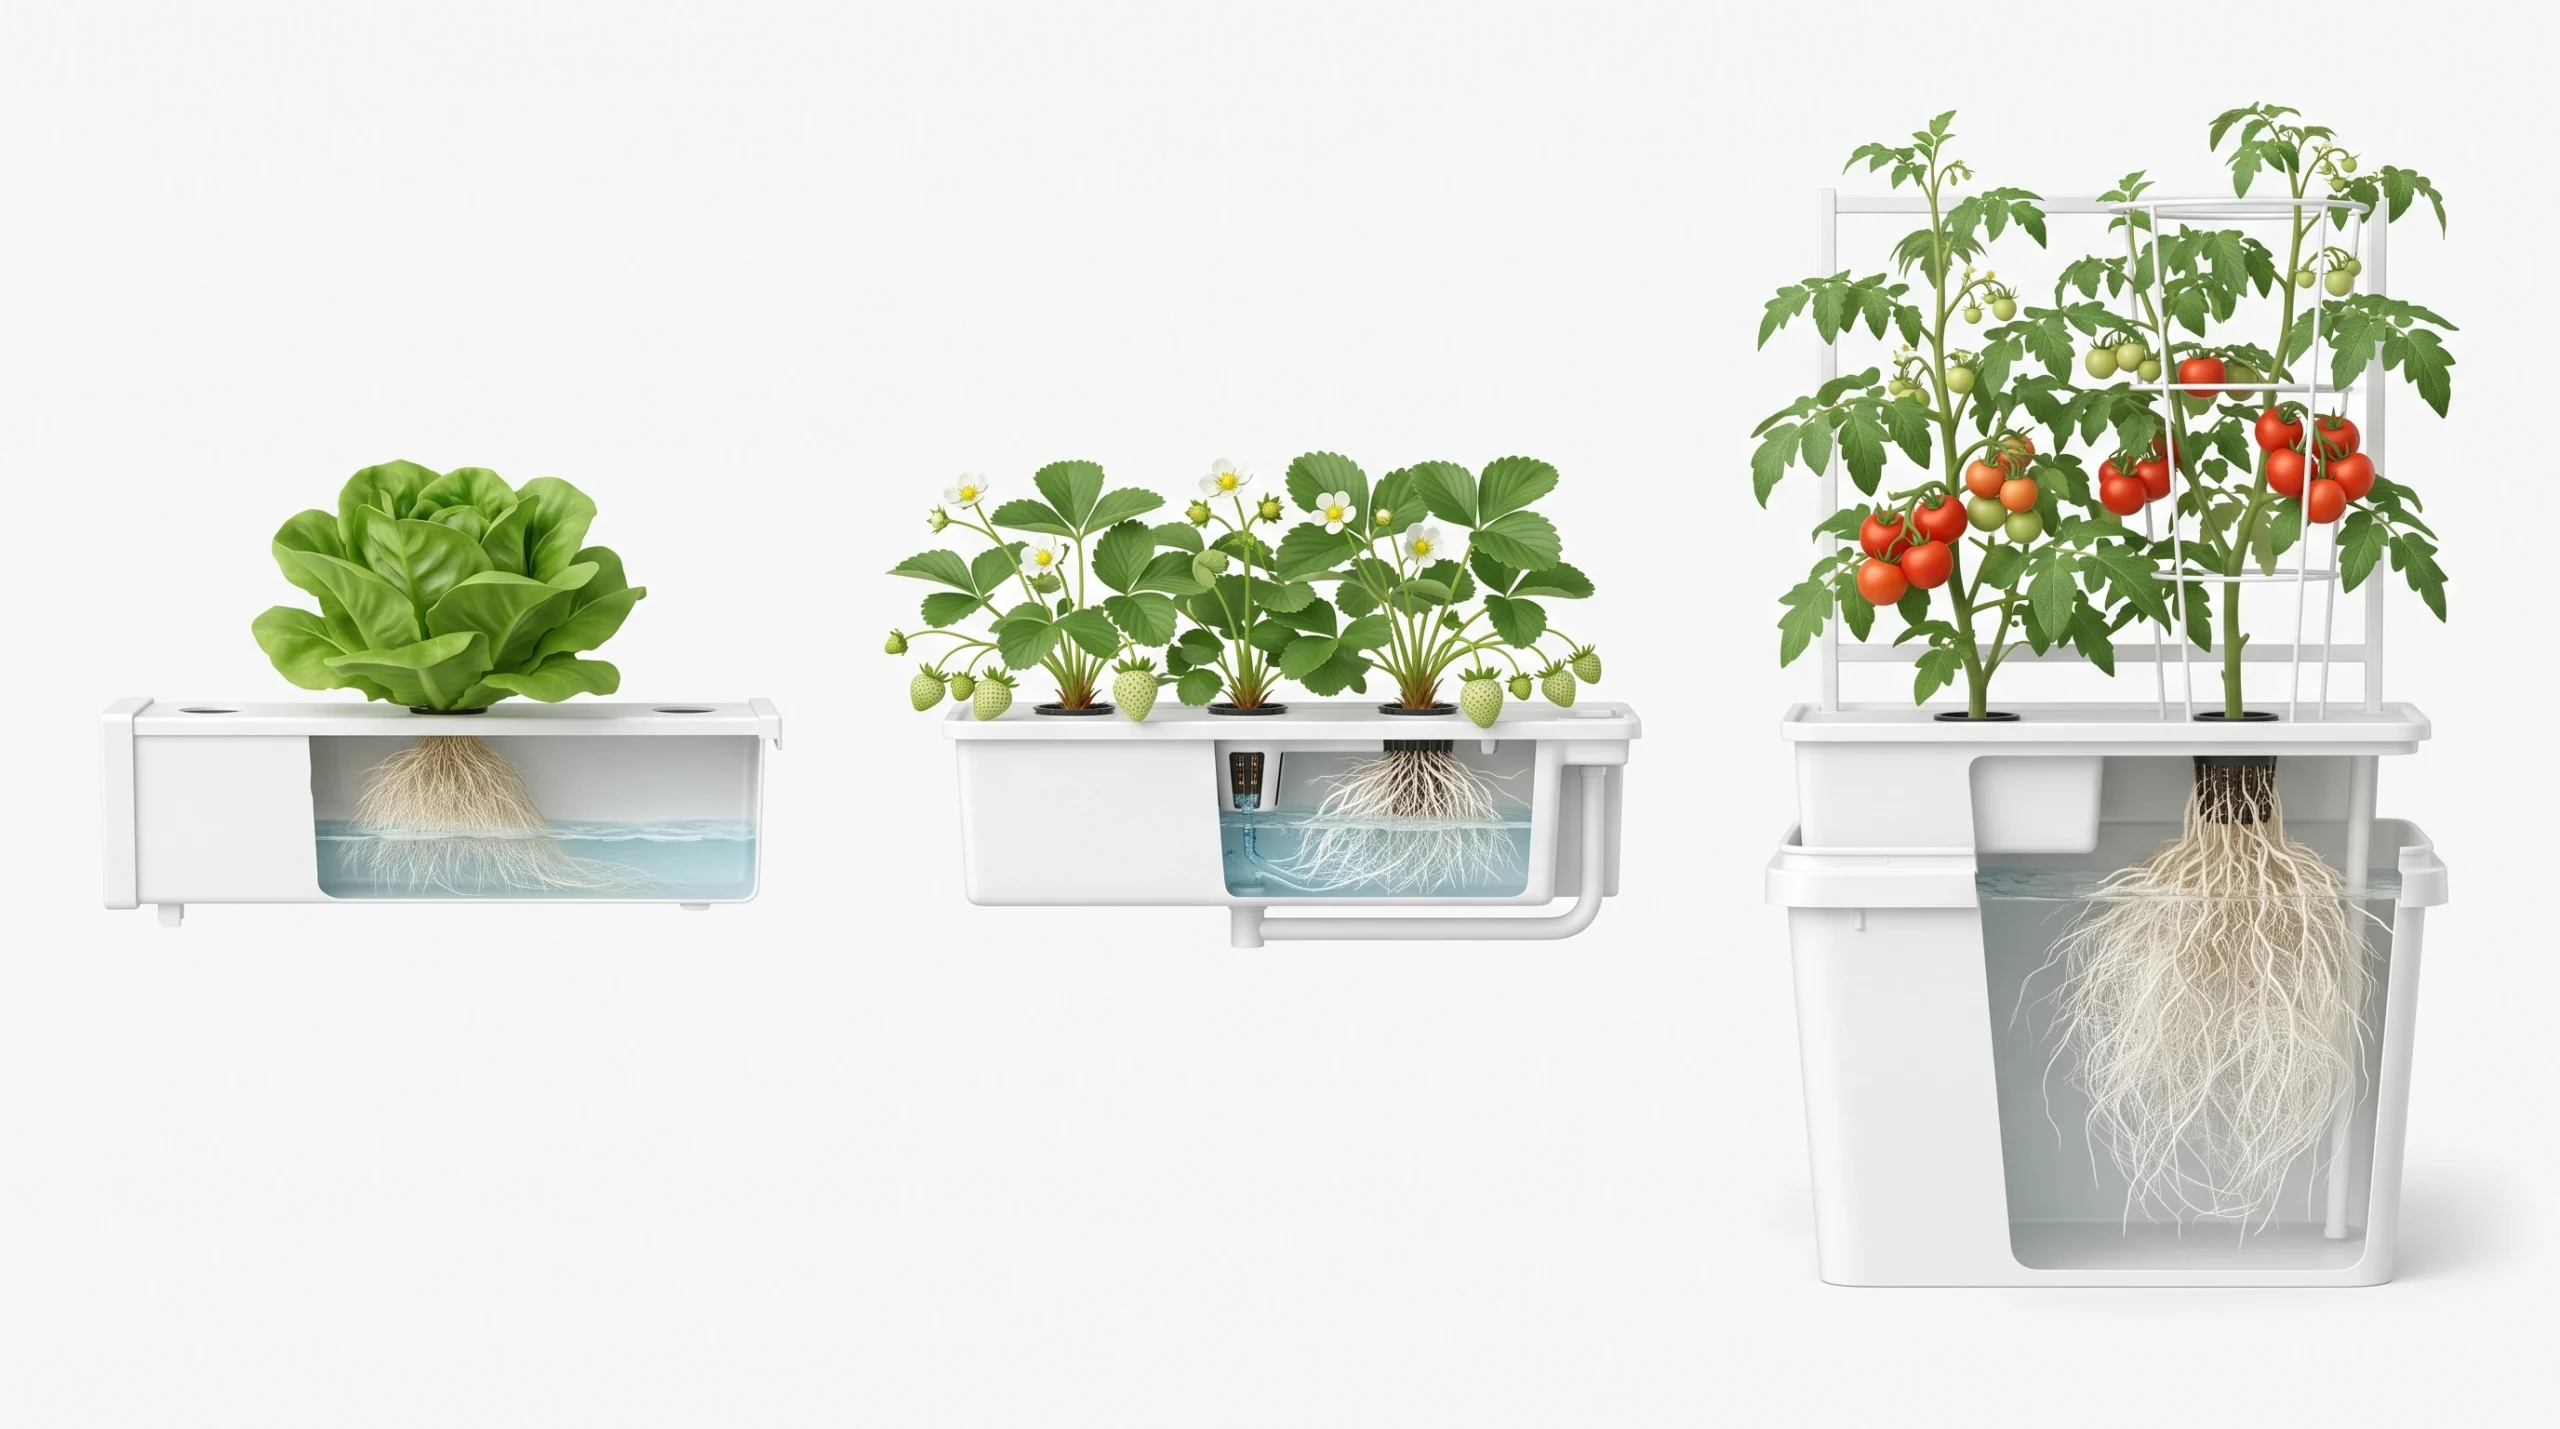
Beginners often select crops based on personal preference rather than baseline system compatibility. Planting heavy-feeding fruiting crops (such as indeterminate tomatoes, cucumbers, or heavy peppers) in systems structurally built for light-feeding greens (like thin NFT channels or compact countertop DWC units) almost always leads to systemic failure.
| Crop Category | Example Crops | Target EC (mS/cm) | Target pH | DLI (mol/m²/day) | Min Root Vol |
|---|---|---|---|---|---|
| Light Feeders | Butterhead, Spinach, Basil, Cilantro |
0.8 – 1.4 | 5.5 – 6.0 | 12 – 17 | 0.5 – 1.0 L |
| Moderate Feeders | Strawberries, Bok Choy, Chard |
1.2 – 1.8 | 5.8 – 6.2 | 15 – 22 | 2.0 – 4.0 L |
| Heavy Feeders | Indeterminate Tomato, Sweet/Hot Peppers |
2.0 – 3.5 | 5.8 – 6.5 | 25 – 35+ | 10.0 – 20.0 L |
Fruiting crops require high light levels (a Daily Light Integral of 25–35+ mol/m2/day), massive root expansion volumes, physical support structures (such as heavy-duty trellising), and aggressive fertilizer EC concentrations (2.0 to 3.5 mS/cm) rich in localized potassium and calcium during active fruit development. Attempting to plant a tomato in a small, shallow NFT channel will choke the channel with root mass within eight weeks, completely backing up solution flow, causing major reservoir overflows, and starving root zones of vital dissolved oxygen.
Conversely, leafy greens and culinary herbs thrive in low-EC, low-stress environments (0.8 to 1.4 mS/cm), require small root volumes, and complete their entire commercial life cycle in just 30 to 45 days. These lightweight profiles make them the ideal candidates for DWC rafts, shallow NFT channels, and compact vertical grow towers.
Before buying seeds, read our detailed guides on growing hydroponic lettuce and spinach and our masterclass on growing hydroponic tomatoes and peppers. You can also match your system profiles using our free interactive plant selection tool.
7. Skipping the Daily System Audit (The 5-Minute Checklist)
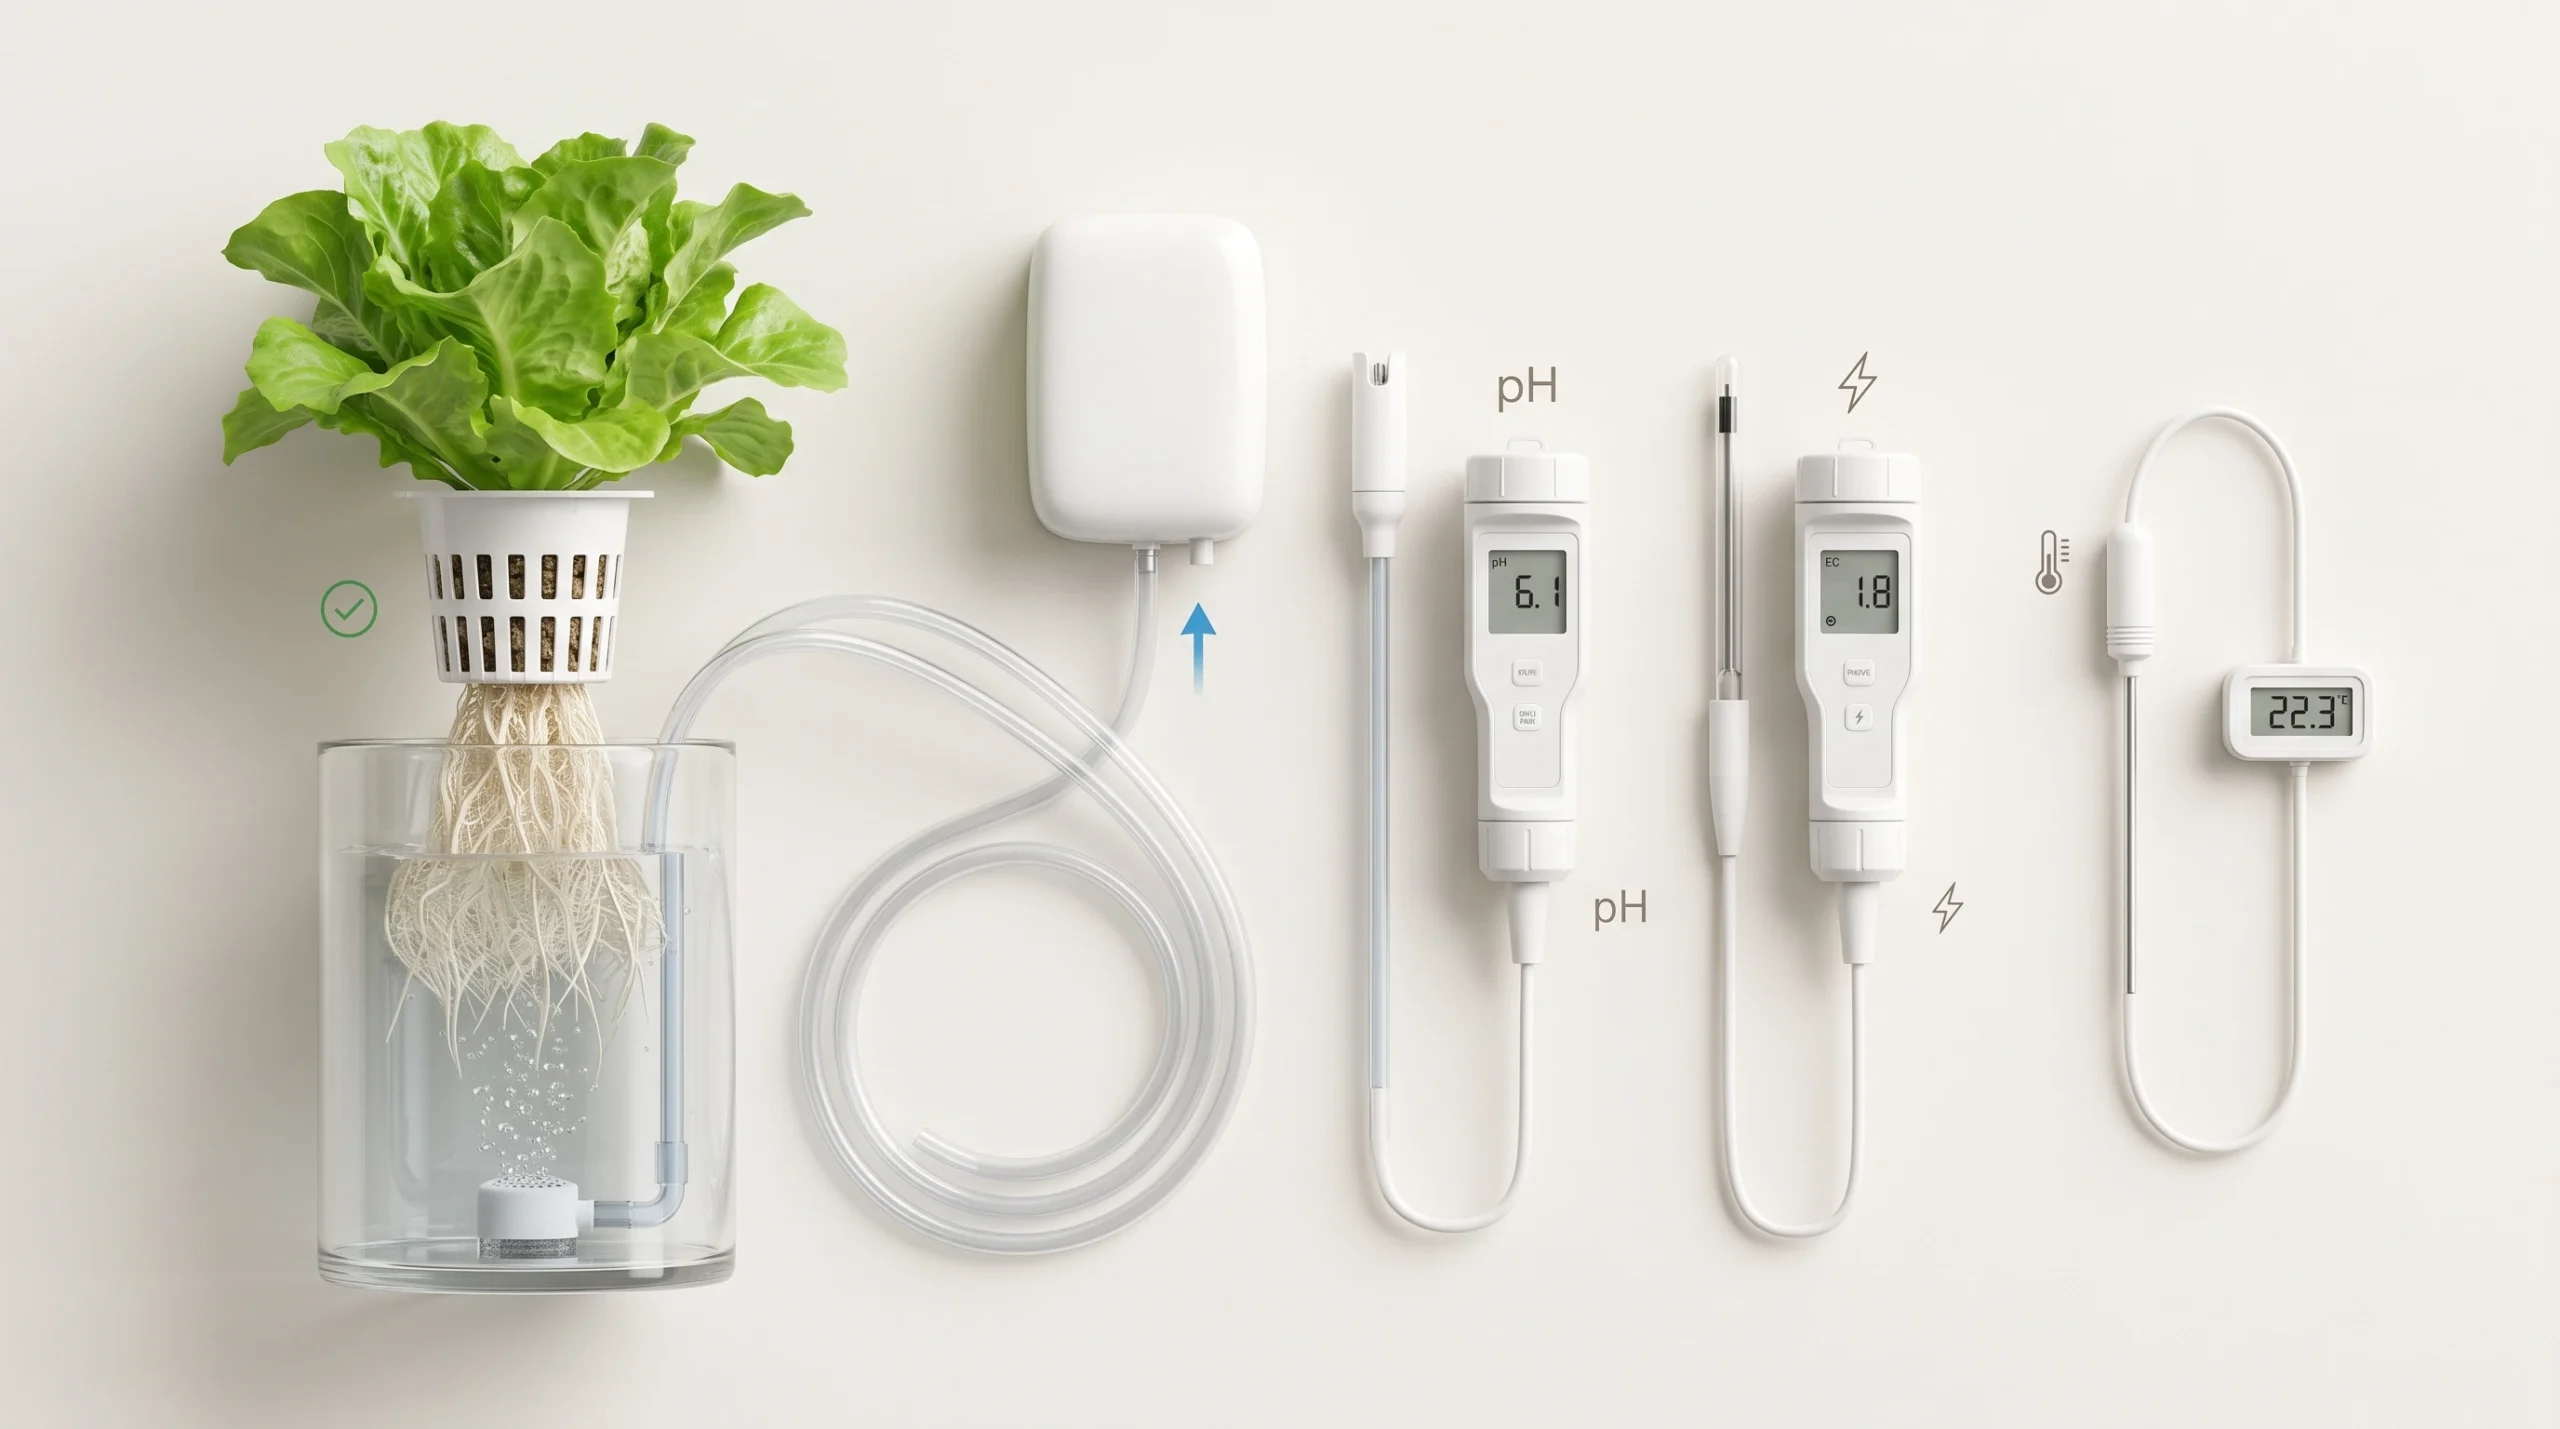
Because hydroponic systems lack the moisture and nutrient reserve of soil, mechanical or environmental disruptions quickly turn critical. A dripper line clogged by salt buildup, a water pump air-locked after a brief power outage, or an air stone disconnected from its manifold will cause plant wilting and root death in hours on a hot day. Daily water uptake by a mature crop causes solution EC to rise as plants absorb pure water faster than they consume mineral salts. Without daily water top-offs, the reservoir volume drops, salt concentration spikes, and roots suffer osmotic shock.
1. Water Level & Reservoir Volume
Check your reservoir's water volume. Evaporation and transpiration concentrate nutrients over time, so you must top off losses with pure, zero-EC Reverse Osmosis (RO) water rather than hard tap water to prevent systemic salt accumulation.
2. Active pH Balance
Measure your solution pH using a calibrated meter. Ensure pH reads within the safe 5.5 to 6.5 sweet spot. If adjustments are needed, dose in tiny, incremental steps to avoid shocking root tissue. For stabilization, review our complete pH drift fixing guide.
3. Electrical Conductivity (EC) Levels
Measure solution EC to verify that nutrient concentrations match your plants' specific development stage. A rising EC combined with falling water indicates plants are drinking water faster than absorbing salts; dilute immediately with RO water to prevent plasmolysis. Review baseline targets in our pH & EC mastery guide.
4. Mechanicals & Aeration Flow
Inspect all sub-system plumbing. Ensure water pumps are running cool, check that drip emitters are flowing freely without salt crust clogs, and verify air stones are bubbling aggressively to maintain optimal dissolved oxygen. Refer to sizing setups in our dissolved oxygen and reservoir aeration guide.
5. Canopy & Root Vital Signs
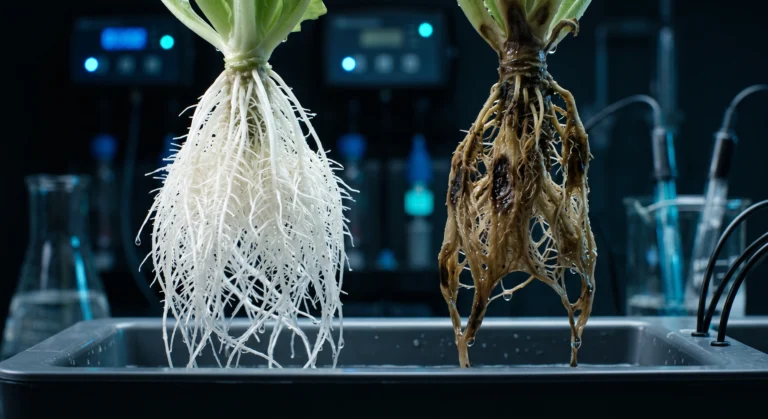
Examine your plants directly. Check new growth for interveinal chlorosis (early lockout indicators) or curling tip burns. Lift your channels or net pots to inspect root health; healthy roots are bright white and crisp, while tan, slimy root surfaces warn of active root rot. See our checklist in the root rot prevention guide.
Use a structured routine to catch issues early. Bookmark our printable daily hydroponic grow checklist to keep your system running smoothly.

- Real-time Monitoring: The Bluelab Guardian Monitor Wi-Fi allows you to monitor your reservoir's pH, Conductivity, and Te...
- Comprehensive Display and Control: Equipped with built-in Wi-Fi, this device offers monitoring and control. Conductivity...
- Alerts Directly to your Smartphone: The device features high/low pH, temperature, and conductivity alerts, and a non-vol...
8. Reactive Over-Correction vs. Systematic Diagnosis
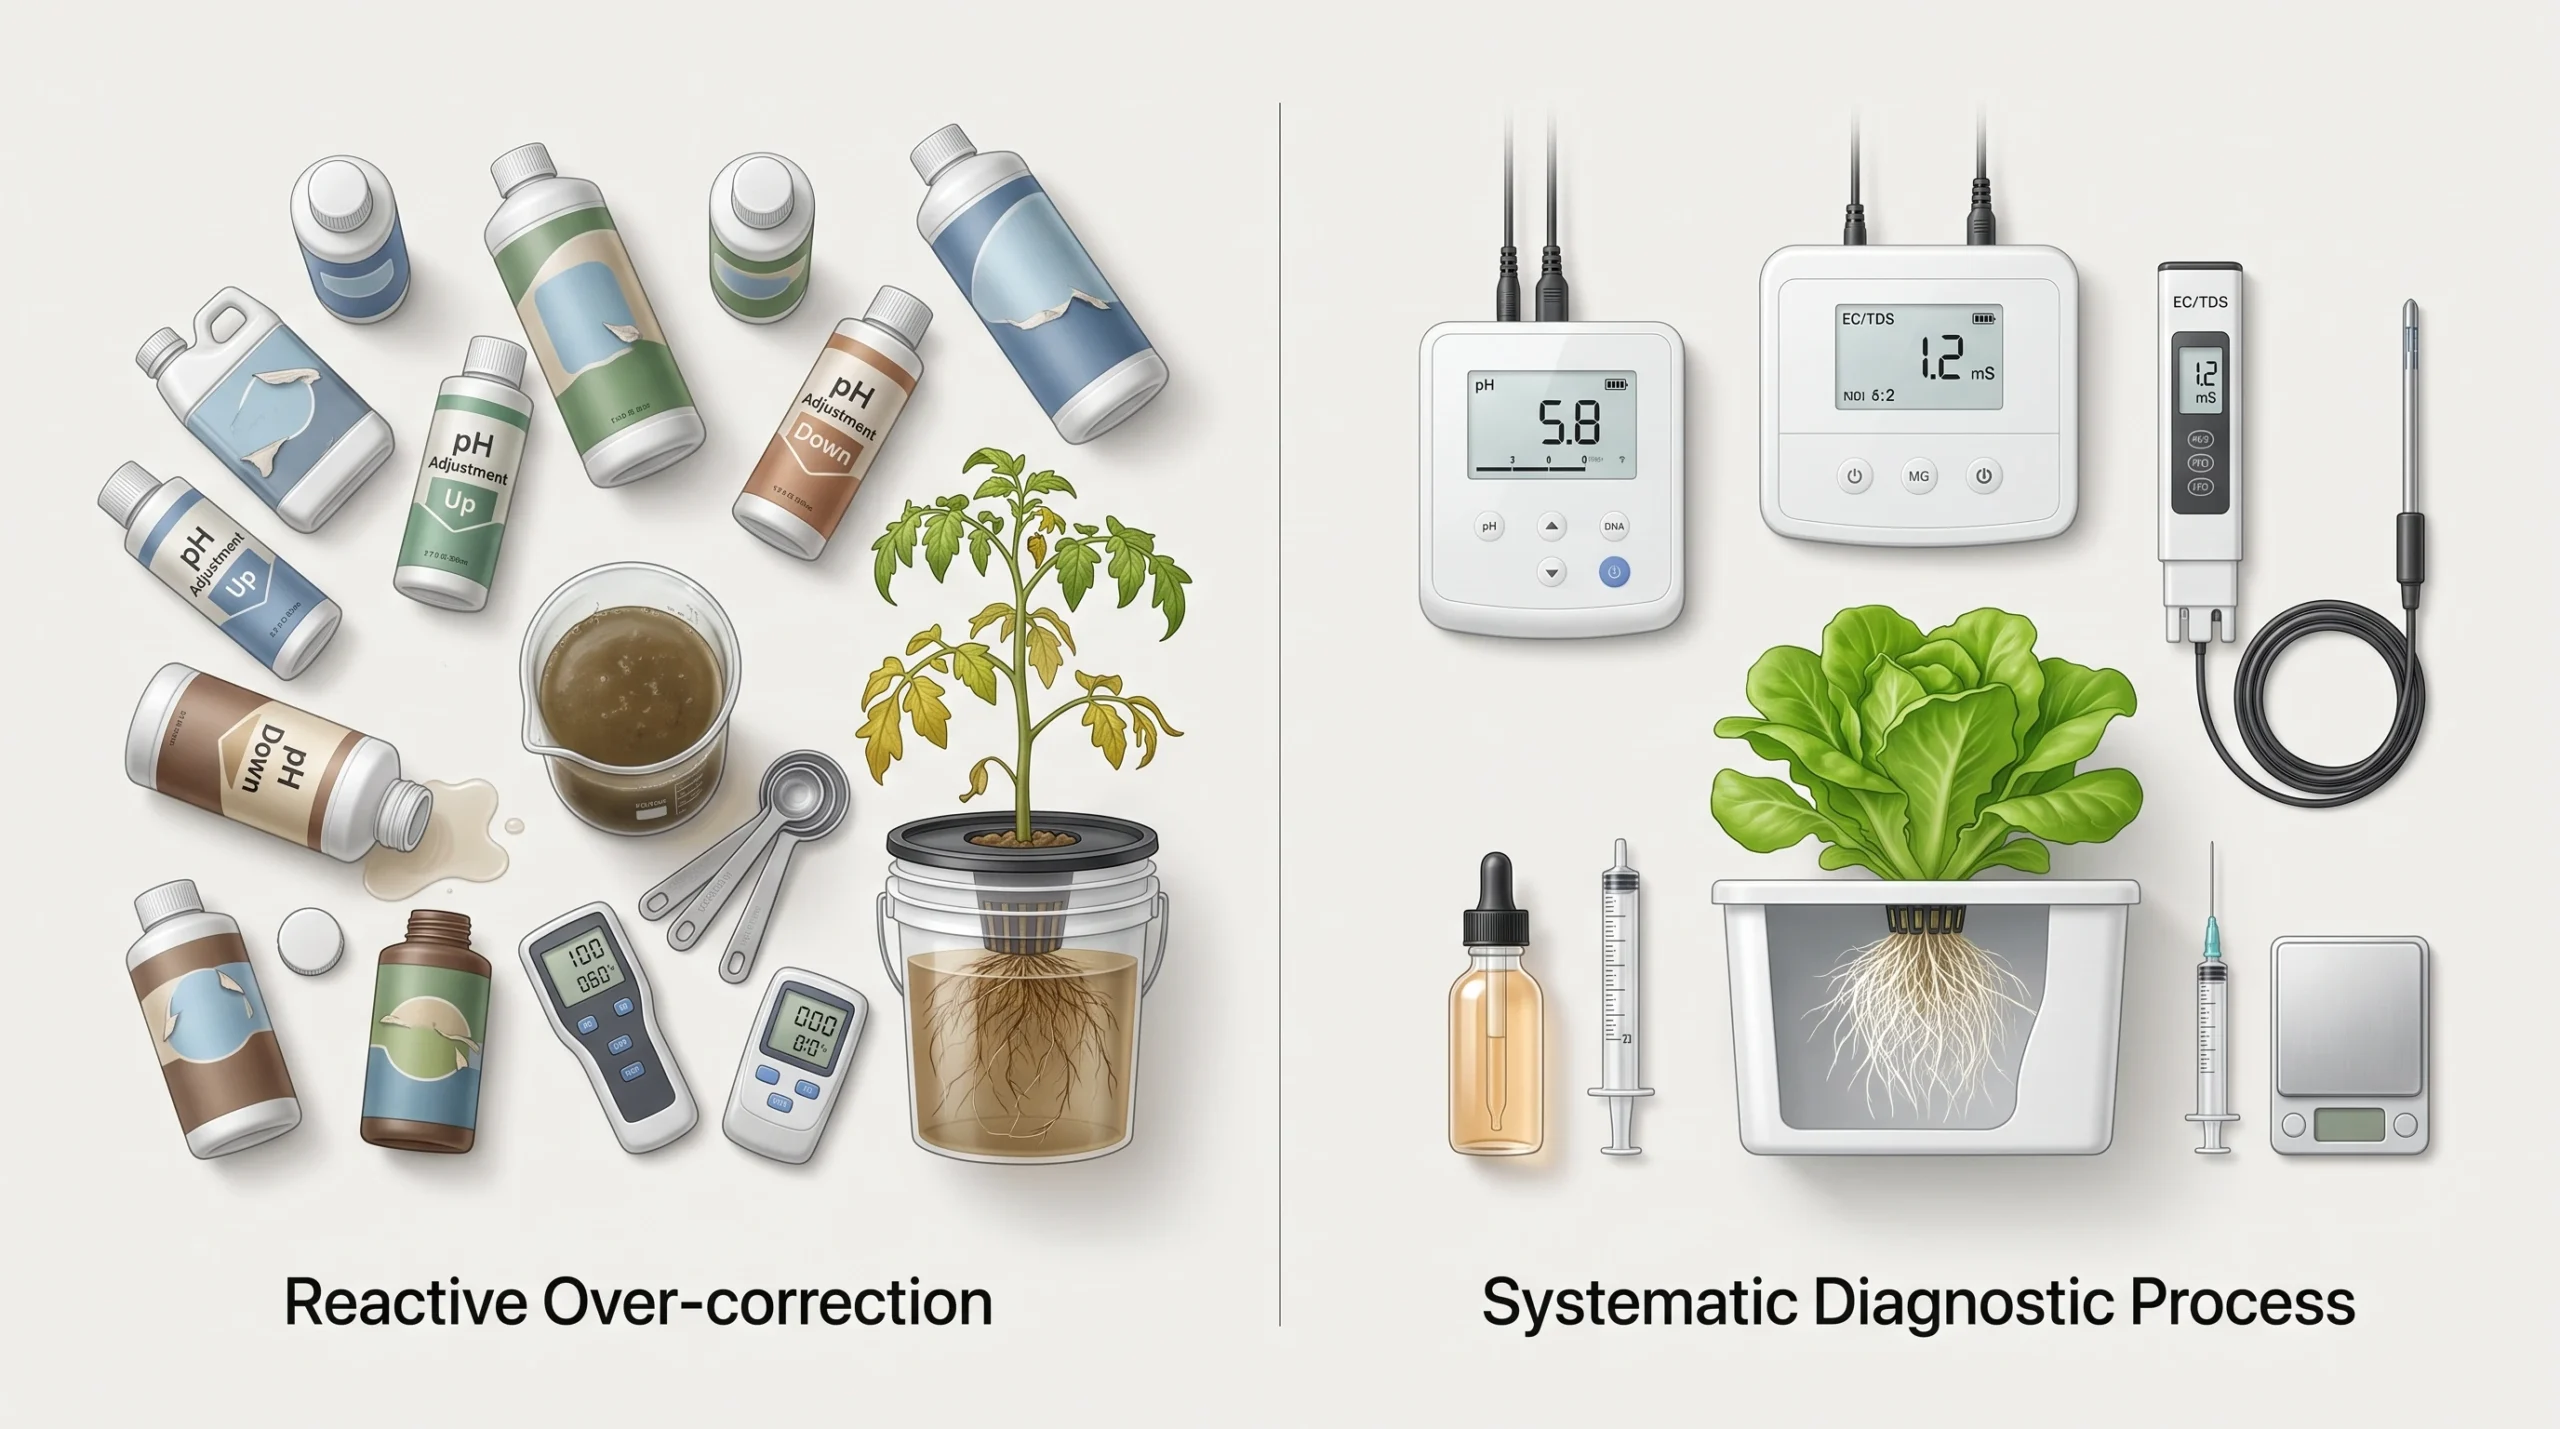
Making large, sudden chemical or environmental changes in response to visual symptoms stresses plants further. Diagnosing issues requires systematic verification of pH, EC, temperature, and mechanics.
When growers see leaf yellowing, spots, or tip curling, a common mistake is making sudden, drastic changes. They might dump bottle after bottle of pH Down into the reservoir, double the fertilizer concentration, and add three different specialty additive bottles all at once. This reactive over-correction creates extreme swings in solution chemistry that stress the plant far more than the initial issue.
+ Dump in "pH Down"
Most visual leaf symptoms are not actually caused by a missing element in your fertilizer blend. Instead, they stem from environmental factors or chemical lockouts occurring inside the reservoir:
- Leaf Chlorosis (Yellowing): This is most frequently triggered by a solution pH drifting above 6.5, which causes essential iron to precipitate out of the liquid. It can also stem from cold root-zone temperatures dropping below 15°C (59°F), which slows root metabolic activity. Dosing more iron or nitrogen without first stabilizing your pH or water temperature will not solve the issue—it will merely spike system EC to chemically toxic levels. Read our complete guide to diagnosing nutrient lockout vs. deficiency.
- Leaf Tip Curling: This symptom is usually driven by high Vapor Pressure Deficit (VPD), poor room air movement, or high solution EC—rarely by an actual physical shortage of calcium in your source water. To trace physiological solutions, read our guide on hydroponic leaves curling causes and fixes.
Leaf tip curling and dry, necrotic margins are frequently misdiagnosed as raw calcium deficiencies, prompting growers to dump excessive Cal-Mag additives into their reservoirs. However, calcium is an immobile element. It moves through the plant strictly via transpirational pull inside the xylem.
If your grow space has high Relative Humidity (above 80%), the Vapor Pressure Deficit (VPD) drops below 0.5 kPa. This means the air is too saturated for the plant to transpire water. When transpiration stops, calcium transport to the leaf tips halts, causing localized cellular collapse (tip burn). Always ensure proper room air movement with oscillating fans and maintain a target VPD of 0.8 to 1.2 kPa during vegetative growth before assuming your reservoir lacks calcium.
Systematic Diagnostic Protocol
Use our step-by-step hydroponic troubleshooting guide to isolate exact root causes before altering your reservoir chemistry.
9. Germination Errors & Transplant Placement
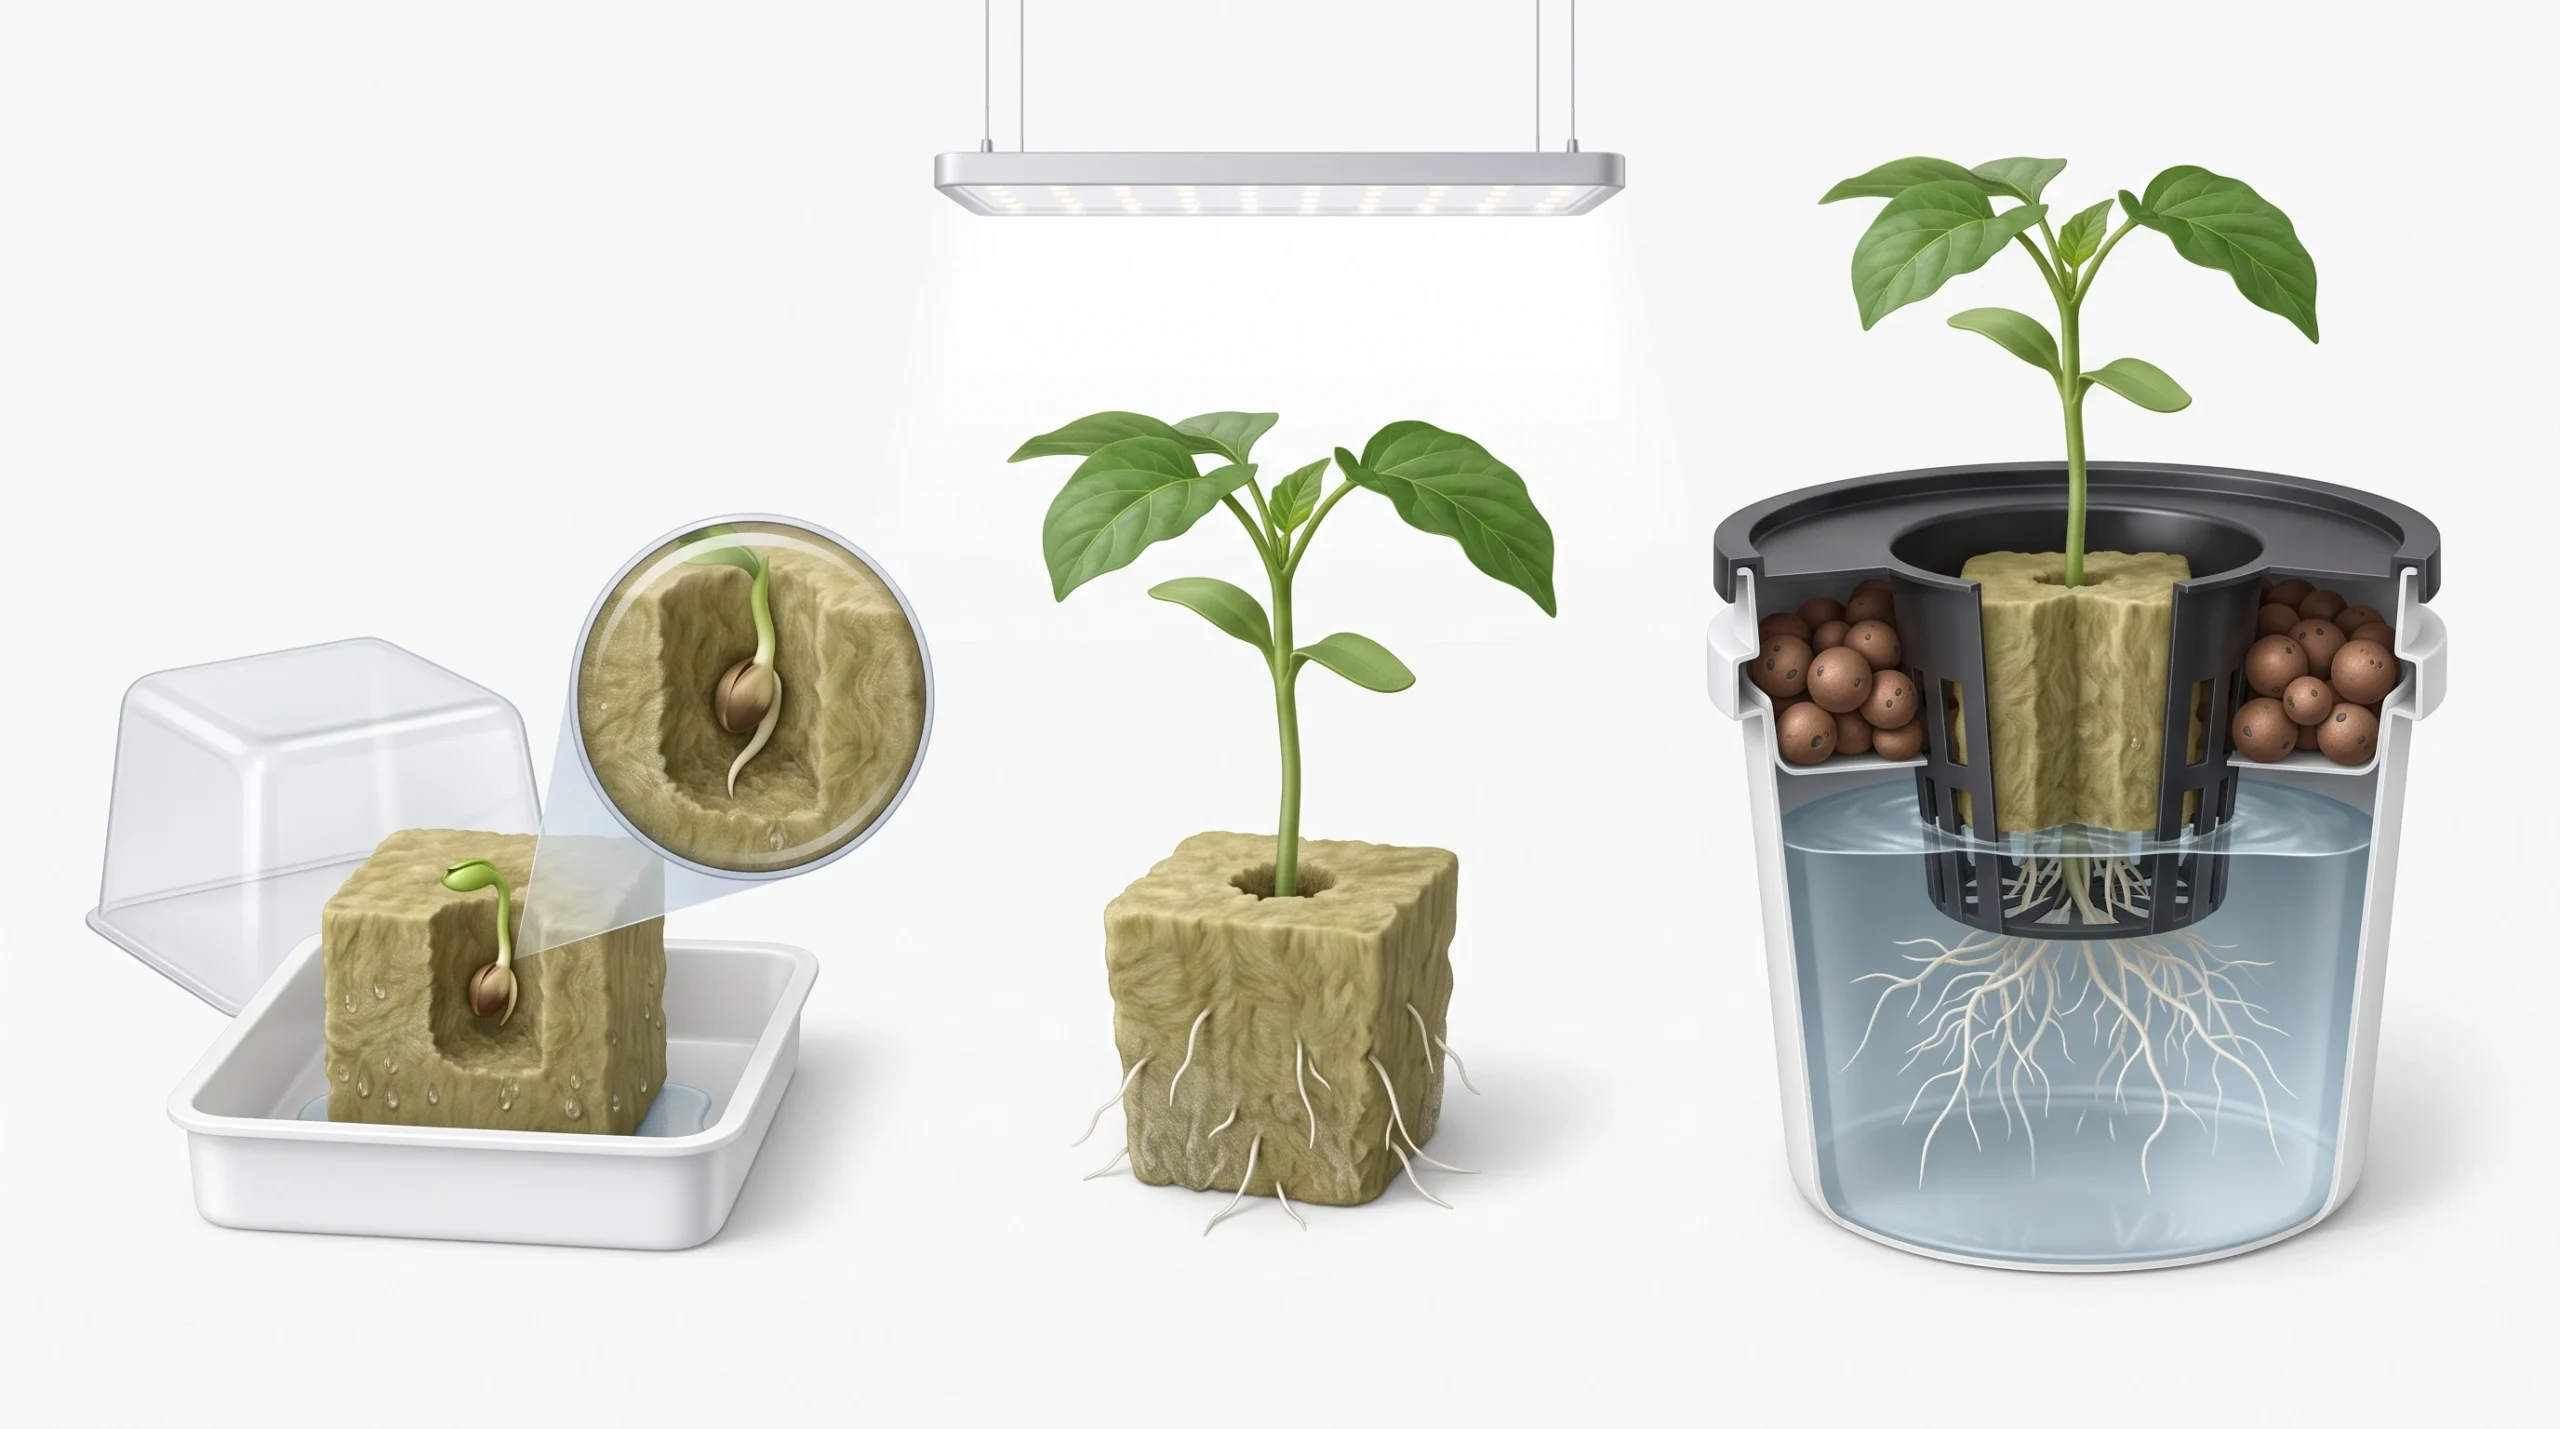
Seedlings require exceptionally high relative humidity and consistent moisture to break dormancy and germinate. However, transplanting tender sprouts into high-EC solutions or setting plugs incorrectly inside net pots starves young roots of water. The germination and early seedling stages are the most vulnerable phases of a plant's life cycle. Technical errors made during these initial stages can permanently stunt your crops, delay vegetative growth by weeks, or cause high seedling mortality rates across your entire batch.
Humidity Dome Phase
Stone Wool Plugs Kept Damp
* Remove dome once seeds emerge! *
Transplant Placement
Common Germination Errors
- Over-Saturating Plugs: Stone wool cubes or peat plugs submerged in water without adequate air drainage lose their air-filled porosity. Seeds drown from a lack of dissolved oxygen and rot before they can sprout. Plugs should be thoroughly soaked in pH-adjusted water (pH 5.5) and then allowed to drain until damp—never dripping wet. Learn more about media water ratios in our comprehensive hydroponic seed starting and media guide.
- Leaving Humidity Domes On Too Long: A humidity dome maintains the 85% to 90% Relative Humidity (RH) required to break seed coat dormancy. However, leaving the dome on once seedlings emerge traps heavy condensation against delicate stems and leaves. This stagnant, high-humidity environment encourages fungal pathogens that cause "damping-off" (Rhizoctonia solani), causing tender seedling stems to collapse at the soil line overnight. Always remove domes as soon as the first true leaves appear.
Common Transplanting Errors
- Placing Plugs into High-EC Solutions: Transplanting tender young seedlings into a mature-plant nutrient solution (EC above 2.0 mS/cm) triggers immediate osmotic shock, burning young root tips and dehydrating cells. Seedlings should always be introduced to nutrient solutions at a gentle, diluted EC between 0.6 and 1.0 mS/cm, gradually increasing chemical strength as the root system expands. Review ideal strength scales in our pH and EC mastery guide.
- Incorrect Net Pot Placement: In DWC reservoirs or NFT channels, if the bottom of the seedling plug does not make direct physical contact with the flowing stream or bubbled splash of the nutrient solution, the plug dries out and the seedling dies before its roots can reach the water below. Position the bottom 3 to 5 mm of the plug in direct contact with the solution until roots physically emerge from the bottom of the net pot.
10. Transform Crop Failure into Actionable Data
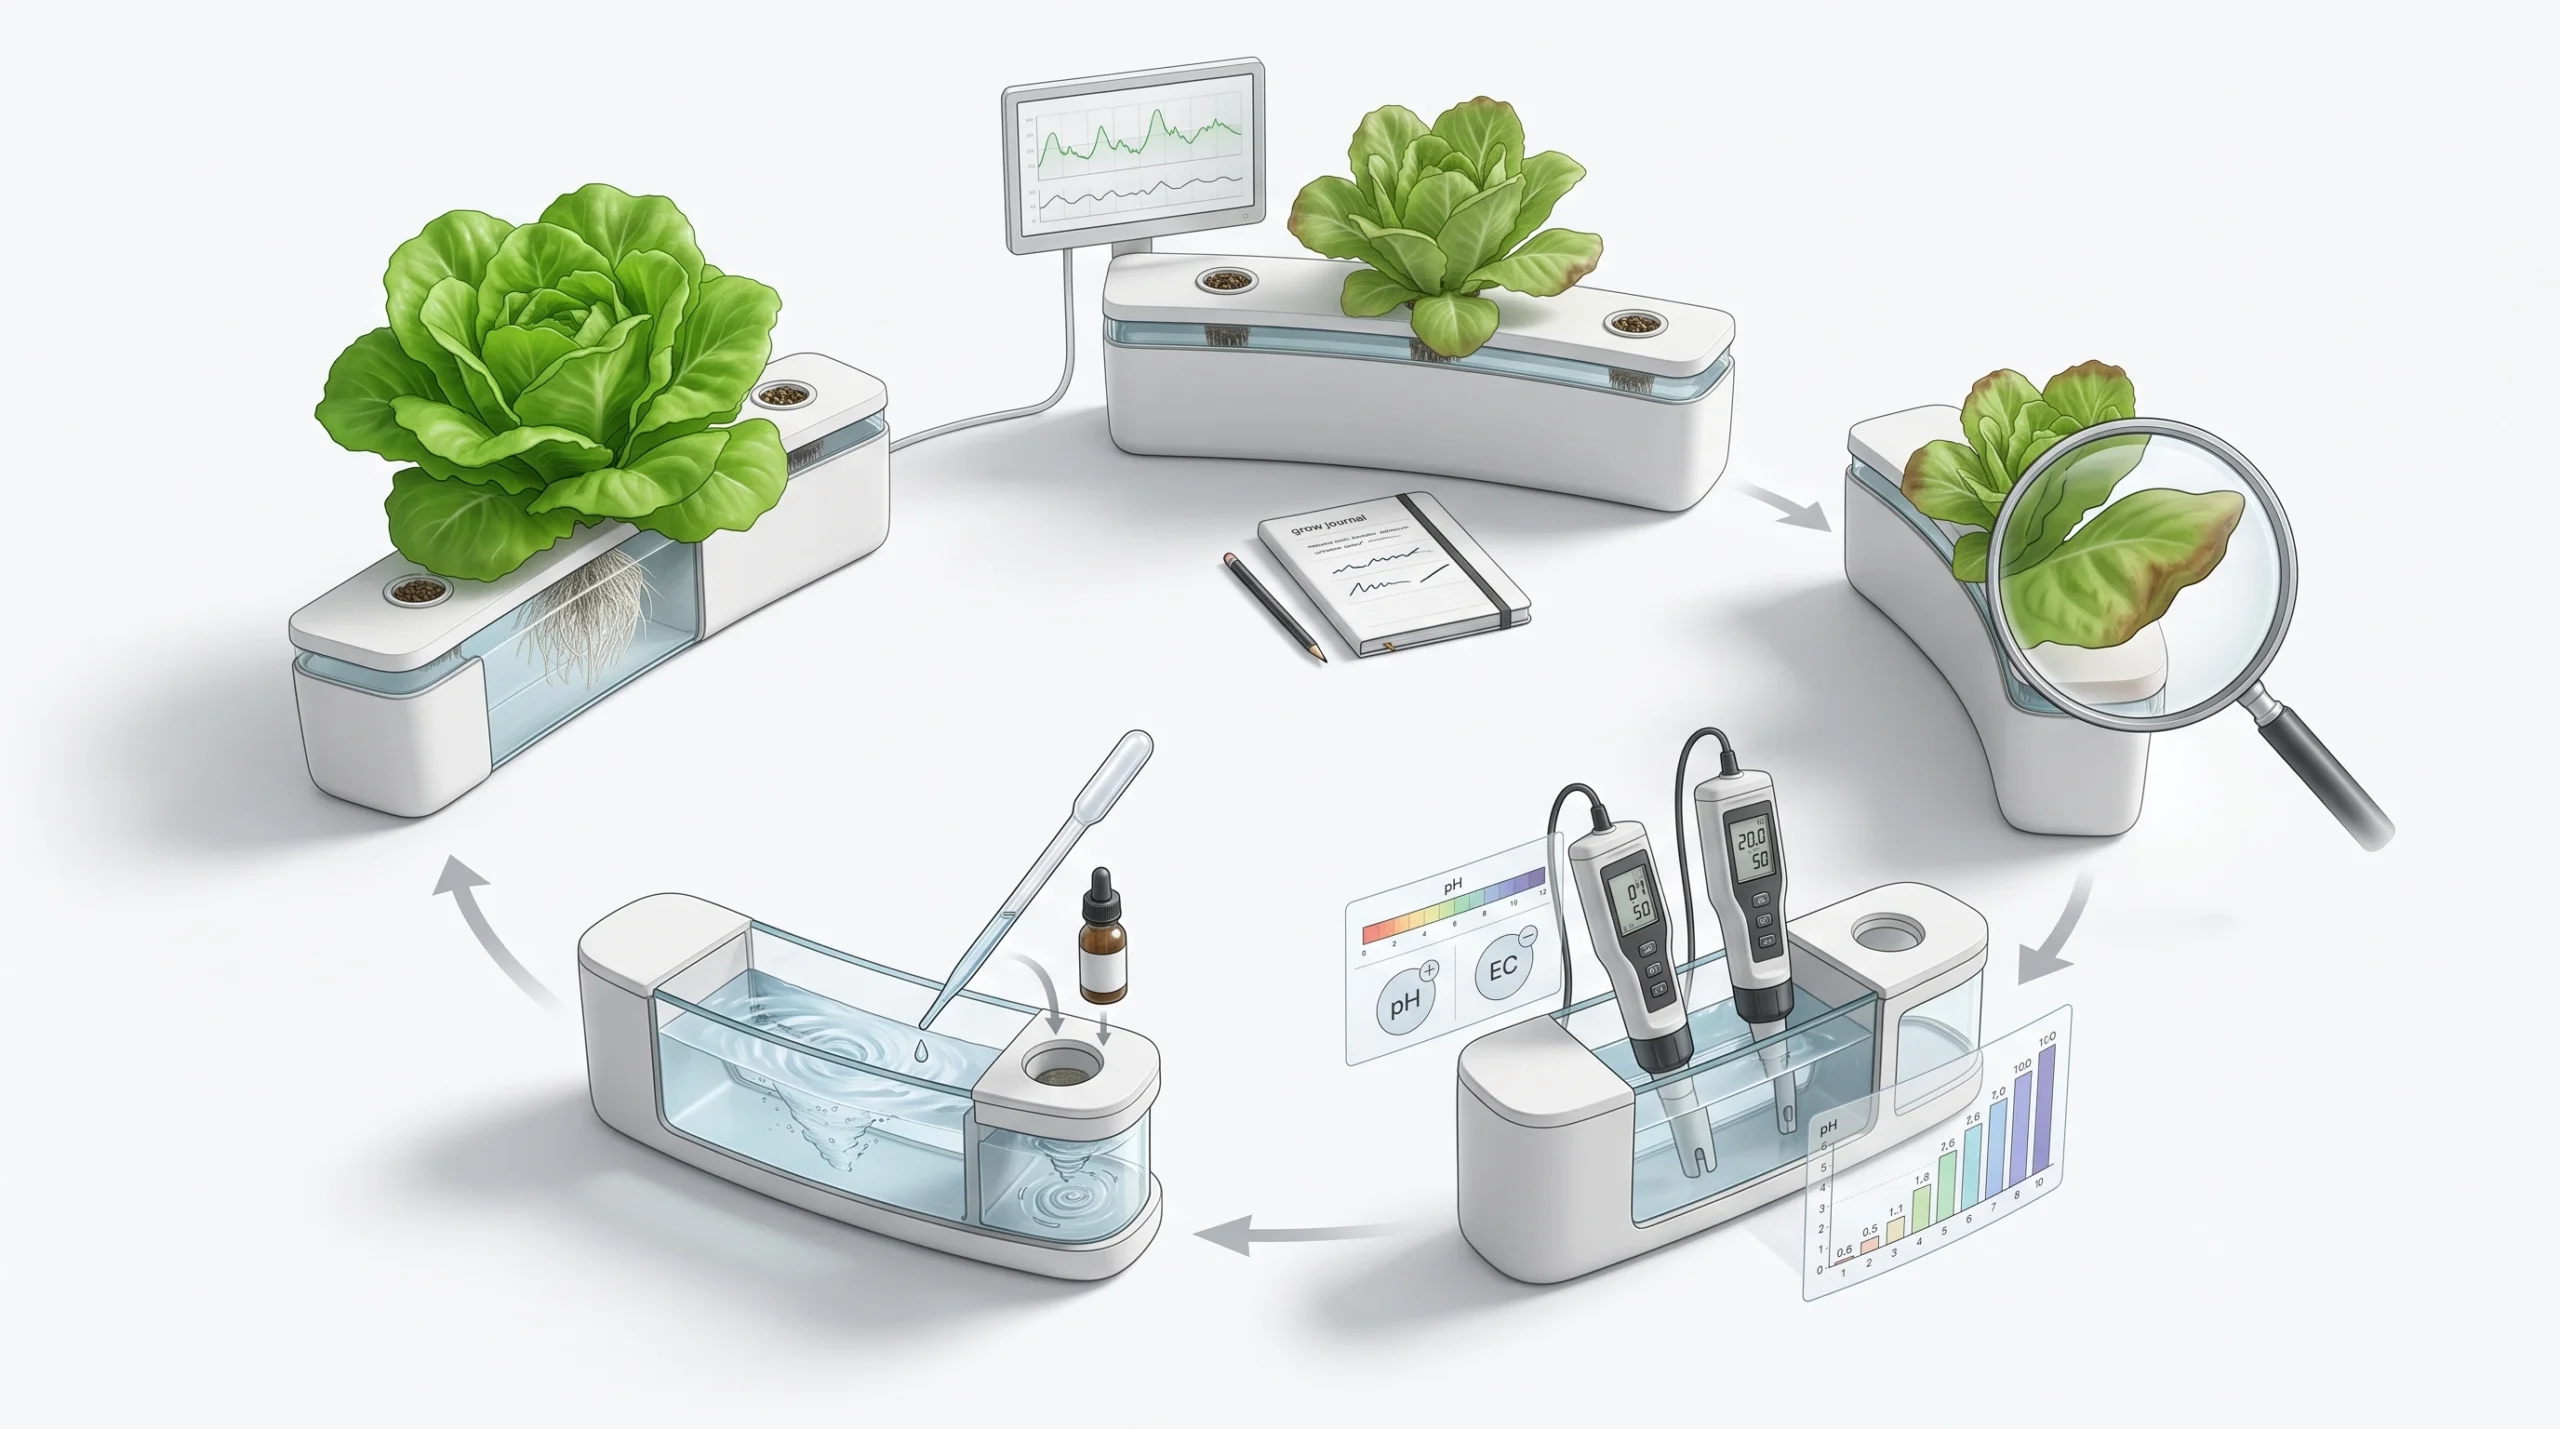
Every experienced grower has lost crops. The key to long-term success is to treat these early failures as biological and chemical data points, log your system variables in a dedicated grow journal, and refine your architecture step-by-step.
The most critical mistake an indoor grower can make is viewing an early crop loss as proof that hydroponics is "too difficult" or "does not work." Soilless culture is a pure science based on controllable physical and chemical laws. A dead crop is simply a physical signal that one or more key environmental variables drifted outside your plants' physiological limits.
The Technical Learning Loop: From Failure to Higher Yields
Every successful commercial farm operator or highly experienced home hobbyist has lost crops to unexpected root rot infestations, sudden pH crashes, or system water pump failures. The absolute dividing line between a failed grower and a master grower is simply how they respond to those structural losses.
Building a Continuous Improvement System
- Maintain a System Log: Log your daily reservoir pH, nutrient EC levels, water temperature, ambient room temperatures, relative humidity values, and water top-off volumes. When a biological or mechanical issue occurs, reviewing this operational history will reveal exactly when and how fast your variables drifted. For a printable tracking template, access our free hydroponic grow journal template.
- Isolate Variables Methodically: Change exactly one parameter at a time. If you suspect an iron lockout, adjust your solution pH back down to 5.8 first. Wait three complete days to evaluate new, emerging canopy growth before adding high-cost iron chelates or altering your indoor grow light intensity levels. Refer to our pH drift stabilizing procedures to isolate chemical issues accurately.
- Start Small and Scale Safely: Begin your cultivation journey with a simple 40-to-100-liter system growing highly forgiving, fast-turnaround leafy greens. Master your baseline water chemistry, daily system checks, and mechanical sanitization on low-risk crops before investing heavy capital in complex, multi-site setups for heavy-feeding varieties. Explore easy starting setups in our hydroponic seed starting and seedling management guide.
Master Hydroponic Troubleshooting & Diagnostic Matrix
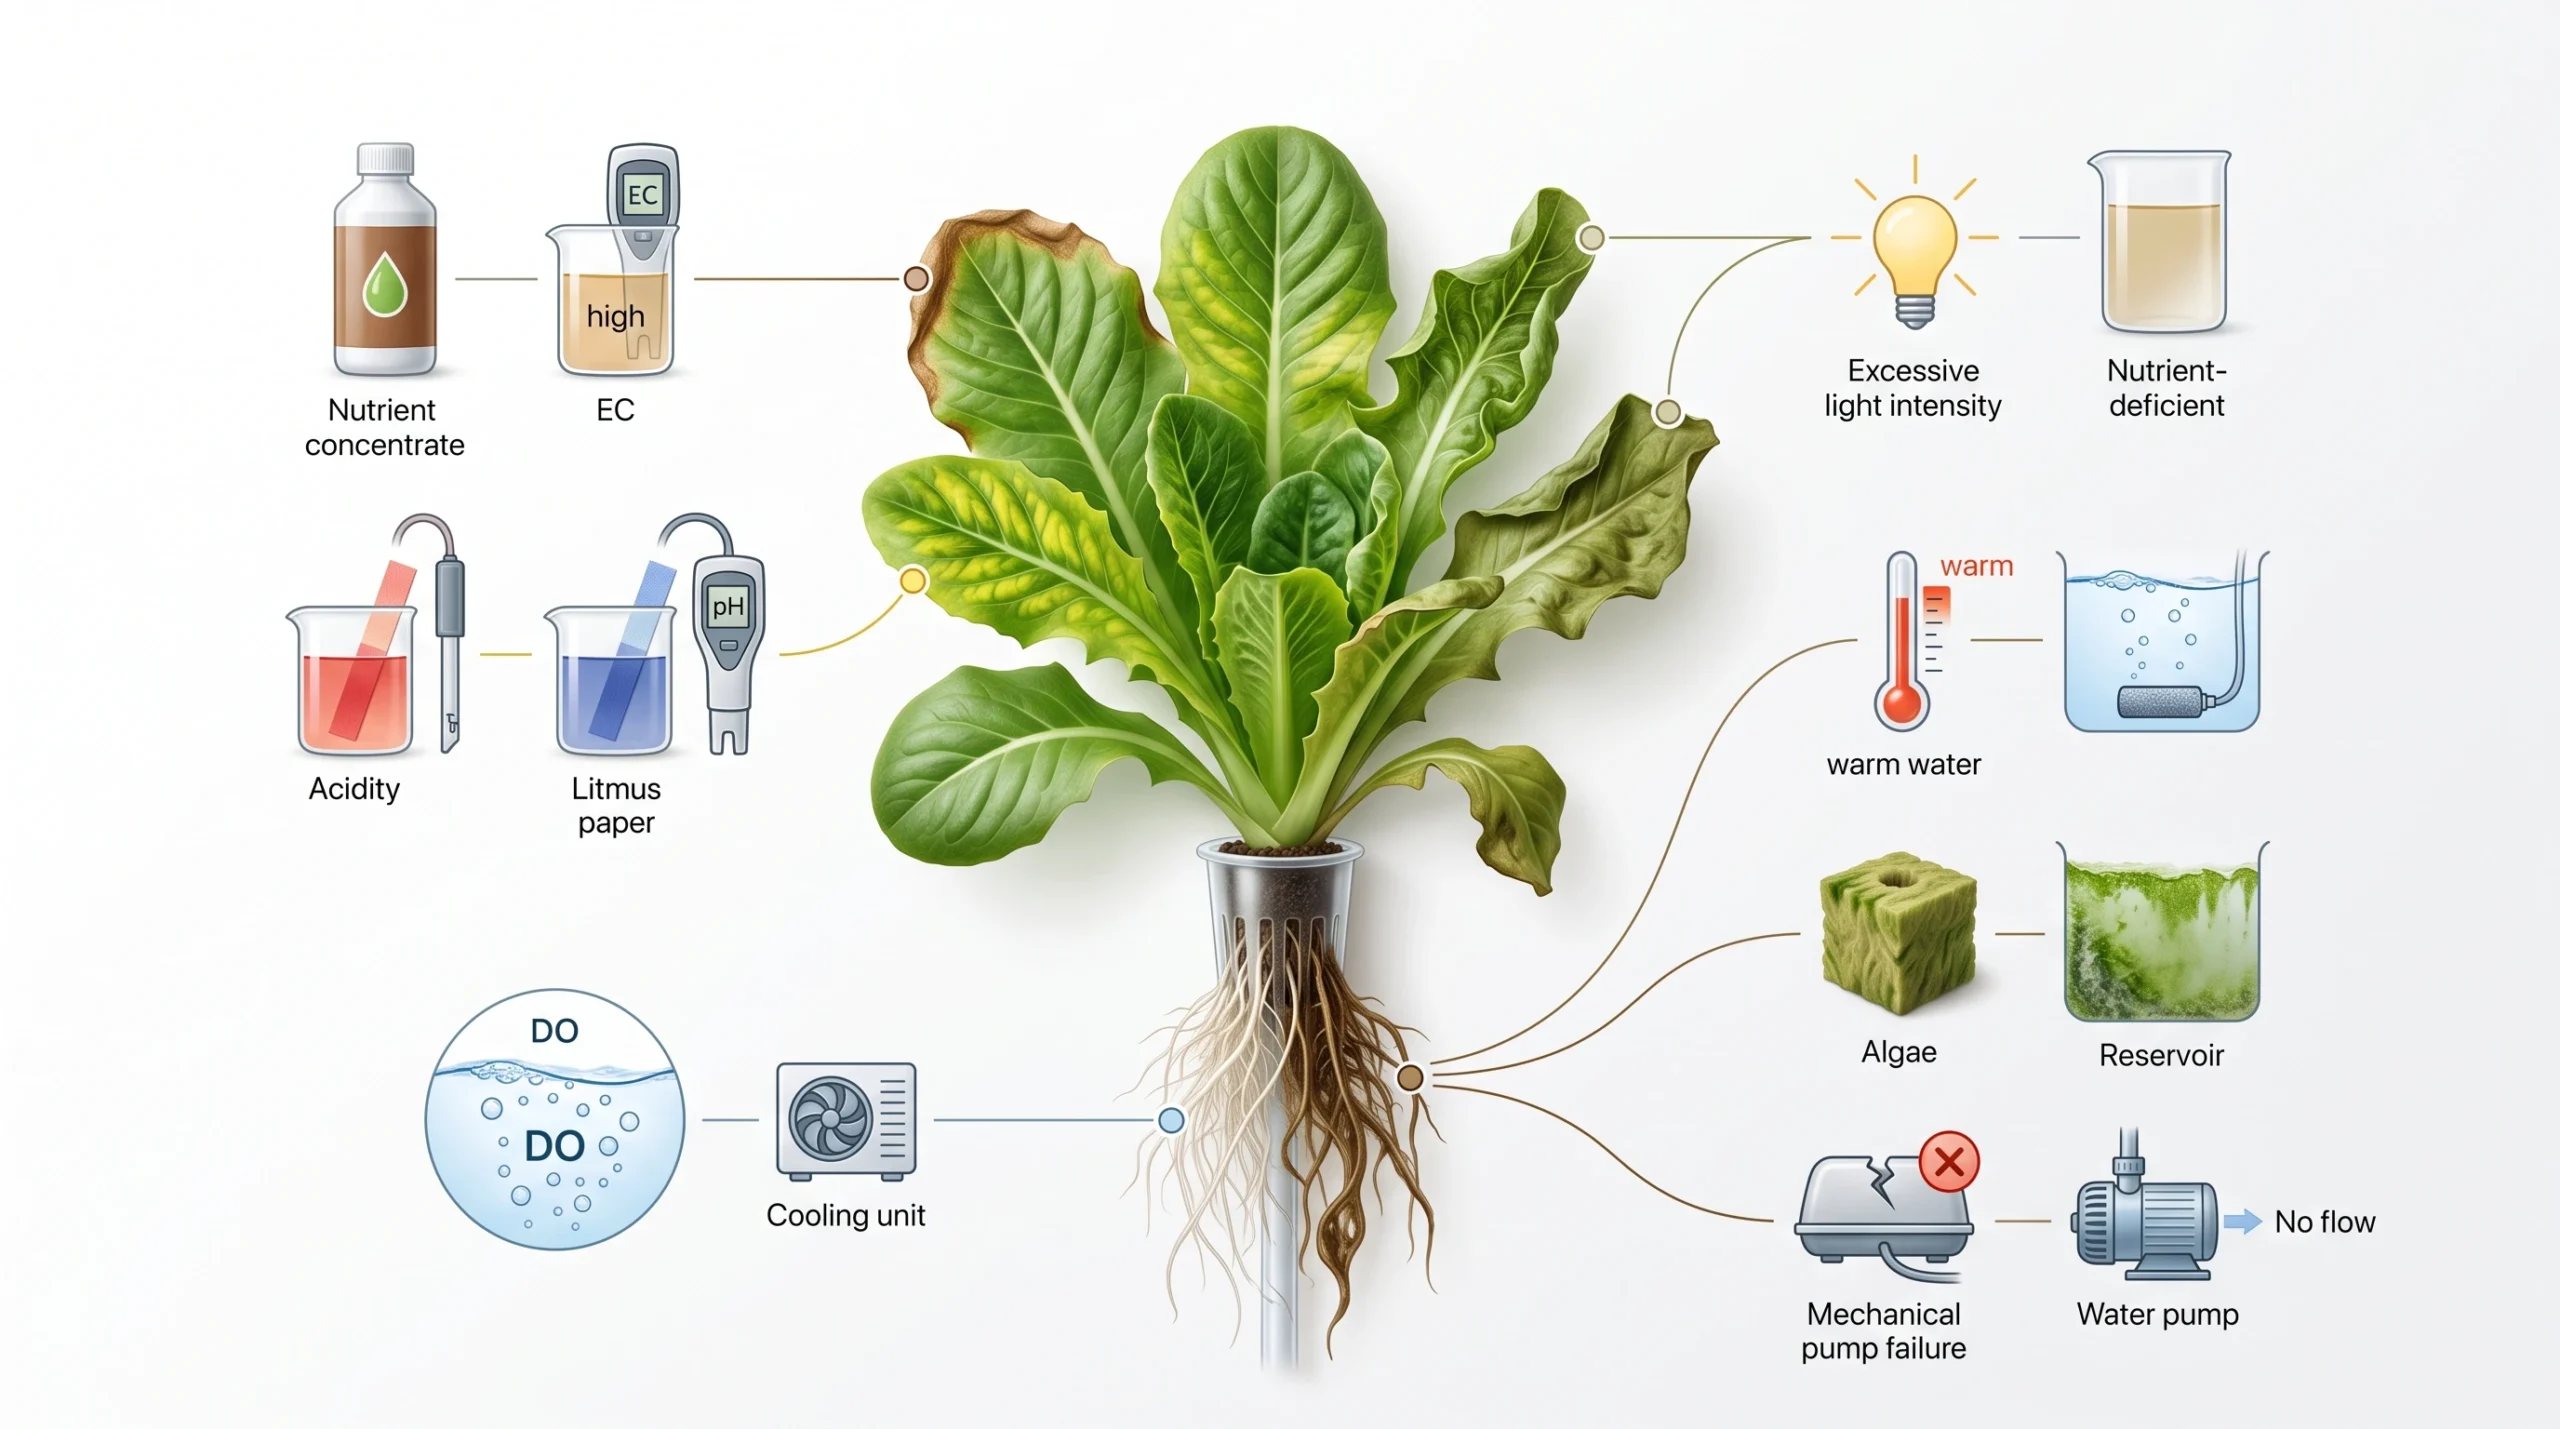
Use this master diagnostic matrix to quickly identify visual leaf and root symptoms, understand their underlying chemical or physical root causes, and apply the correct technical fix to restore system balance before cellular damage becomes irreversible.
| Visual Symptom | Cultivation Error | Root Cause (Chemical/Physical) | Immediate Technical Fix | Recommended Prevention |
|---|---|---|---|---|
| New leaves turning pale yellow (chlorosis), but leaf veins remain dark green. | pH Drift (Above 6.5) | Elevated pH precipitates iron molecules out of solution, making them physically unavailable for root-zone absorption. | Adjust reservoir pH slowly down to 5.8 using small, diluted doses of phosphoric acid (pH Down). | Switch to nutrient lines formulated with Fe-DTPA or Fe-EDDHA chelates; check pH daily. |
| Roots turning brown, limp, and slimy; giving off an earthy, decaying odor. | Anoxic Root Zone | Lack of dissolved oxygen (< 5.0 mg/L) causes root cell suffocation, attracting pathogenic Pythium spores. | Flush reservoir, dose with 1.0 to 2.0 ppm active hypochlorous acid (HOCl), and upgrade pump LPM. | Maintain water temperatures between 18°C–20°C (64°F–68°F) using an active root rot prevention layout. |
| Leaf tips and margins curling downward, drying out, and turning papery brown. | Salt Toxicity (High EC) | Excessive EC spikes reservoir osmotic pressure, reversing normal water movement and dehydrating root cells (plasmolysis). | Dilute the reservoir with fresh RO water using the mass-balance dilution formula. | Feed young crops at 30%–50% strength; track daily reservoir EC drawdown rates. |
| Interveinal yellowing and red/purple discoloration appearing on older, mature leaves. | K-Mg Lockout | Excessive Potassium (K+) outcompetes Magnesium (Mg2+) at root-cell absorption sites. | Drain and completely flush the reservoir; refill with a fresh, balanced base nutrient formula. | Maintain balanced, sitemap-proven K-to-Mg elemental ratios (typically 3:1 to 4:1 in solution analyses). |
| Leaf margins curl upward and dry out; black necrotic spots forming on fruit bottoms. | Low VPD Blockage | Stagnant air or high humidity (>80%) halts transpiration, stopping the passive movement of calcium to leaf tips. | Set up active oscillating fans and dehumidify the room to achieve 0.8–1.2 kPa VPD. | Monitor grow room Vapor Pressure Deficit (VPD) alongside baseline reservoir chemistry. |
| Young sprouting seedlings suddenly collapse at the soil or plug line overnight. | Damping-Off Pathogens | Trapping saturated, stagnant air under humidity domes too long triggers fungal damping-off (Rhizoctonia). | Remove the humidity dome immediately, let the plug surface dry out, and introduce a gentle fan breeze. | Remove domes immediately upon 50% seedling emergence; keep plugs damp, not waterlogged. |
Do not let a drift crash or microbial pathogen bloom ruin your harvest. Treat every visual leaf spot as a scientific data point. To isolate complex issues and find exact systemic remedies, access our diagnostic tool: Open the Master Hydroponic Troubleshooting Guide.
Frequently Asked Questions (FAQ)
1 Why does my hydroponic reservoir pH keep rising every 24 hours?
pH drift in hydroponic reservoirs is usually driven by three distinct biological and chemical factors:
Plant Ion Absorption: When plants absorb nitrate anions (NO3-), they must release hydroxide (OH-) or bicarbonate (HCO3-) ions back into the solution to maintain electrical equilibrium, naturally driving the pH up.
Algae Photosynthesis: Light entering your water allows algae to consume dissolved carbon dioxide (CO2), driving the pH up past 7.5 during light cycles.
Off-Gassing Carbonates: Tap water rich in bicarbonates off-gasses CO2 when aggressively aerated by air stones, causing pH to rise until the water reaches a stable chemical equilibrium. Read our complete pH drift fixing guide to resolve daily swings.
2 Can I use tap water for my hydroponic reservoir?
You can use tap water if its starting EC is safely below 0.3 mS/cm (around 150–200 PPM on a 500-scale) and it contains low baseline levels of sodium (Na+) and chloride (Cl-). However, if your tap water has an initial EC above 0.5 mS/cm or contains high levels of chloramines and carbonates, you must use a Reverse Osmosis (RO) filter system. High starting mineral levels in tap water limit the amount of beneficial hydroponic fertilizer you can add before hitting osmotic boundaries.
3 How often should I completely drain and replace my nutrient reservoir?
You should completely flush and replace your nutrient solution every 7 to 14 days in recirculating systems (such as DWC, NFT, and Ebb and Flow). Over time, plants absorb water and specific ions at wildly different rates, leaving behind unused ions like sodium and sulfate. This alters the elemental balance, even if your overall EC reading appears stable on a meter. Draining the reservoir resets the chemical baseline and prevents toxic nutrient lockouts. Review solution chemistry fundamentals in our pH and EC mastery guide.
4 What is the difference between 500-scale and 700-scale PPM meters?
PPM (Parts Per Million) meters do not measure mineral ions directly; they measure Electrical Conductivity (EC in mS/cm) and multiply that value by a manufacturer conversion factor:
500 Scale (TDS / NaCl Scale): PPM = EC (in mS/cm) × 500. (e.g., 1.4 mS/cm × 500 = 700 PPM).
700 Scale (Truncheon / KCl Scale): PPM = EC (in mS/cm) × 700. (e.g., 1.4 mS/cm × 700 = 980 PPM).
Because conversion scales vary significantly by manufacturer, always measure and report your hydroponic solution strength in standard EC (mS/cm) to avoid dangerous dosing confusion.
5 What causes root rot even when my air pump is running continuously?
Running an air pump does not guarantee adequate dissolved oxygen if your reservoir water temperature is too high. At water temperatures above 22°C (72°F), oxygen solubility drops significantly while root respiration rates spike. Additionally, if fine organic debris or dead root tissue accumulates in DWC tanks or NFT channels, saprophytic bacteria proliferate, rapidly consuming available dissolved oxygen and creating anoxic micro-environments where Pythium thrives. Read our blueprint to safeguard your crop roots in the root rot prevention guide.
6 How do I calculate how much water to add when my EC is too high?
Use the physical mass-balance dilution equation to isolate how much fresh water (Vadded) is required:
Vadded = ((Current EC × Current Volume) ÷ Target EC) − Current Volume
For example, if a 50-liter reservoir has drifted up to an EC of 2.4 mS/cm and your optimal target EC is 1.2 mS/cm:
Vadded = ((2.4 × 50) ÷ 1.2) − 50 = 100 − 50 = 50 Liters
Adding 50 Liters of pure RO water instantly drops your solution EC back down to the target 1.2 mS/cm. Use our free, interactive hydroponic nutrient calculator to automatically run these adjustments on your smartphone.
Conclusion & Next Steps
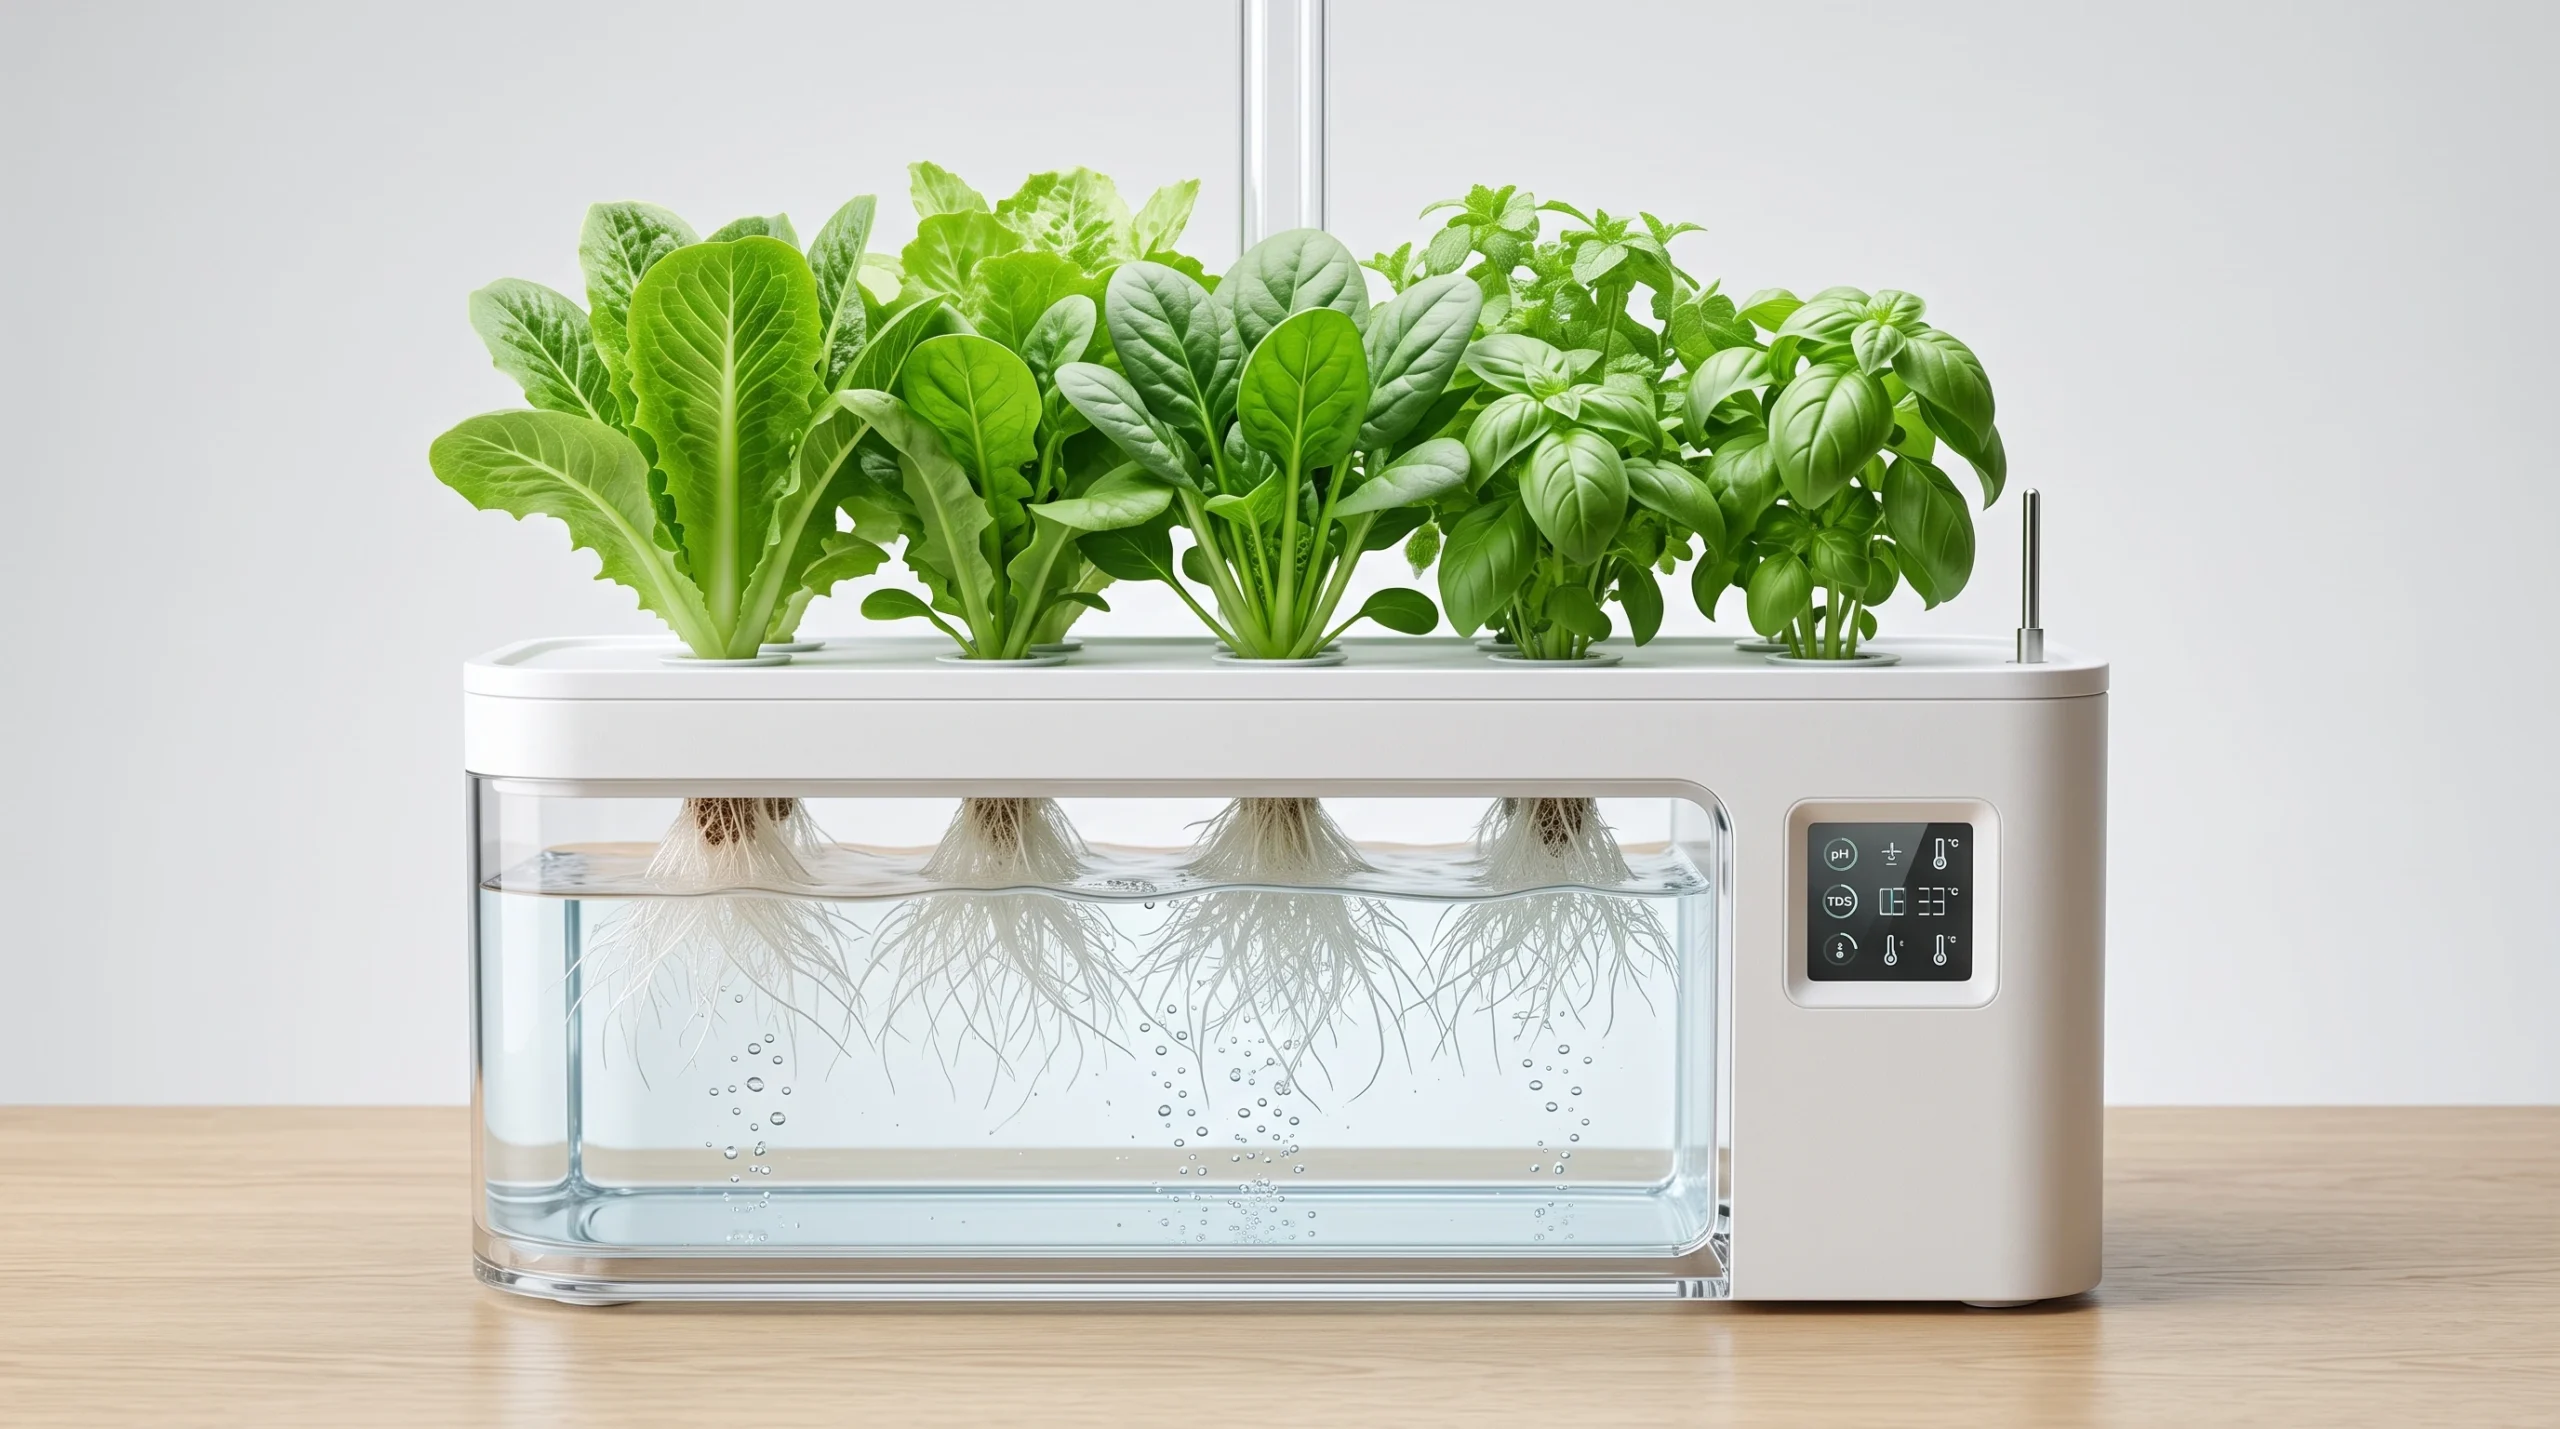
Hydroponic culture replaces the traditional physical buffer capacity of soil with active engineering controls and precise water chemistry management. Ultimately, avoiding catastrophic crop losses comes down to mastering a few core operational practices: maintaining your solution pH steadily between 5.5 and 6.5, keeping water temperatures locked around the 18°C to 20°C (64°F–68°F) sweet spot, sizing your air pumps to deliver high dissolved oxygen, and continuously adjusting EC based on your crop's current growth stage.
When parameters drift or visual symptoms occur, avoid making large, hasty chemical or environmental changes. Use a systematic troubleshooting process: measure your pH and EC, verify your reservoir water temperature and room air movement, inspect your system pumps and aeration plumbing, and flush the entire reservoir with a fresh, pH-adjusted base solution at 50% strength if multiple parameters are far out of balance.
Modern farming is a journey of continuous refinement. Explore our engineered comparison blueprints, read our individual crop management guides, or run automated calculations using our suite of interactive tools:

Continue Your Learning Journey